Categories
Artificial Intelligence Cloud

Generative AI in Education With AI-x-plainer and Amazon PartyRock

Working as a professor at the St. Pölten University Applied Sciences, I’ve observed the dual impact of generative AI in education. In this article, I’ll discuss how we are adapting teaching methodologies.

The result is the AIxplainer educational tool, which you can freely test and remix through Amazon PartyRock.

Please accept YouTube cookies to play this video. By accepting you will be accessing content from YouTube, a service provided by an external third party.

YouTube privacy policy

If you accept this notice, your choice will be saved and the page will refresh.

Integrating AI in Education

Traditional coding instruction is becoming less effective as AI tools streamline code creation. However, constructing extensive system architectures and corresponding code predominantly remains a human task.

Thus, we need an educational approach where students engage with AI to address advanced challenges that extend beyond what is typically explained within lectures.

Categories
Android AR / VR Image Processing

Visualize AR Depth Maps in Unity (Part 5)

In the final part, let’s look at how we can generate and use the AR depth maps through Unity’s AR Foundation. In the previous part, we tested the ready-made example. Now, it’s time to write code ourselves.

In this case, I’m using Unity 2021.1 (Alpha) together with AR Foundation 4.1.1 to make sure we have the latest AR support & features in our app. But as written in the previous article, Unity 2020.2 should be sufficient.

I’ve tested the example on Android (Google Pixel 4 with Android 11 & ARCore), but it should work fine also on iOS with ARKit.

You can download the full, final AR Foundation Depth Map sample from GitHub. I’ve released the project under MIT license.

Project Setup

First, configure the project for AR Foundation. I won’t go into too many details here, as the official documentation is quite good on that:

  1. XR Plug-in management: activate the management in the project settings. Additionally, enable the ARCore Plug-in provider. To check if everything was installed, open Window > Package Manager. You should see both AR Foundation as well as ARCore XR Plugin with at least version 4.1.1.
Unity Package Manager with AR Foundation & ARCore XR Plugin packages installed.
  1. Android player settings: switch to the Android build platform, uncheck multithreaded rendering, remove Vulkan from the rendering APIs, make sure the package name is personalized and finally set the minimum API level to at least 24 (Android 7.0).
  2. Scene setup: add the required prefabs and GameObjects to your scene. Right-click in the hierarchy panel > XR > XR Session. Also add the XR Session Origin.

By default, the AR depth map is always returned in Landscape Right orientation, no matter what screen orientation your app is currently in. While we could of course adapt the map to the current screen rotation, we want to keep this example focused on the depth map. Therefore, simply lock the screen orientation through Project Settings > Player > Resolution and Presentation > Orientation > Default Orientation: Landscape Right.

Categories
Android AR / VR Image Processing

Compare AR Foundation Depth Maps (Part 4)

In the previous parts, we’ve taken a look behind the scenes and manually implemented a depth map with Python and OpenCV. Now, let’s compare the results to Unity’s AR Foundation.

How exactly do depth maps work in ARCore? While Google’s paper describes their approach in detail, their implementation is not open source.

However, Google has released a sample project along with a further paper called DepthLab . It’s directly accessing the ARCore depth API and builds complete sample use-cases on top of them.

DepthLab is available as an open-source Unity app. They use the ARCore SDK for Unity directly and not yet the AR Foundation package.

Depth Maps with AR Foundation in Unity

However, Google recommends using AR Foundation with their own ARCore Extensions module (if needed; currently, they only add Cloud Anchor support). Therefore, let’s take a closer look at how to create depth maps using ARFoundation.

Categories
Android AR / VR Image Processing

How to Apply Stereo Matching to Generate Depth Maps (Part 3)

In part 2, we rectified our two camera images. The last major step is stereo matching. The algorithm that Google is using for ARCore is an optimized hybrid of two previous publications: PatchMatch Stereo and HashMatch .

An implementation in OpenCV is based on Semi-Global Matching (SGM) as published by Hirschmüller . In Google’s paper , they compare themselves to an implementation of Hirschmüller and outperform those; but for the first experiments, OpenCV’s default is good enough and provides plenty of room for experimentation.

3. Stereo Matching for the Disparity Map (Depth Map)

OpenCV documentation includes two examples that include the stereo matching / disparity map generation: stereo image matching and depth map.

Most of the following code in this article is just an explanation of the configuration options based on the documentation. Setting fitting values for the scenes you expect is crucial to the success of this algorithm. Some insights are listed in the Choosing Good Stereo Parameters article. These are the most important settings to consider:

  • Block size: if set to 1, the algorithm matches on the pixel level. Especially for higher resolution images, bigger block sizes often lead to a cleaner result.
  • Minimum / maximum disparity: this should match the expected movements of objects within the images. In freely moving camera settings, a negative disparity could occur as well – when the camera doesn’t only move but also rotate, some parts of the image might move from left to right between keyframes, while other parts move from right to left.
  • Speckle: the algorithm already includes some smoothing by avoiding small speckles of different depths than their surroundings.

Visualizing Results of Stereo Matching

I’ve chosen values that work well for the sample images I have captured. After configuring these values, computing the disparity map is a simple function call supplying both rectified images.

Categories
Android AR / VR Image Processing

Understand and Apply Stereo Rectification for Depth Maps (Part 2)

In part 1 of the article series, we’ve identified the key steps to create a depth map. We have captured a scene from two distinct positions and loaded them with Python and OpenCV. However, the images don’t line up perfectly fine. A process called stereo rectification is crucial to easily compare pixels in both images to triangulate the scene’s depth!

For triangulation, we need to match each pixel from one image with the same pixel in another image. When the camera rotates or moves forward / backward, the pixels don’t just move left or right; they could also be found further up or down in the image. That makes matching difficult.

Wrapping Images for Stereo Rectification

Image rectification wraps both images. The result is that they appear as if they have been taken only with a horizontal displacement. This simplifies calculating the disparities of each pixel!

With smartphone-based AR like in ARCore, the user can freely move the camera in the real world. The depth map algorithm only has the freedom to choose two distinct keyframes from the live camera stream. As such, the stereo rectification needs to be very intelligent in matching & wrapping the images!

Stereo Rectification: reprojecting images to make calculating depth maps easier.

In more technical terms, this means that after stereo rectification, all epipolar lines are parallel to the horizontal axis of the image.

To perform stereo rectification, we need to perform two important tasks:

  1. Detect keypoints in each image.
  2. We then need the best keypoints where we are sure they are matched in both images to calculate reprojection matrices.
  3. Using these, we can rectify the images to a common image plane. Matching keypoints are on the same horizontal epipolar line in both images. This enables efficient pixel / block comparison to calculate the disparity map (= how much offset the same block has between both images) for all regions of the image (not just the keypoints!).

Google’s research improves upon the research performed by Pollefeys et al. . Google additionally addresses issues that might happen, especially in mobile scenarios.

Categories
Android AR / VR Image Processing

Easily Create a Depth Map with Smartphone AR (Part 1)

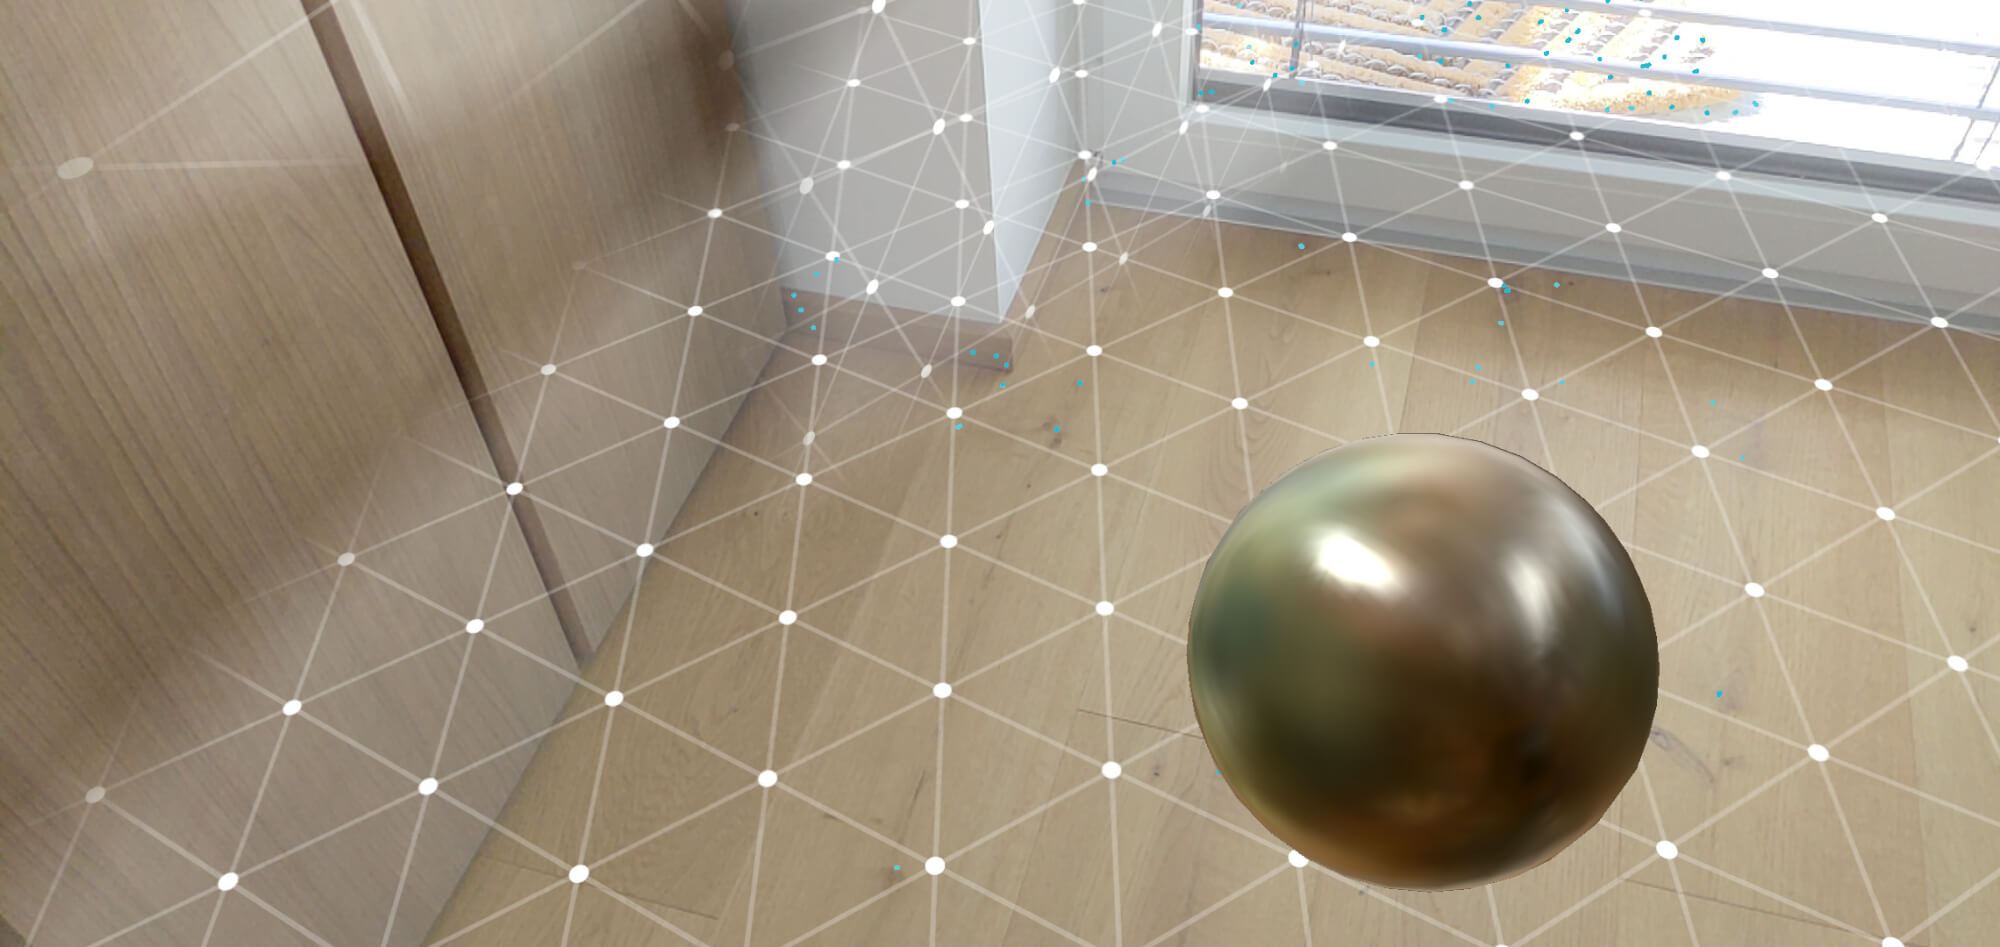
For a realistic Augmented Reality (AR) scene, a depth map of the environment is crucial: if a real, physical object doesn’t occlude a virtual object, it immediately breaks the immersion.

Of course, some devices already include specialized active hardware to create real-time environmental depth maps – e.g., the Microsoft HoloLens or the current high-end iPhones with a Lidar sensor. However, Google decided to go into a different direction: its aim is to bring depth estimation to the mass market, enabling it even for cheaper smartphones that only have a single RGB camera.

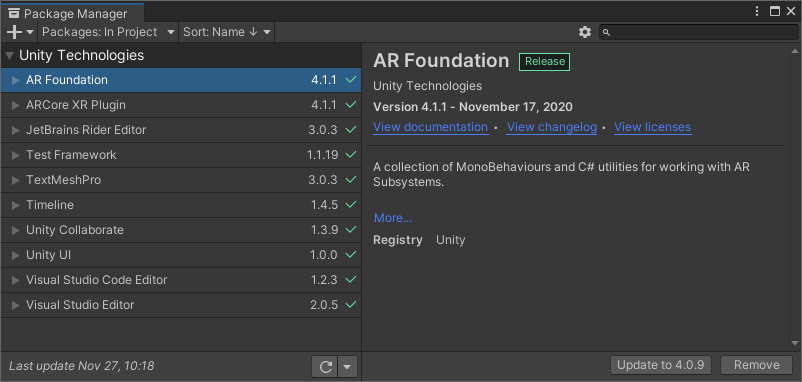
In this article series, we’ll look at how it works by analyzing the related scientific papers published by Google. I’ll also show a Python demo based on commonly used comparable algorithms which are present in OpenCV. In the last step, we’ll create a sample Unity project to see depth maps in action. The full Unity example is available on GitHub.

Quick Overview: ARCore Depth Map API

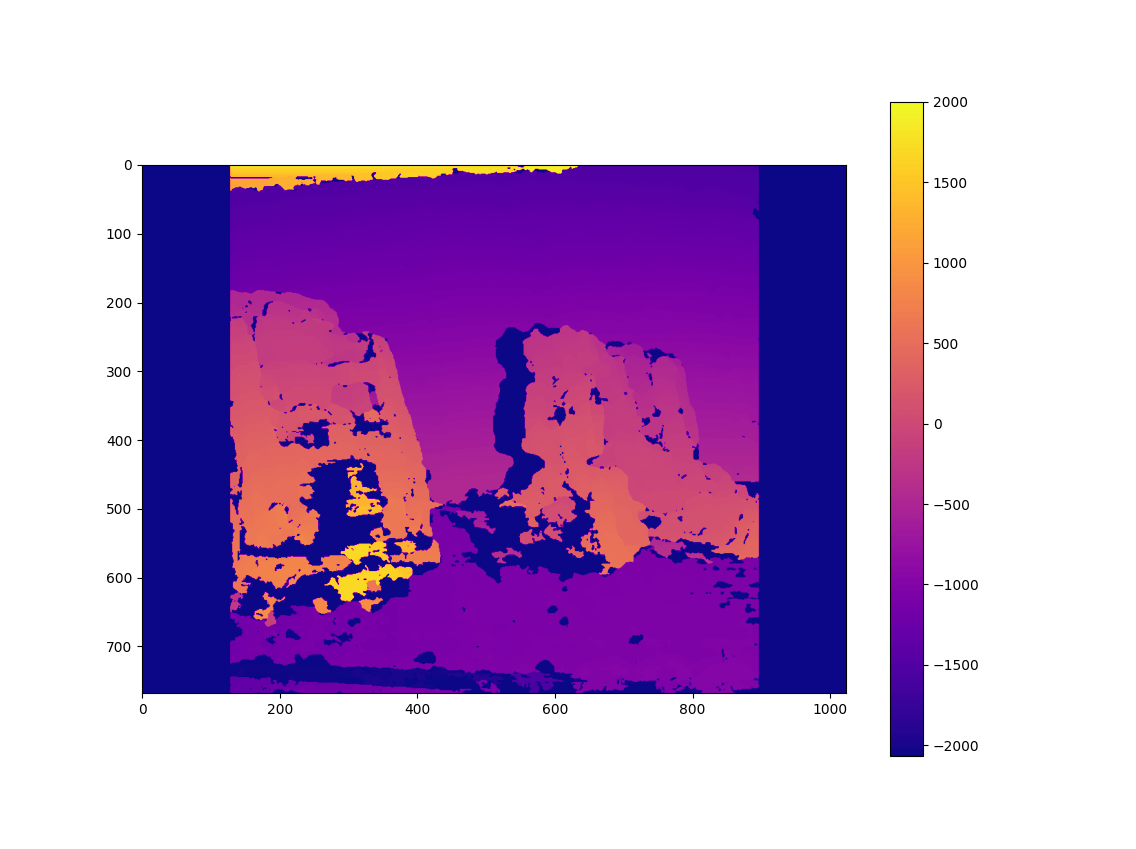
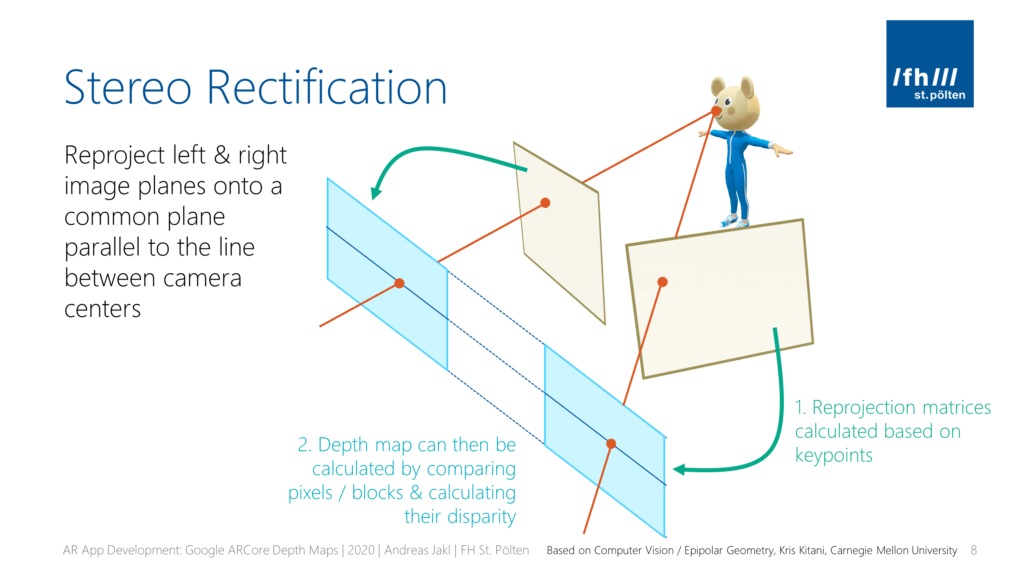
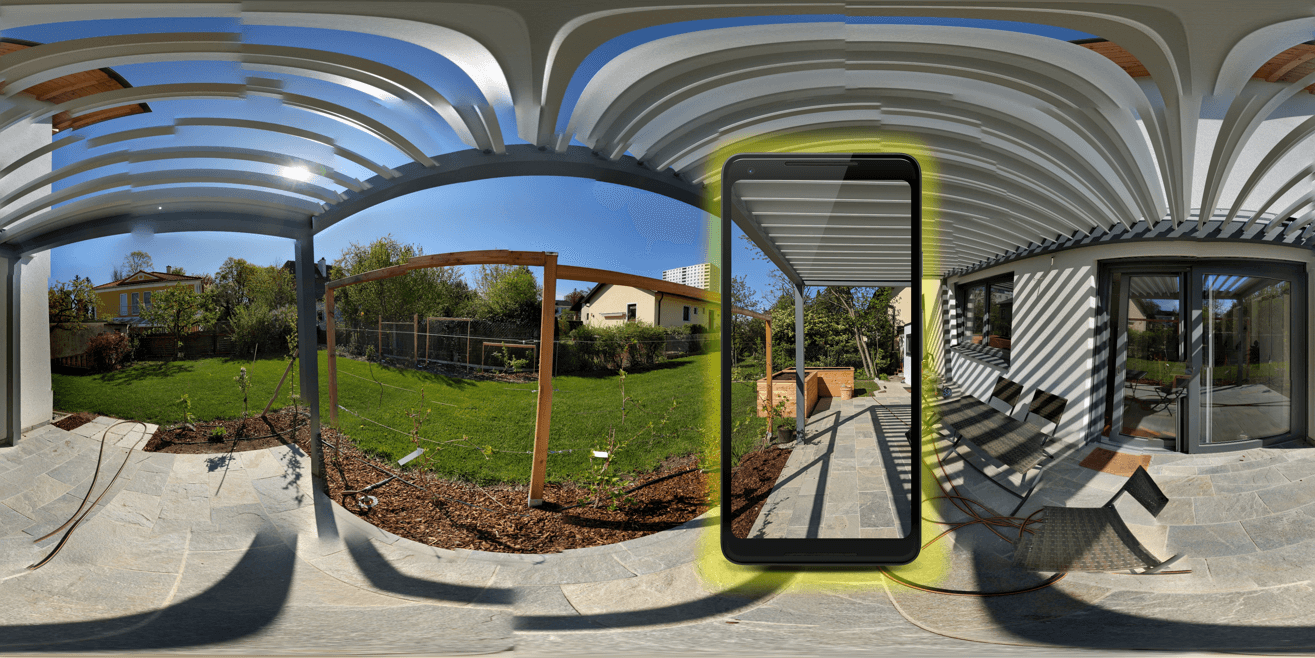
How do Depth Maps with ARCore work? The smartphone saves previous images from the live camera feed and estimates the phone’s motion between these captures. Then, it selects two images that show the same scene from a different position. Based on the parallax effect (objects nearer to you move faster than these farther away – e.g., trees close to a train track move fast versus the mountain in the background moving only very slowly), the algorithm then calculates the distance of this area in the image.

This has the advantage that a single-color camera is enough to estimate the depth. However, this approach needs structured surfaces to detect the movement of unique features in the image. For example, you couldn’t get many insights from two images of a plain white wall, shot from two positions 20 cm apart. Additionally, it’s problematic if the scene isn’t static and objects move around.

As such, given that you have a well-structured and static scene, the algorithm developed by Google works best in a range between 0.5 and 5 meters.

Categories
Artificial Intelligence Image Processing

Hands-On “Deep Learning” Videos: Now on YouTube

Every new product or service claims to use deep learning or neural networks. But: how do they really work? What can machine learning do? How complicated is it to get started?

In the 4-part video series “Deep Learning Hands-On with TensorFlow 2 & Python”, you’ll learn what many of the buzzwords are about and how they relate to the problems you want to solve.

By watching the short videos, your journey will start with the background of neural networks, which are the base of deep learning. Then, two practical examples show two concrete applications on how you can use neural networks to perform classification with TensorFlow:

  • Breast cancer classification: based on numerical / categorical data
  • Hand-written image classification: the classic MNIST dataset based on small images

In the last part, we’ll look at one of the most important specialized variants of neural networks: convolutional neural networks (CNNs), which are especially well-suited for image classification.

Watching all four videos gives you a thorough understanding of how deep learning works and the guidance to get started!

Categories
Android AR / VR

Environmental HDR Lighting & Reflections in ARCore: Implementation in Unity 3D (Part 3)

How to make real-time HDR lighting and reflections possible on a smartphone? Based on the unique properties of human perception and the challenges of capturing the world’s state and applying it to virtual objects. Is it still possible?

Google found an interesting approach, which is based on using Artificial Intelligence to fill the missing gaps. In this article, we’ll take a look at how ARCore handles this. The practical implementation of this research is available in the ARCore SDK for Unity. Based on this, a short hands-on guide demonstrates how to create a sphere that reflects the real world – even though the smartphone only captures a fraction of it.

Google ARCore Approach to Environmental HDR Lighting

To still make environmental HDR lighting possible in real-time on smartphones, Google uses an innovative approach, which they also published as a scientific paper . Here, I’ll give you a short, high-level overview of their approach:

First, Google captured a massive amount of training data. The video feed of the smartphone camera captured both the environment, as well as three different spheres. The setup is shown in the image below.

Categories
Android AR / VR

Environmental HDR Lighting & Reflections in ARCore: Virtual Lighting (Part 2)

In part 1, we looked at how humans perceive lighting and reflections – vital basic knowledge to estimate how realistic these cues need to be. The most important goal is that the scene looks natural to human viewers. Therefore, the virtual lighting needs to be closely aligned with real lighting.

But how to measure lighting in the real world, and how to apply it to virtual objects?

Virtual Lighting

How do you need to set up virtual lighting to satisfy the criteria mentioned in part 1? Humans recognize if an object doesn’t fit in:

The left image shows a simple scene setup, where the shadow direction is wrong. The virtual object doesn't fit in.
In the ideal case on the right, the shadow and shading is correct.
Comparing a simple scene setup to environmental HDR lighting. Image adapted from the Google Developer documentation.

The image above from the Google Developer Documentation shows both extremes. Even though you might still recognize that the rocket is a virtual object in the right image, you’ll need to look a lot harder. The image on the left is clearly wrong, especially due to the misplaced shadow.

Categories
Android AR / VR

Environmental HDR Lighting & Reflections in ARCore: Human Perception (Part 1)

Realistically merging virtual objects with the real world in Augmented Reality has a few challenges. The most important:

  1. Realistic positioning, scale and rotation
  2. Lighting and shadows that match the real-world illumination
  3. Occlusion with real-world objects

The first is working very well in today’s AR systems. Number 3 for occlusion is working OK on the Microsoft HoloLens; and it’s soon also coming to ARCore (a private preview is currently running through the ARCore Depth API – which is probably based on the research by Flynn et al. ).

But what about the second item? Google put a lot of effort into this recently. So, let’s look behind the scenes. How does ARCore estimate HDR (high dynamic range) lighting and reflections from the camera image?

Remember that ARCore needs to scale to a variety of smartphones; thus, a requirement is that it also works on phones that only have a single RGB camera – like the Google Pixel 2.