Categories
Android AR / VR Digital Healthcare

Enlightening Patients with Augmented Reality

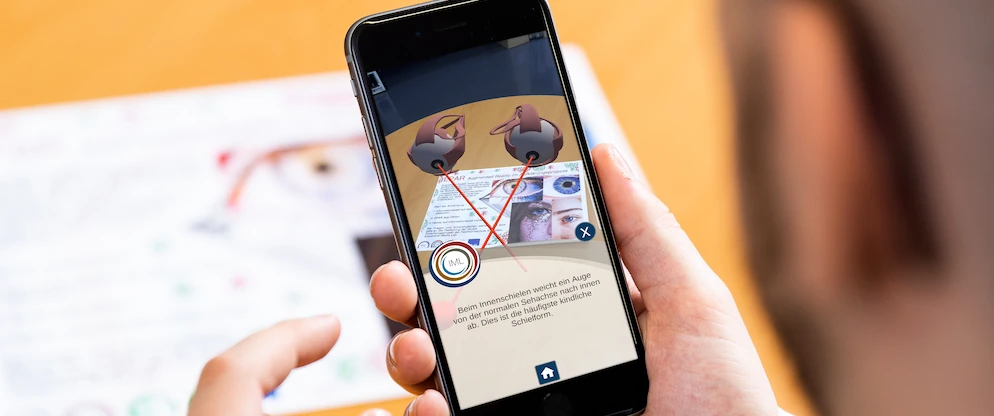
In a recent research project, we researched possibilities for interactive storytelling, usability, and interaction methods of an Augmented Reality app for patient education. We developed an ARCore app with Unity that helps patients with strabismus to better understand the processes of examinations and eye surgeries. Afterwards, we performed a 2-phase evaluation with a total of 24 test subjects.

We published the results at the IEEE VR conference. The peer-reviewed paper is available through the open access online proceedings or on ResearchGate.

A brief overview of the main findings:

Health Literacy and Education

Low health literacy is a well-known and serious issue. 1 in 5 American adults lack skills to fully understand implications of processes related to their health . Audio and computer-aided instructions can be helpful. Especially spoken instructions lead to a higher rate of understanding . A smartphone app that combines multiple approaches can therefore provide great benefits.

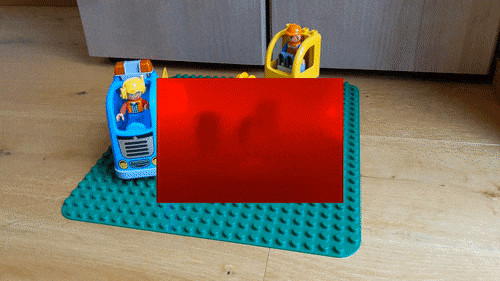
We developed and evaluated a prototype Augmented Reality (AR) mobile application called Enlightening Patients with Augmented Reality (EPAR). The app is designed for patient education about strabismus and the corresponding eye surgery. It is intended to be used in addition to the doctors’ mandatory consultations.

Categories
Android App Development AR / VR

2D Image Tracking with AR Foundation (Part 4)

With 2D image tracking, you can create real-life anchors. You need pre-defined markers; Google calls the system Augmented Images. Just point your phone at the image, and your app lets the 3D model immediately appear on top of it.

In the previous part of the tutorial, we wrote Unity scripts so that the user could place 3D models in the Augmented Reality world. A raycast from the smartphone’s screen hit a trackable in the real world, where we then anchored the object. However, this approach requires user interaction and a good user experience to guide users, especially if they’re new to AR.

Please accept YouTube cookies to play this video. By accepting you will be accessing content from YouTube, a service provided by an external third party.

YouTube privacy policy

If you accept this notice, your choice will be saved and the page will refresh.

Using 2D Image Tracking

You need to provide reference images, which your app’s users will then encounter in the real world. AR Foundation distinguishes these images and tracks their physical location.

Some usage scenarios where 2D image tracking is helpful:

  • Recognition of real-world objects
  • Automatically place information on top of objects
  • Create an indoor info or navigation system
  • Often quicker & easier than plan detection
Categories
Android App Development AR / VR

Raycast & Anchor: Placing AR Foundation Holograms (Part 3)

In the first two parts, we set up an AR Foundation project in Unity. Next, we looked at to handle trackables in AR. Now, we’re finally ready to place virtual objects in the real world. For this, we perform a raycast and then create an anchor at the target position. How to perform this with AR Foundation? How to attach an anchor to the world or to a plane?

Please accept YouTube cookies to play this video. By accepting you will be accessing content from YouTube, a service provided by an external third party.

YouTube privacy policy

If you accept this notice, your choice will be saved and the page will refresh.

AR Raycast Manager

If you’d like to let the user place a virtual object in relation to a physical structure in the real world, you need to perform a raycast. You “shoot” a ray from the position of the finger tap into the perceived AR world. The raycast then tells you if and where this ray intersects with a trackable like a plane or a point cloud.

A traditional raycast only considers objects present in its physics system, which isn’t the case for AR Foundation trackables. Therefore, AR foundation comes with its own variant of raycasts. They support two modes:

Categories
Android App Development AR / VR

Trackables and Managers in AR Foundation (Part 2)

After setting up the initial AR Foundation project in Unity in part 1, we’re now adding the first basic augmented reality features to our project. How does AR Foundation ensure that your virtual 3D objects stay in place in the live camera view by moving them accordingly in Unity’s world space? AR Foundation uses the concept of trackables. For each AR feature you’d like to use, you will additionally add a corresponding trackable manager to your AR Session Origin.

Trackables

In general, a trackable in AR Foundation is anything that can be detected and tracked in the real world. This starts with basics like anchors, point clouds and planes. More advanced tracking even allows environmental probes for realistic reflection cube maps, face tracking, or even information about other participants in a collaborative AR session.

Trackable managers available in AR Foundation.

Each type of trackable has a corresponding manager class as part of the AR Foundation package that we added to our project.

Categories
Android App Development AR / VR

AR Foundation Fundamentals with Unity (Part 1)

When developing mobile Augmented Reality apps, you usually want to target both Android and iOS phones. AR Foundation is Unity’s approach to provide a common layer, which unifies both Google’s ARCore and Apple’s ARKit. As such, it is the recommended way to build AR apps with Unity.

However, few examples and instructions are available. This guide provides a thorough step-by-step guide for getting started with AR Foundation. The full source code is available on GitHub.

AR Foundation Architecture and AR SDKs

To work with AR Foundation, you first have to understand its structure. The top layer of its modulare design doesn’t hide everything else. Sometimes, the platform-dependent layers and their respective capabilities shine through, and you must consider these as well.

AR Foundation is a highly modular system. At the bottom, individual provider plug-ins contain the glue to the platform-specific native AR functionality (ARCore and ARKit). On top of that, the XR Subsystems provide different functionalities; with a platform-agnostic interface.

Categories
Android AR / VR Image Processing

Visualize AR Depth Maps in Unity (Part 5)

In the final part, let’s look at how we can generate and use the AR depth maps through Unity’s AR Foundation. In the previous part, we tested the ready-made example. Now, it’s time to write code ourselves.

In this case, I’m using Unity 2021.1 (Alpha) together with AR Foundation 4.1.1 to make sure we have the latest AR support & features in our app. But as written in the previous article, Unity 2020.2 should be sufficient.

I’ve tested the example on Android (Google Pixel 4 with Android 11 & ARCore), but it should work fine also on iOS with ARKit.

You can download the full, final AR Foundation Depth Map sample from GitHub. I’ve released the project under MIT license.

Project Setup

First, configure the project for AR Foundation. I won’t go into too many details here, as the official documentation is quite good on that:

  1. XR Plug-in management: activate the management in the project settings. Additionally, enable the ARCore Plug-in provider. To check if everything was installed, open Window > Package Manager. You should see both AR Foundation as well as ARCore XR Plugin with at least version 4.1.1.
Unity Package Manager with AR Foundation & ARCore XR Plugin packages installed.
  1. Android player settings: switch to the Android build platform, uncheck multithreaded rendering, remove Vulkan from the rendering APIs, make sure the package name is personalized and finally set the minimum API level to at least 24 (Android 7.0).
  2. Scene setup: add the required prefabs and GameObjects to your scene. Right-click in the hierarchy panel > XR > XR Session. Also add the XR Session Origin.

By default, the AR depth map is always returned in Landscape Right orientation, no matter what screen orientation your app is currently in. While we could of course adapt the map to the current screen rotation, we want to keep this example focused on the depth map. Therefore, simply lock the screen orientation through Project Settings > Player > Resolution and Presentation > Orientation > Default Orientation: Landscape Right.

Categories
Android AR / VR Image Processing

Compare AR Foundation Depth Maps (Part 4)

In the previous parts, we’ve taken a look behind the scenes and manually implemented a depth map with Python and OpenCV. Now, let’s compare the results to Unity’s AR Foundation.

How exactly do depth maps work in ARCore? While Google’s paper describes their approach in detail, their implementation is not open source.

However, Google has released a sample project along with a further paper called DepthLab . It’s directly accessing the ARCore depth API and builds complete sample use-cases on top of them.

DepthLab is available as an open-source Unity app. They use the ARCore SDK for Unity directly and not yet the AR Foundation package.

Depth Maps with AR Foundation in Unity

However, Google recommends using AR Foundation with their own ARCore Extensions module (if needed; currently, they only add Cloud Anchor support). Therefore, let’s take a closer look at how to create depth maps using ARFoundation.

Categories
Android AR / VR Image Processing

How to Apply Stereo Matching to Generate Depth Maps (Part 3)

In part 2, we rectified our two camera images. The last major step is stereo matching. The algorithm that Google is using for ARCore is an optimized hybrid of two previous publications: PatchMatch Stereo and HashMatch .

An implementation in OpenCV is based on Semi-Global Matching (SGM) as published by Hirschmüller . In Google’s paper , they compare themselves to an implementation of Hirschmüller and outperform those; but for the first experiments, OpenCV’s default is good enough and provides plenty of room for experimentation.

3. Stereo Matching for the Disparity Map (Depth Map)

OpenCV documentation includes two examples that include the stereo matching / disparity map generation: stereo image matching and depth map.

Most of the following code in this article is just an explanation of the configuration options based on the documentation. Setting fitting values for the scenes you expect is crucial to the success of this algorithm. Some insights are listed in the Choosing Good Stereo Parameters article. These are the most important settings to consider:

  • Block size: if set to 1, the algorithm matches on the pixel level. Especially for higher resolution images, bigger block sizes often lead to a cleaner result.
  • Minimum / maximum disparity: this should match the expected movements of objects within the images. In freely moving camera settings, a negative disparity could occur as well – when the camera doesn’t only move but also rotate, some parts of the image might move from left to right between keyframes, while other parts move from right to left.
  • Speckle: the algorithm already includes some smoothing by avoiding small speckles of different depths than their surroundings.

Visualizing Results of Stereo Matching

I’ve chosen values that work well for the sample images I have captured. After configuring these values, computing the disparity map is a simple function call supplying both rectified images.

Categories
Android AR / VR Image Processing

Understand and Apply Stereo Rectification for Depth Maps (Part 2)

In part 1 of the article series, we’ve identified the key steps to create a depth map. We have captured a scene from two distinct positions and loaded them with Python and OpenCV. However, the images don’t line up perfectly fine. A process called stereo rectification is crucial to easily compare pixels in both images to triangulate the scene’s depth!

For triangulation, we need to match each pixel from one image with the same pixel in another image. When the camera rotates or moves forward / backward, the pixels don’t just move left or right; they could also be found further up or down in the image. That makes matching difficult.

Wrapping Images for Stereo Rectification

Image rectification wraps both images. The result is that they appear as if they have been taken only with a horizontal displacement. This simplifies calculating the disparities of each pixel!

With smartphone-based AR like in ARCore, the user can freely move the camera in the real world. The depth map algorithm only has the freedom to choose two distinct keyframes from the live camera stream. As such, the stereo rectification needs to be very intelligent in matching & wrapping the images!

Stereo Rectification: reprojecting images to make calculating depth maps easier.

In more technical terms, this means that after stereo rectification, all epipolar lines are parallel to the horizontal axis of the image.

To perform stereo rectification, we need to perform two important tasks:

  1. Detect keypoints in each image.
  2. We then need the best keypoints where we are sure they are matched in both images to calculate reprojection matrices.
  3. Using these, we can rectify the images to a common image plane. Matching keypoints are on the same horizontal epipolar line in both images. This enables efficient pixel / block comparison to calculate the disparity map (= how much offset the same block has between both images) for all regions of the image (not just the keypoints!).

Google’s research improves upon the research performed by Pollefeys et al. . Google additionally addresses issues that might happen, especially in mobile scenarios.

Categories
Android AR / VR Image Processing

Easily Create a Depth Map with Smartphone AR (Part 1)

For a realistic Augmented Reality (AR) scene, a depth map of the environment is crucial: if a real, physical object doesn’t occlude a virtual object, it immediately breaks the immersion.

Of course, some devices already include specialized active hardware to create real-time environmental depth maps – e.g., the Microsoft HoloLens or the current high-end iPhones with a Lidar sensor. However, Google decided to go into a different direction: its aim is to bring depth estimation to the mass market, enabling it even for cheaper smartphones that only have a single RGB camera.

In this article series, we’ll look at how it works by analyzing the related scientific papers published by Google. I’ll also show a Python demo based on commonly used comparable algorithms which are present in OpenCV. In the last step, we’ll create a sample Unity project to see depth maps in action. The full Unity example is available on GitHub.

Quick Overview: ARCore Depth Map API

How do Depth Maps with ARCore work? The smartphone saves previous images from the live camera feed and estimates the phone’s motion between these captures. Then, it selects two images that show the same scene from a different position. Based on the parallax effect (objects nearer to you move faster than these farther away – e.g., trees close to a train track move fast versus the mountain in the background moving only very slowly), the algorithm then calculates the distance of this area in the image.

This has the advantage that a single-color camera is enough to estimate the depth. However, this approach needs structured surfaces to detect the movement of unique features in the image. For example, you couldn’t get many insights from two images of a plain white wall, shot from two positions 20 cm apart. Additionally, it’s problematic if the scene isn’t static and objects move around.

As such, given that you have a well-structured and static scene, the algorithm developed by Google works best in a range between 0.5 and 5 meters.