When developing mobile Augmented Reality apps, you usually want to target both Android and iOS phones. AR Foundation is Unity’s approach to provide a common layer, which unifies both Google’s ARCore and Apple’s ARKit. As such, it is the recommended way to build AR apps with Unity.
However, few examples and instructions are available. This guide provides a thorough step-by-step guide for getting started with AR Foundation. The full source code is available on GitHub.
AR Foundation Architecture and AR SDKs
To work with AR Foundation, you first have to understand its structure. The top layer of its modulare design doesn’t hide everything else. Sometimes, the platform-dependent layers and their respective capabilities shine through, and you must consider these as well.
AR Foundation is a highly modular system. At the bottom, individual provider plug-ins contain the glue to the platform-specific native AR functionality (ARCore and ARKit). On top of that, the XR Subsystems provide different functionalities; with a platform-agnostic interface.
Note that feature support varies by platform: while Microsoft’s HoloLens or Magic Leap are theoretically supported, they only provide limited functionality. For these platforms, AR Foundation is currently not a great option. For HoloLens, use the Mixed Reality Toolkit instead. It might get easier in the future, with a preview package for OpenXR developed by Unity, especially for more streamlined VR integration.
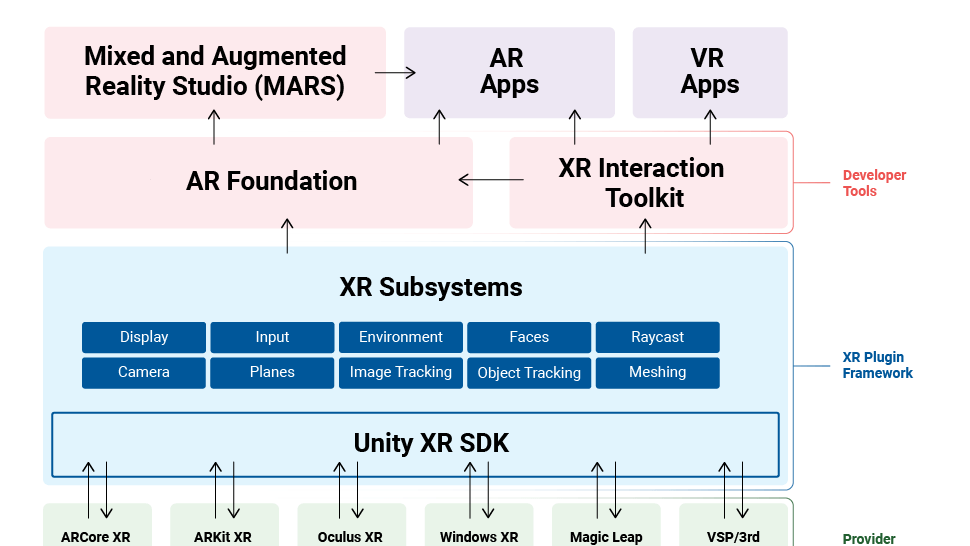
On top, AR Foundation provides some ready-made components and scripts that you include in your project, which interact with the subsystems.
We’re not looking at Unity MARS in this guide – it provides some additional authoring tools for Augmented Reality. However, it’s not included in the Unity normal license.
AR Foundation Architecture in Code
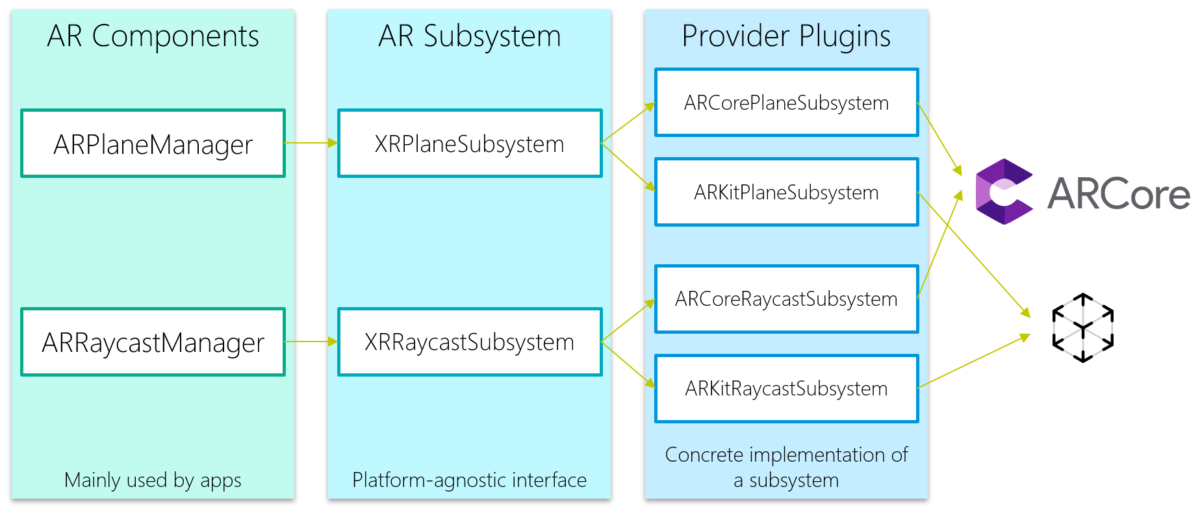
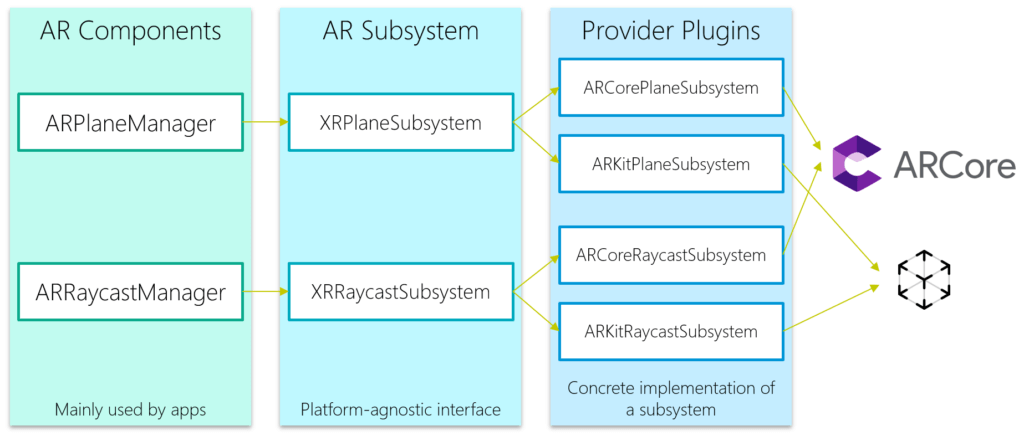
The following image shows a concrete example: you integrate the ARRaycastManager GameObject in your project. This component manages the platform-agnostic interface XRRaycastSubsystem: an abstract class that is implemented by a provider. The concrete implementation is dependent on the platform – the ARCore variant is the ARCoreRaycastSubsystem.
What other components are there, based on Google ARCore as an example? The Google ARCore XR Plugin is the provider plugin that provides the platform specific implementation. You’ll need to install it to your project alongside with the AR Foundation plugin to target ARCore.
In addition, Google provides the ARCore Extensions. It’s a free Unity package that you need to self-import to your project; it’s not yet available through the Unity Package Manager. The package adds some Google specific features that are not in AR Foundation, e.g., Google cloud anchors or support for recording and playback of AR sessions. It’s completely optional to add, though.
An alternative: directly use Google’s ARCore SDK for Unity. It’s officially deprecated and no longer supported in Unity 2020 or later. However, it’s still maintained on GitHub and the latest ARCore features usually first appear there before they’re added to Unity’s AR Foundation later. I’ve written a few articles about ARCore earlier, like this ARCore getting started guide.
Quickstart: Your First AR Foundation Project
Let’s create our first AR Foundation project, so that we can look at the individual AR features. I’ll focus on Android and ARCore here, but except from a few basic project settings, AR Fondation is cross-platform by nature. ARKit currently supports a lot more AR features than ARCore. Check out the Feature Support by Platform matrix in the docs.
First, create a new project according to Google’s AR Foundation guidelines. The “Configure Player Settings” section is relevant. Quick summary:
- Switch the target platform to Android
- Open Player Settings and apply the following changes:
- Other Settings > Rendering: uncheck auto graphics API, remove Vulkan.
- Other Settings > Package Name: create unique name
- Other Settings > Minimum API Level: especially for AR Required, at least API Level 24 or higher. Keep in mind that ARCore capable devices that are still running Android 7.0 ‘Nougat’ won’t offer much performance. For a showcase app, you can therefore consider higher minimum API levels to restrict your app to current and more powerful phones.
64-bit Requirement?
All new apps published in the Play Store need to support 64-bit architectures. This also applies to ARCore. However, the Mono scripting backend in Unity can only compile 32-bit apps.
Therefore, Google recommends switching to the IL2CPP scripting backend to enable the ARM64 architecture (in addition to ARMv7 for 32-bit).
Personally, I’m mostly still using Mono (with .NET Standard) during development, as it’s A LOT quicker to compile the app than IL2CPP. On my laptop, the compile-time difference is several minutes; with limited AR testing support directly in the Unity editor, I like to keep compile & phone deploy times to a minimum. You can always change the scripting backend back-and-forth.
XR Plug-in Management
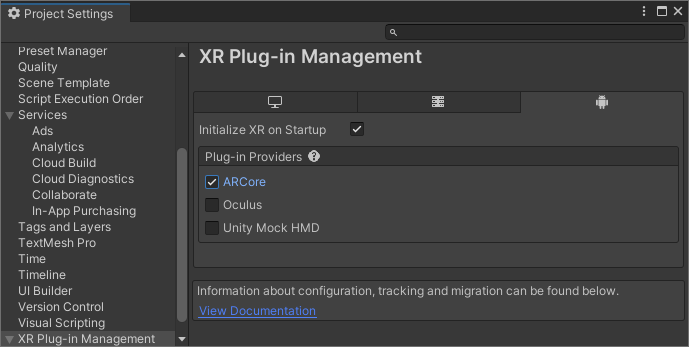
Next, go to Project Settings > XR Plug-in Management. Click on “Install”. This uses the Unity Package Manager to install the XR Plugin Management plug-in.

Then, enable ARCore. This installs the ARCore XR Plugin, as the provider plugin.
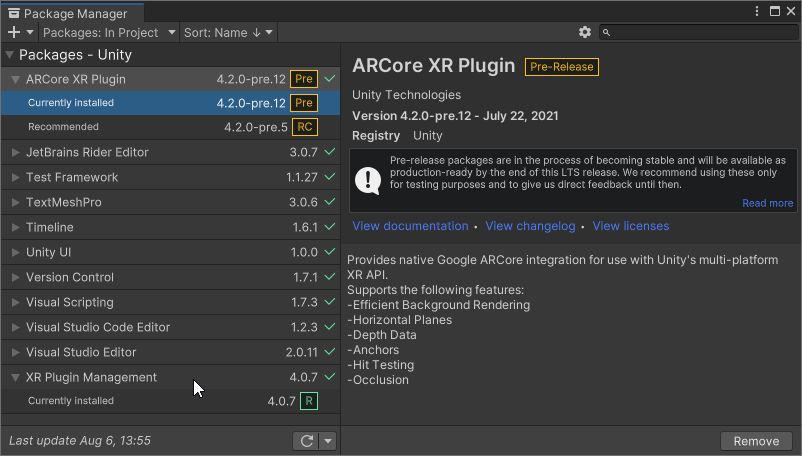
Finally, I’d recommend going to the Unity Package Manager and to update all Plug-ins. The auto-installed versions don’t necessarily have to be the latest.
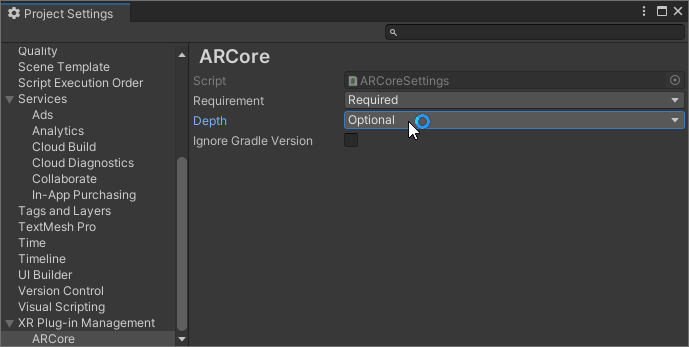
By default, in the ARCore settings, also Depth measurement support is set to “required”. Most current ARCore capable devices do not have this yet. You can always check the current smartphone list in ARCore Supported Devices, which also lists Depth API support. So, in case your use-case doesn’t rely on depth estimation, you should make depth “optional”.
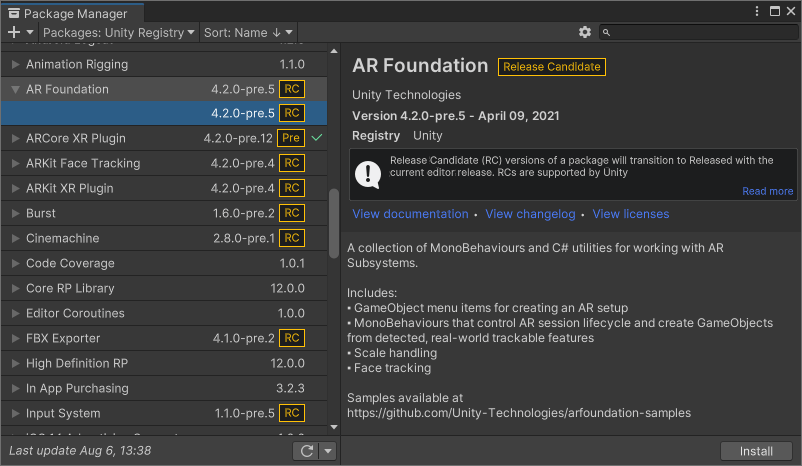
If the XR Plug-in Management didn’t install the AR Foundation plug-in automatically, you must do so yourself. In the Package Manager, switch to “Packages: Unity Registry” to see all available packages instead of just the installed packages. Then, install the latest version of the AR Foundation plug-in:
AR Scene Setup
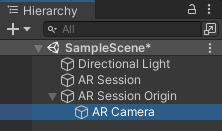
First, remove the default camera in your scene. Then, add AR Session and AR Session Origin through the context-menu of the scene.
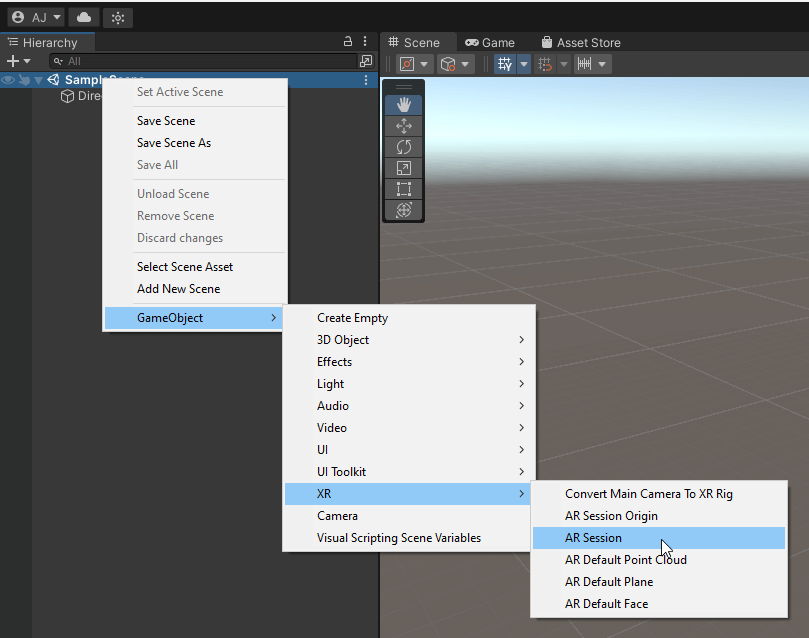
In case you don’t see these menu options, install the “AR Foundation” plug-in as seen in the previous section, and ensure that Android (or iOS) is the active target platform.
Main AR Foundation Components
AR Foundation uses some fundamental concepts which are part of every AR app. The following sections briefly explain what they do, as you will need to interact with some of these GameObjects or configure the settings to suit your application scenario.
AR Session
This GameObject controls the lifecycle of your AR experience. It checks for AR device support. It manages the current state of the session – when everything is initialized and OK, the state will be SessionTracking. The GameObject also provides means to enable and disable AR, e.g., when you’re in a menu.
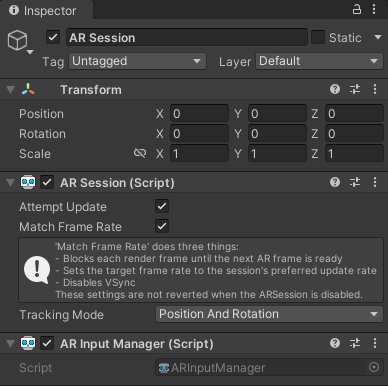
AR Session is a global construct, you only have it one time in the scene, attached to any component.
The Attempt Update setting tries to install AR libraries on the device if possible – e.g., the ARCore services through the Google Play Store.
The GameObject also contains the AR Input Manager script. It’s also required 1x anywhere in the scene and enables world tracking.
AR Session Origin
The second GameObject we just added is the ARSessionOrigin. It applies transformations (position, orientation, and scale) from trackable features (like feature points or planes) to anchored objects in the Unity scene’s.
Trackables in AR are managed in “session space” by the device. They are relative to the device’s coordinate system. However, your GameObjects in Unity are managed in world space.
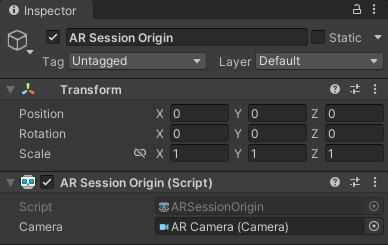
To make sure the virtual camera moves along with the real smartphone’s camera through the world, AR Camera should be a child of AR Session Origin.
AR Pose Driver
A component of the AR Camera. It drives the local position & orientation according to the device’s tracking info. This updates the AR Camera‘s position and orientation.
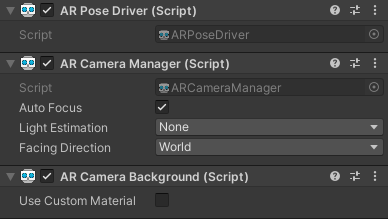
An alternative would be the TrackedPoseDriver, which is part of the XR Legacy Input Helper.
AR Camera Manager
In this script, you can manage the camera’s auto focus state. Usually, it’s recommended to keep auto focus on – an exception could be if you’re only working with far away scenes.
Activate light estimation when needed. It then keeps properties updated, which you manually apply to a light source in your Unity scene. More on this process later. Keep in mind that not all light estimation features are supported by all devices and platforms.
Additionally, you can use the AR Camera Manager to switch between the world- and user-facing camera.
AR Camera Background
By default, this shows the live camera feed in the background of your AR contents rendered on top. You can replace it with a custom material if needed.
Next Steps
Now your project is ready to support AR. In the next part of the tutorial, we’ll visualize tracked feature points and planes and perform ray casting.
AR Foundation Article Series
A hands-on tutorial which guides you through your first AR Foundation app. Start with a new Unity 3D project. Understand its architecture with trackables and managers. Use Plane and Point Cloud detection. Perform raycasts and create anchors in the real world or on planes. Plus: place 3D models on printed 2D images that your app tracks in the real world.
- AR Foundation Fundamentals with Unity (Part 1)
- Trackables and Managers in AR Foundation (Part 2)
- Raycast & Anchor: Placing AR Foundation Holograms (Part 3)
- 2D Image Tracking with AR Foundation (Part 4)