Updated: December 12th, 2022 – changed info from Microsoft LUIS to Microsoft Azure Cognitive Services / Conversational Language Understanding.
During the last few years, cognitive services have become immensely powerful. Especially interesting is natural language understanding. Using the latest tools, training the computer to understand spoken sentences and to extract information is reduced to a matter of minutes. We as humans no longer need to learn how to speak with a computer; it simply understands us.
I’ll show you how to use the Conversational Language Understanding Cognitive Service from Microsoft. The aim is to build an automated checklist for nurses working at hospitals. Every morning, they record the vital sign of every patient. At the same time, they document the measurements on paper checklists.
With the new app developed in this article, the process is much easier. While checking the vital signs, nurses usually talk to the patients about their assessments. The “Vital Signs Checklist” app filters out the relevant data (e.g., the temperature or the pupillary response) and marks it in a checklist. Nurses no longer have to pick up a pen to manually record the information.
The Result: Vital Signs Checklist
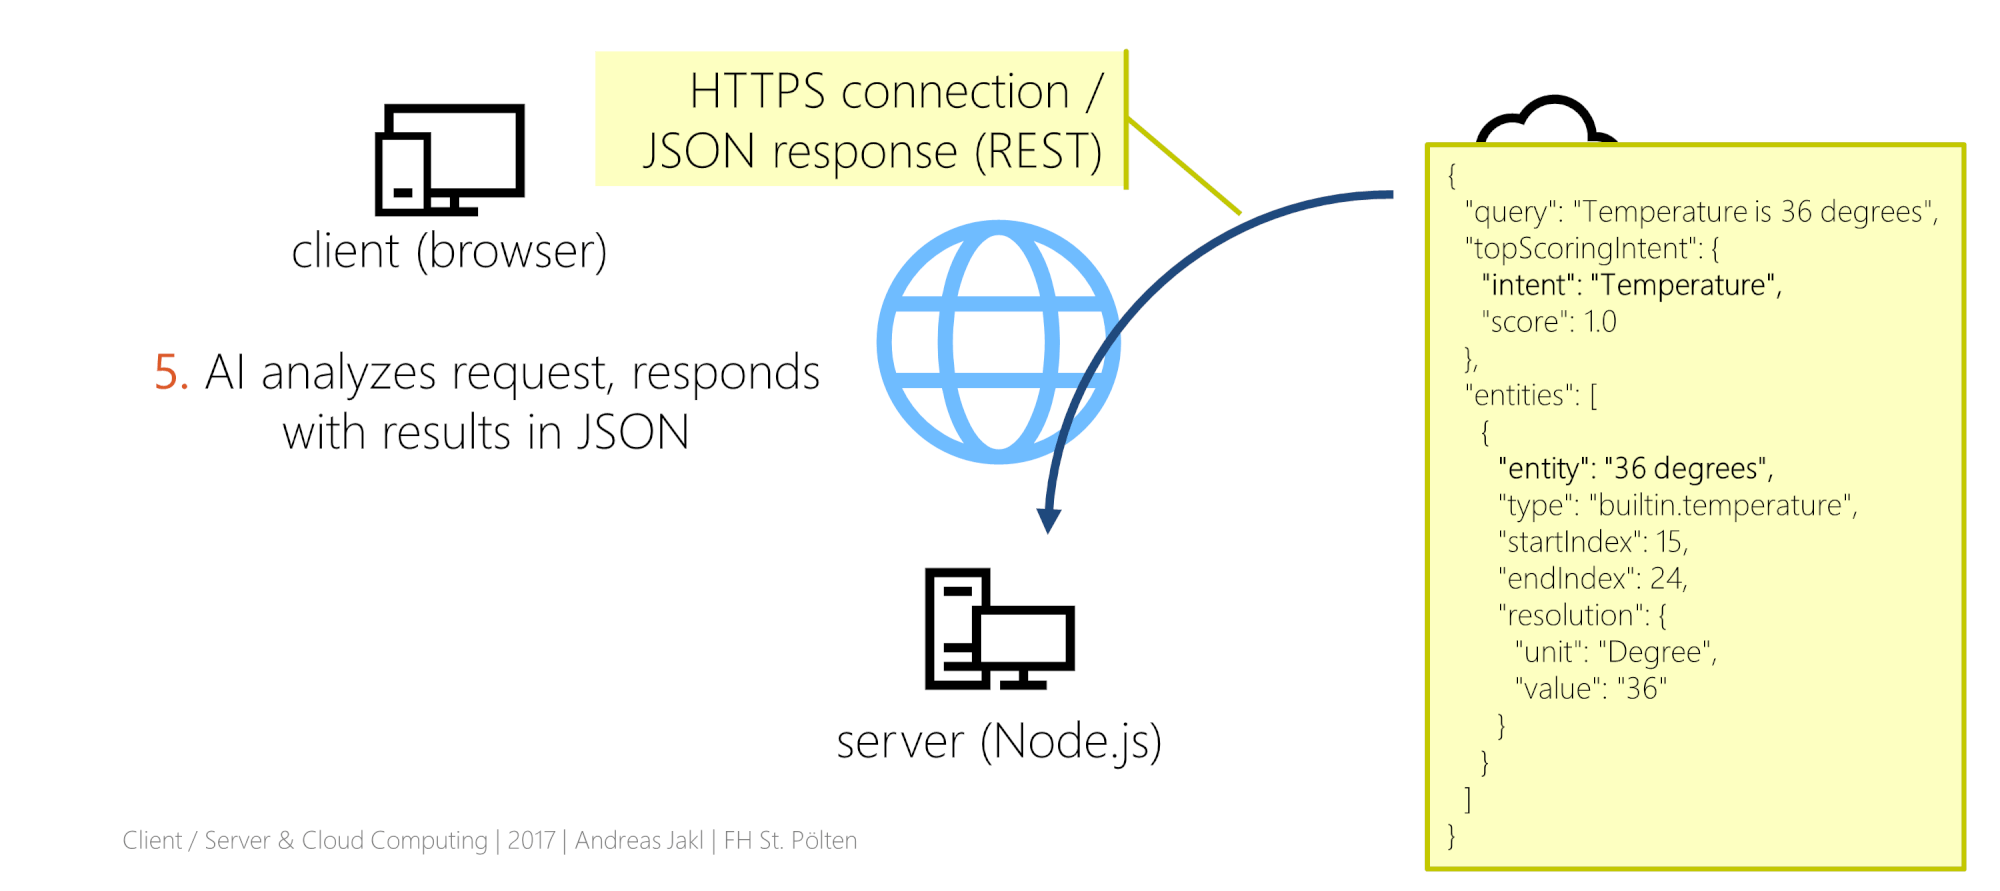
In this article, we’ll create a simple app that uses the conversational language understanding APIs of the Microsoft Azure Cognitive Services. The service extracts the relevant data from freely written or spoken assessments.