Are there any other ways to 3D print segmented medical data coming from MRI / CT / Ultrasound by splitting it in two halves?
In the first part of this article, the result was that the support structures required by a standard 3D printer significantly reduce the details present on the surface of the printed body part.
Christoph Braun had the idea for another method to reduce the support structures to a minimum: by splitting the object in two halves, each has a flat surface area that can be used as the base for the 3D print.
Importing and Scaling the STL Model
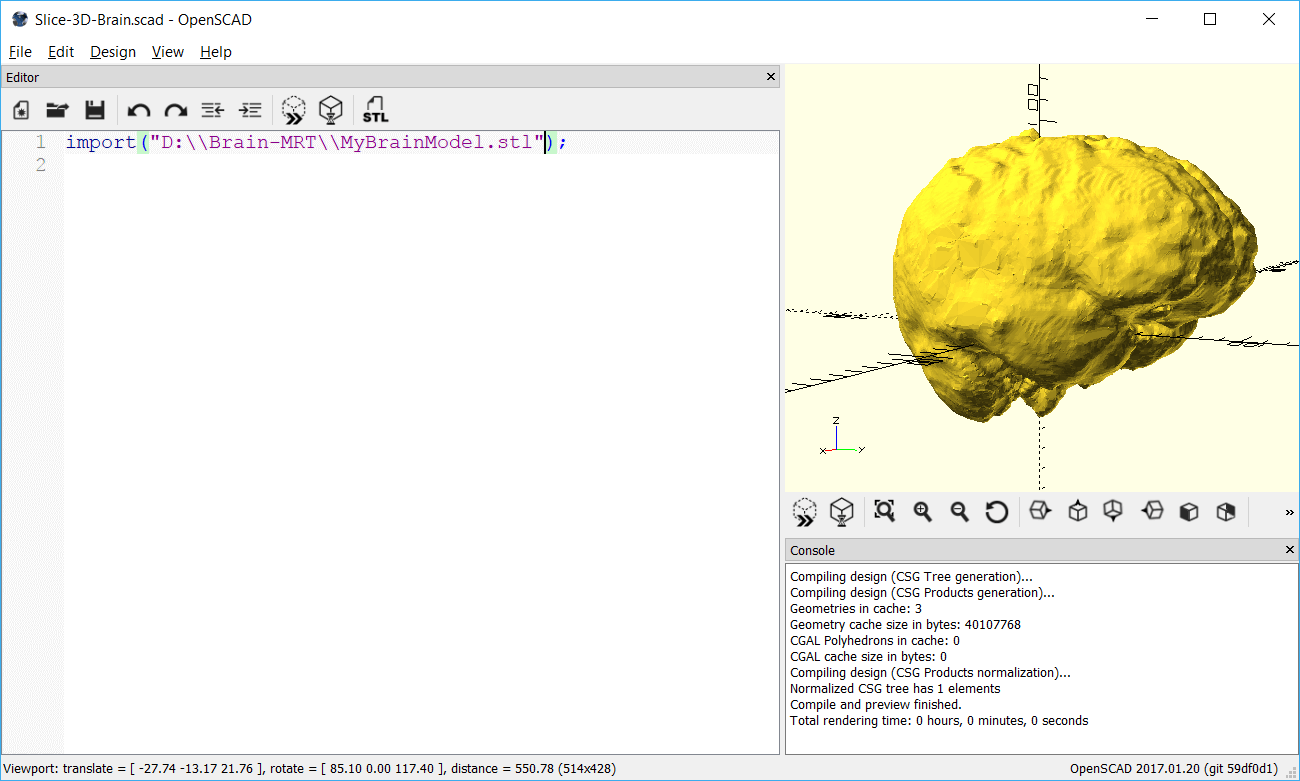
For processing the 3D object, we’ll use OpenSCAD – The Programmers Solid 3D CAD Modeler. It’s a free open source tool, aimed more at developers, with the advantage that the processes can easily be automated.
As the last stable release is already quite old, I’m using the latest available development snapshot (currently 2017.01.20).
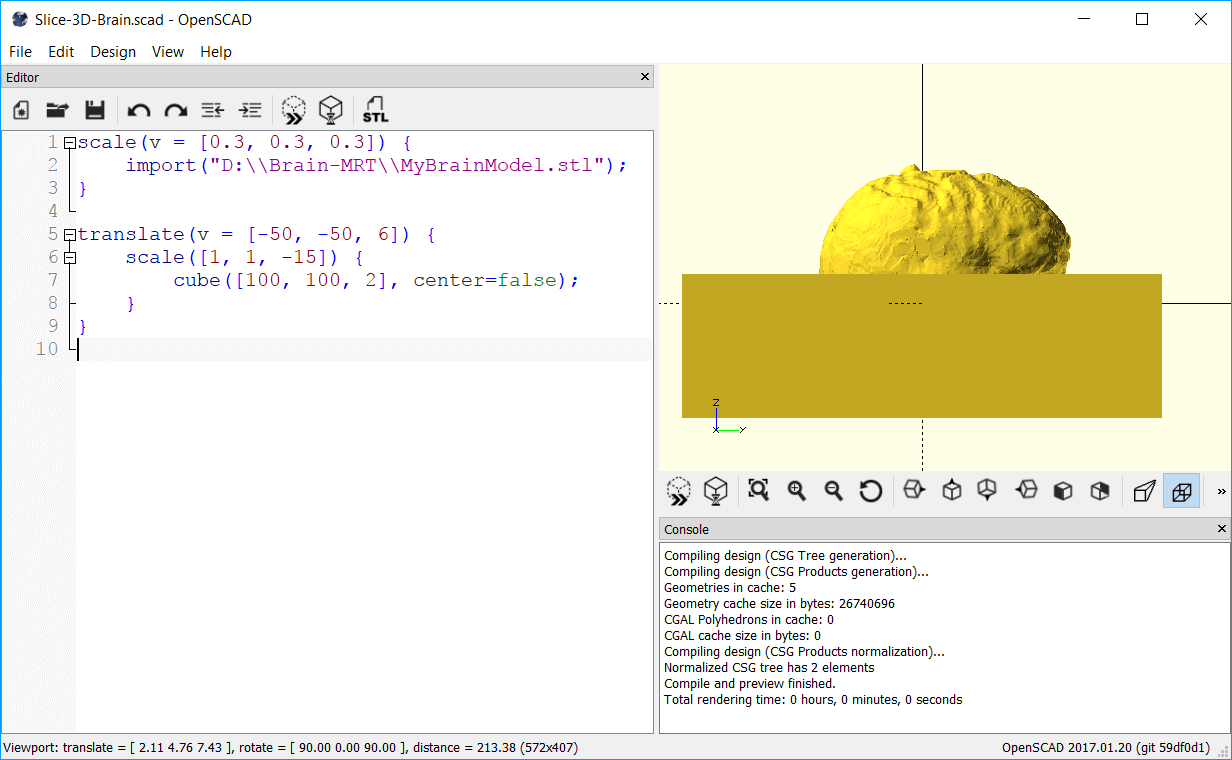
As a programmer’s CAD app, you need to write code to perform most actions. Fortunately, the steps are simple enough. First, we need to load the segmented 3D brain STL file using the import command and specifying the location on your computer:
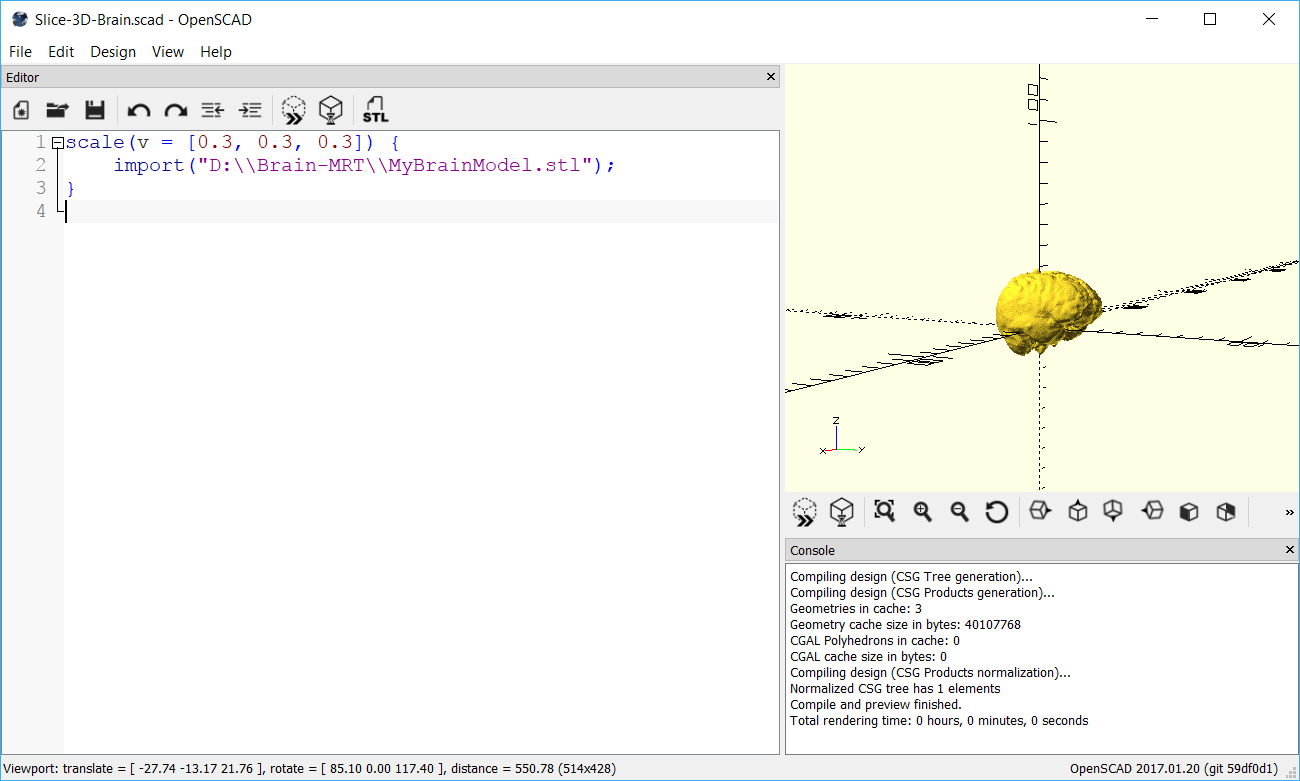
As the whole 1:1 brain would be rather large and take several hours to print, it’s a clever idea to also scale the model. In this case, we scale it to 30%, by encapsulating the import statement with a scale statement. By supplying a vector with every axis set to 0.3, we achieve a uniform downscale:
Preparing the Boolean Difference Operation
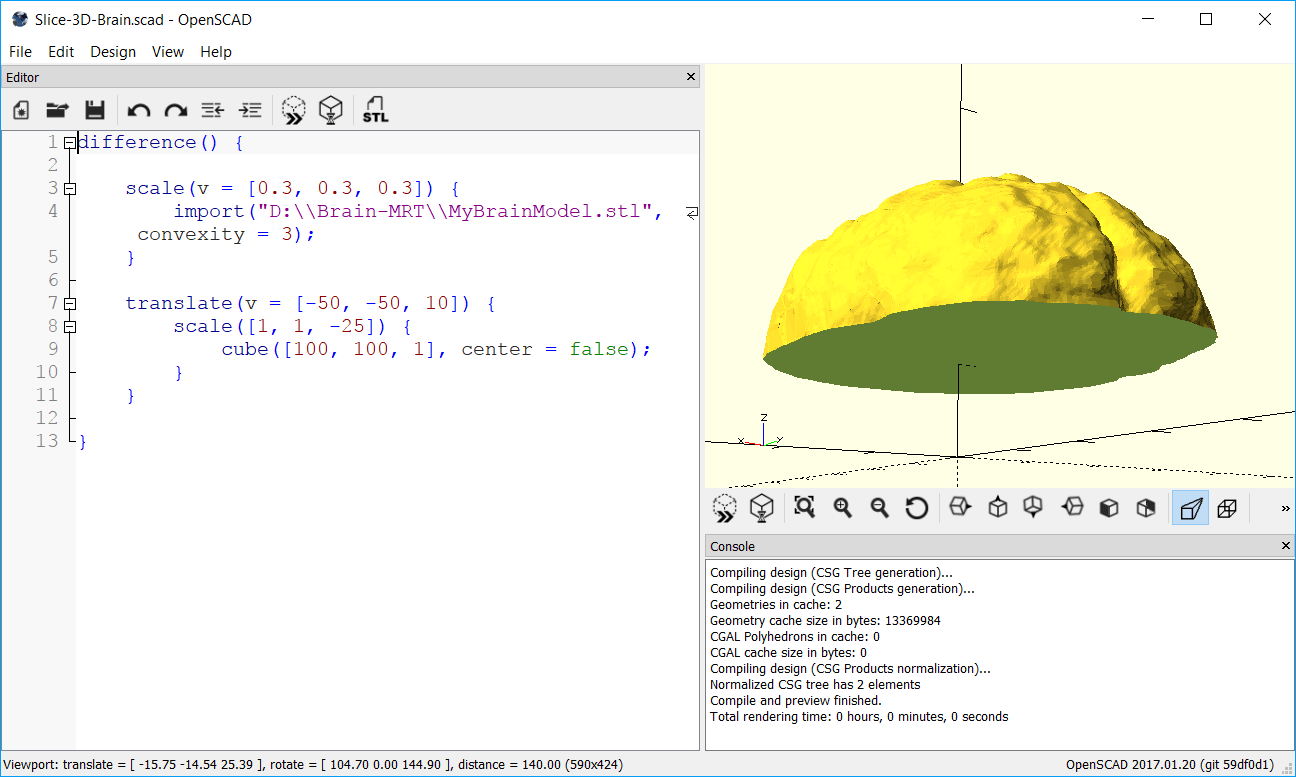
The next step is to split the object in two halves. To do this, we create a cube and then use a Boolean operation (difference) to subtract the cube from the brain model.
First, create a cube that has a suitable size on the x and y axis to enclose the whole object – in this example, 100 is a good value. We don’t center the cube, so that it’s easier later to scale the object to generate two individual halves out of the whole model.
This scaling we apply only affects the z-axis. The logic is easy: scale to a negative value to extend the cube to the bottom. Scale the z-axis to a positive value to extend the cube to cover the top half of the brain. The pivot point for the scaling operation is on the surface of the cube and not in the center, so we get a clear separation and no overlap between the two halves.
The last command to add is a translation, as we didn’t center the object before. With a size of 100 on the x and y axis, move it by -50 each to center the object on these axes. For the z-axis, move the cube so that it starts at a good vertical position that doesn’t produce much overhang for either the top or bottom half.
Splitting the Brain in Two Halves
Now that the scene is prepared, we only need to perform the Boolean operation to create the difference between the brain and the cube. In this case, we’ll simply subtract the cube from the brain so that only the top half remains.
Encapsulate both the code part that imports the brain 3D model, as well as the part that creates and adapts the cube in a new difference statement. This automatically subtracts the cube from the other model, leaving only one half of the brain and thus splitting it in two parts.
In the preview of the OpenSCAD software, the model might now appear translucent in some areas. There is an easy fix for that – set the convexity to 3 in the import statement. The convexity defines the maximum number of front-facing surfaces a rendering ray might penetrate, but it only has effects on the quick preview mode, so is a cosmetic setting.
The final code for splitting the 3D model:
difference() {

    scale(v = [0.3, 0.3, 0.3]) {
        import("D:\\Brain-MRT\\MyBrainModel.stl", convexity = 3);
    }

    translate(v = [-50, -50, 10]) {
        scale([1, 1, -25]) {
            cube([100, 100, 1], center = false);
        }
    }

}
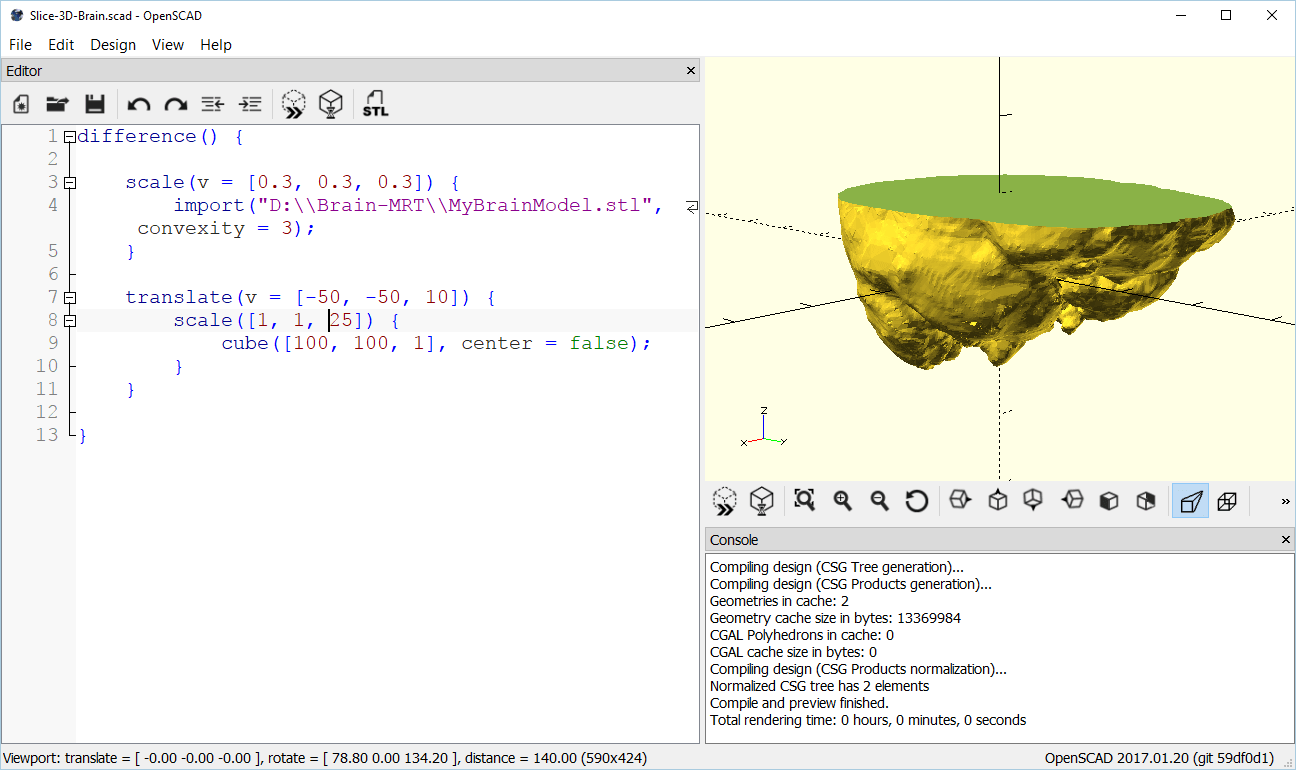
Now, we repeat a similar process to create the other half of the model. In the scale command of the cube, apply a positive sign to the z-axis scale. This mirrors the cube to the top half. After applying the difference operator, only the bottom half of the brain remains.
Export the 3D Models
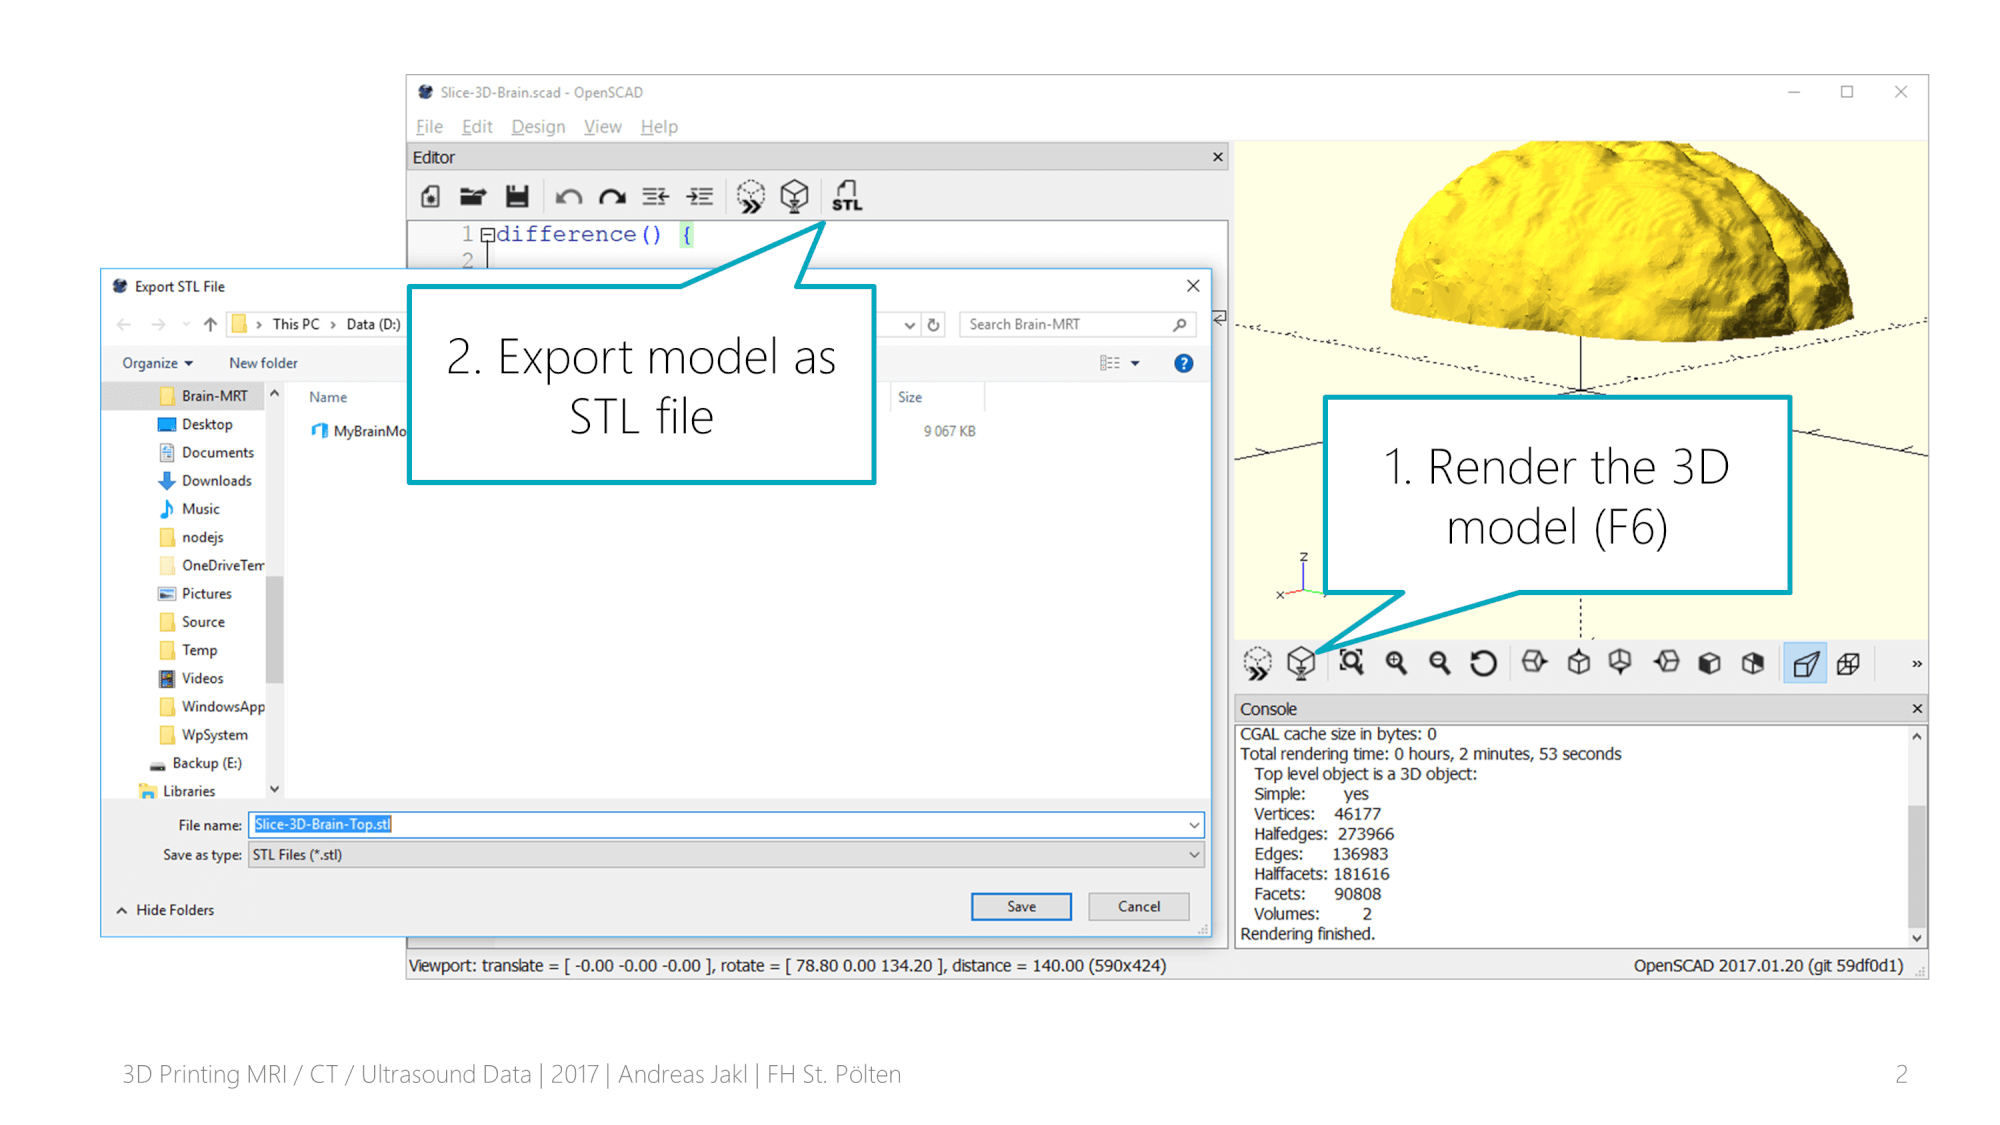
To export both halves as separate 3D models, you first need to render the object (or press F6). Now, the “Export to STL” button in the toolbar directly above the code window saves the processed brain halves into an STL file. Repeat the process for both brain halves; simply switch the sign of the scale command in-between the exports.
Preparing the Brain for 3D Printing
Now, you only need to open the models in Cura for 3D Printing, as described in the guide in the first part of this article. Place the two halves next to each other. Rotate the lower half of the brain so that both model parts have the flat surface at the bottom of the 3D print.
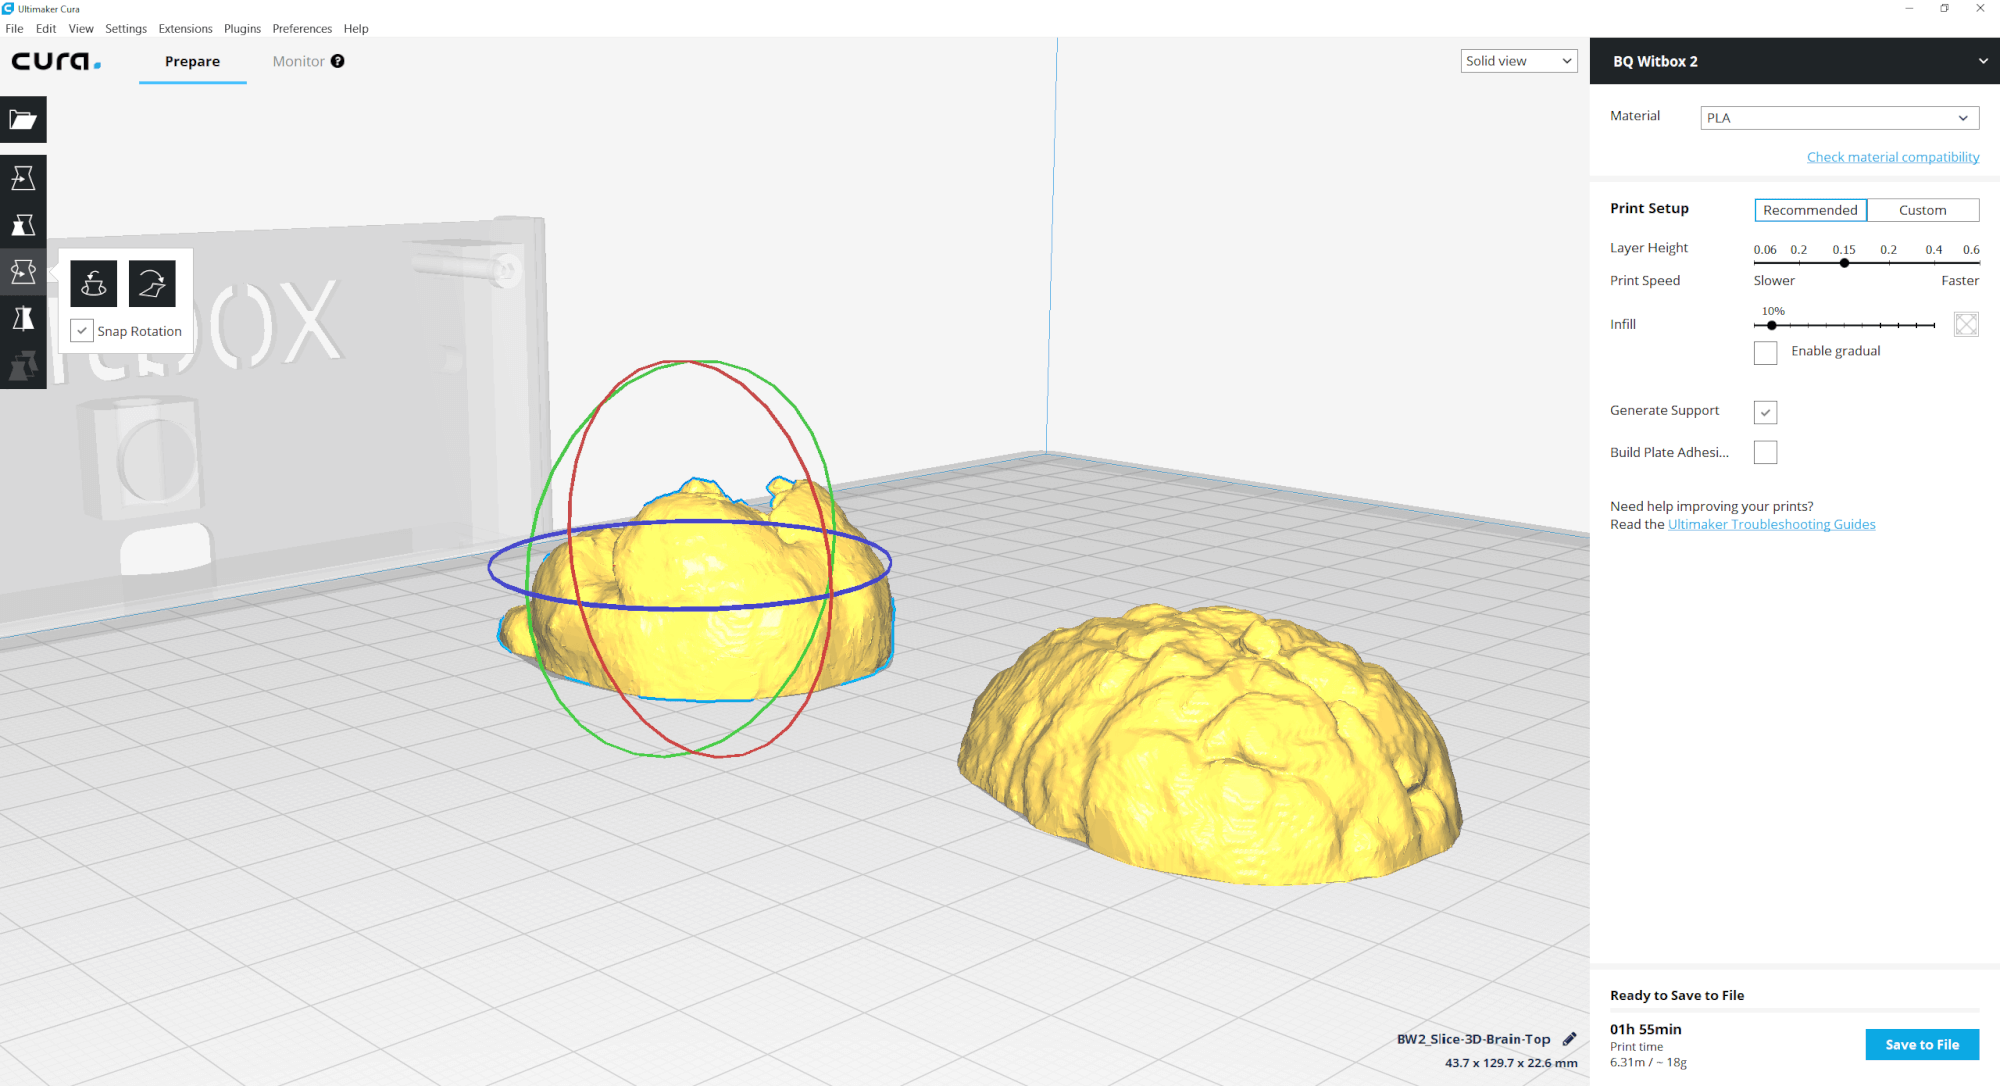
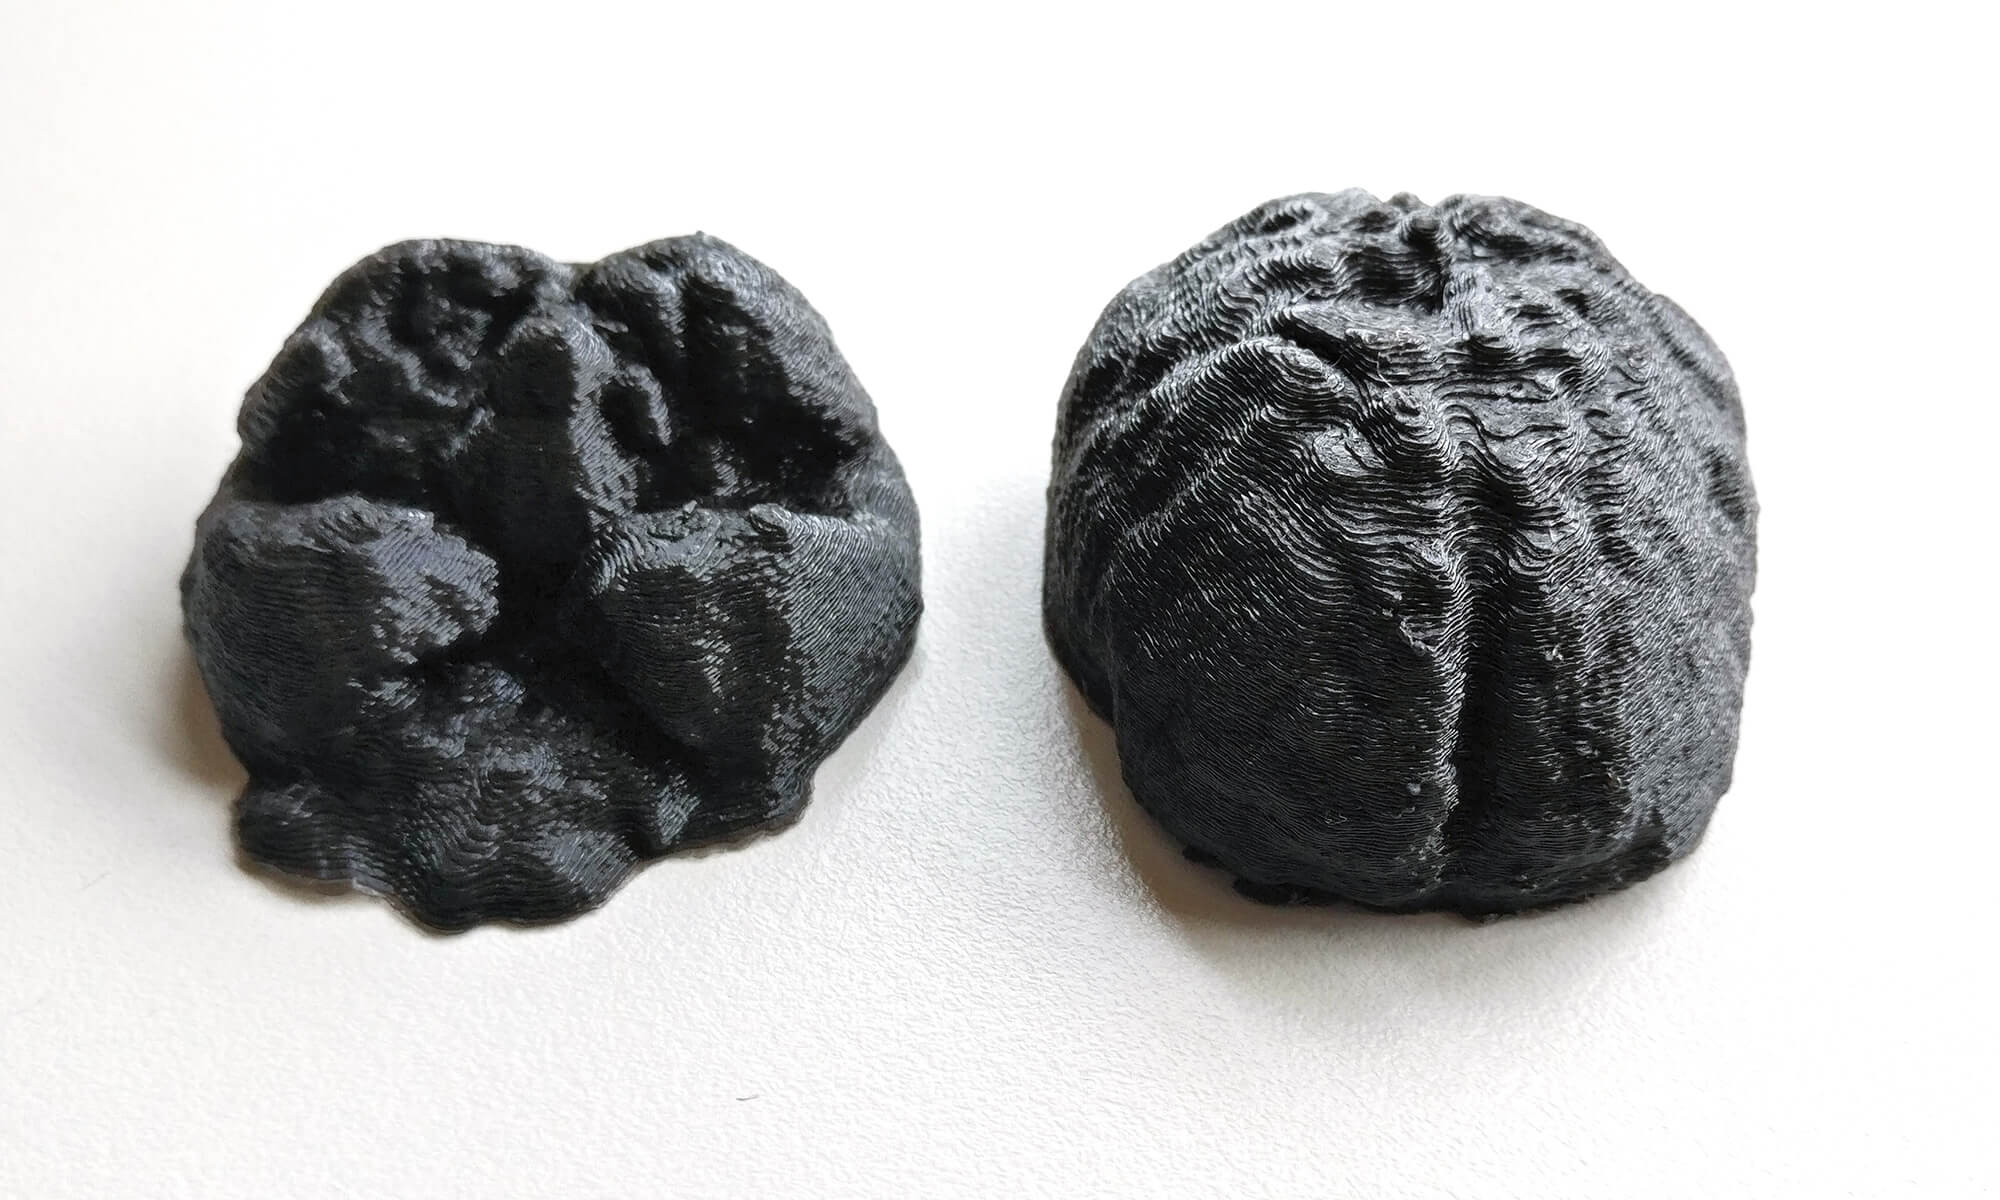
As you can see, there is pretty much no overhang anymore. Therefore, the brain can be printed almost without supporting structures. Send this setup to your 3D printer.
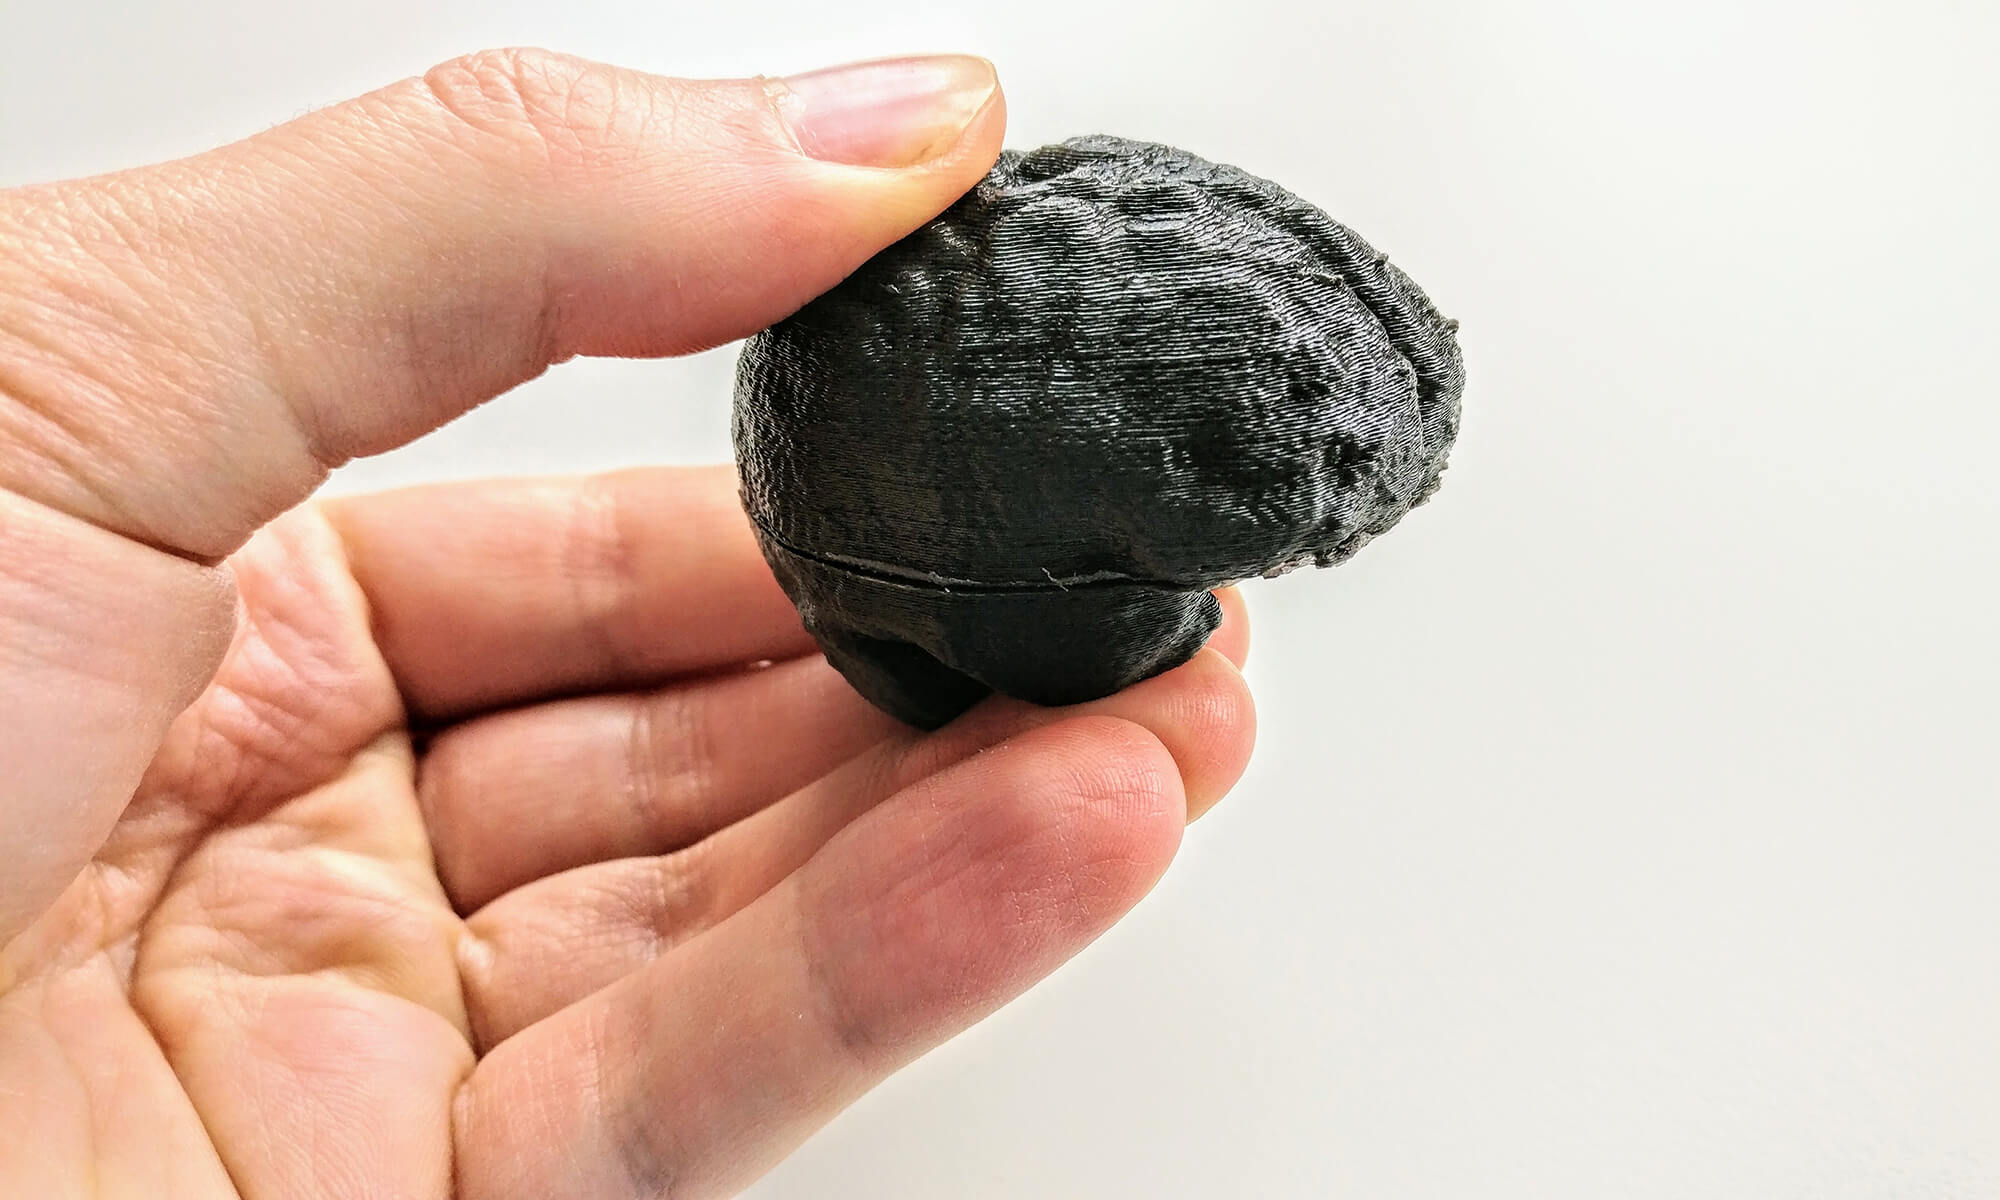
The Final Result
The result looks excellent from the model surface. Of course, you must glue or melt the two halves together, and the seam will still be visible. However, it might still be a better compromise than manually removing support structures and losing surface detail during the sanding process.