Image classification & content description is incredibly powerful. Cloud-based computer vision services instantly return a JSON-based description of what they see in photos.
However, most examples are quite complex. As a beginning developer with your main knowledge in HTML + JavaScript, the following code is for you. You don’t need to worry about Node.js or native apps. The code runs directly in your browser from your computer.
HTML Page Setup
First, create a simple HTML page. All the HTML elements you need are summarized in the following overview:
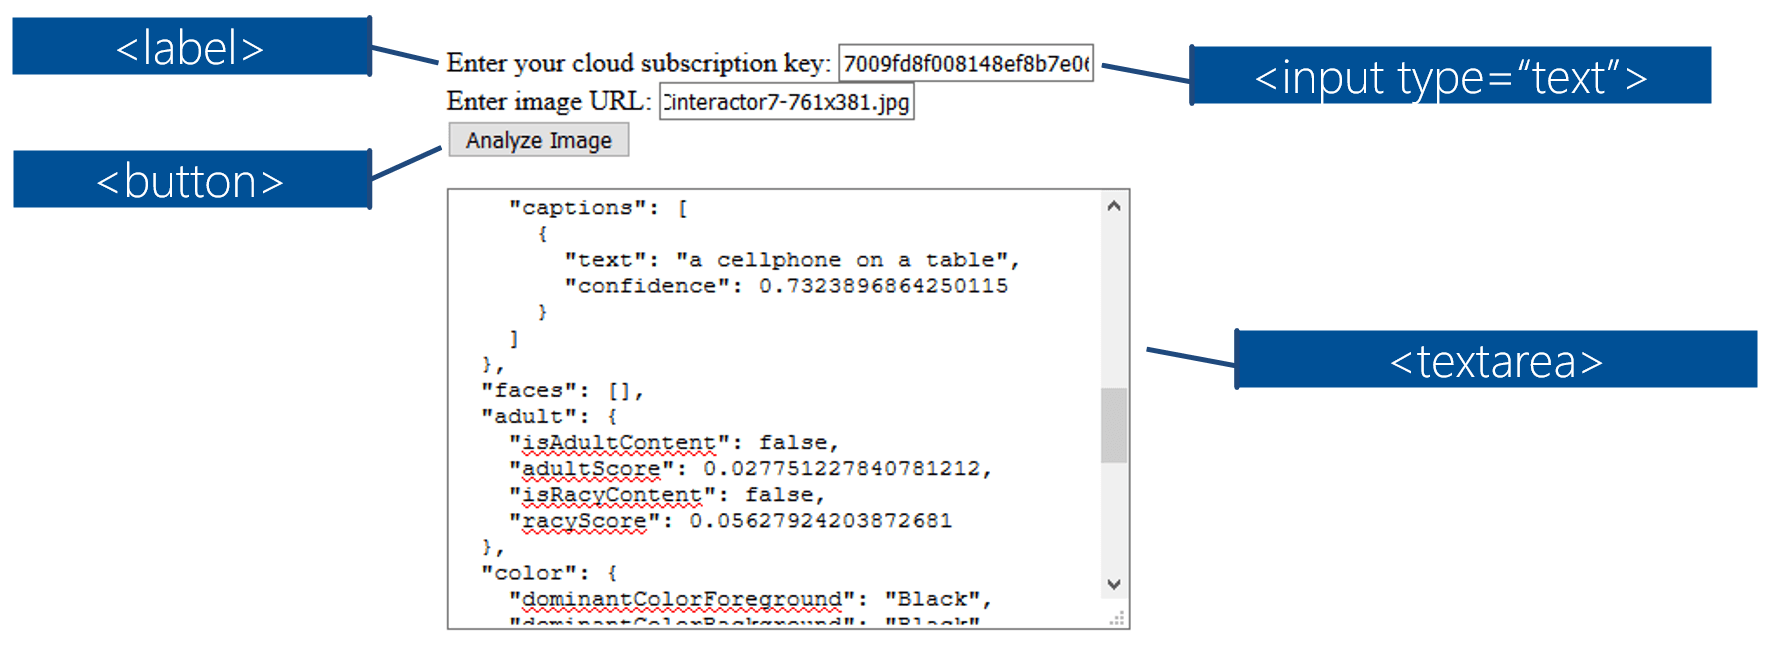
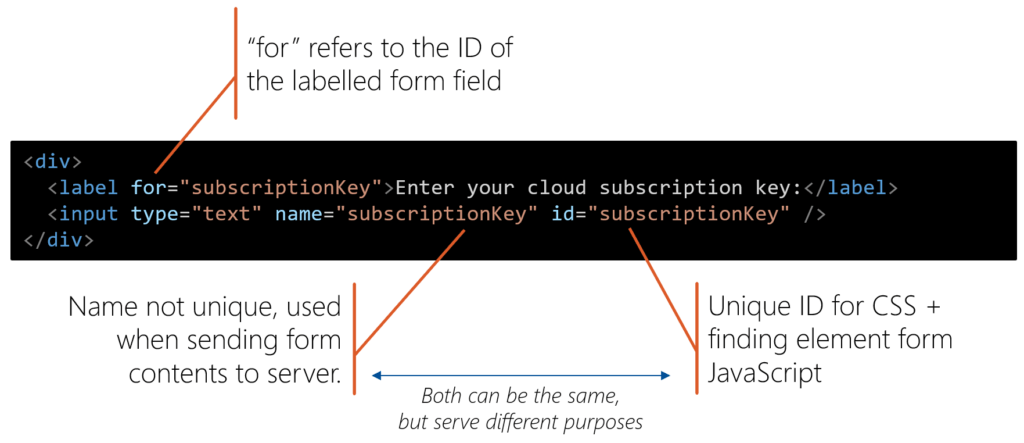
Create a simple HTML form that contains of two inputs of type text, with their appropriate labels:
- Cloud subscription key: to associate the calls with your cognitive services account
- Image URL: picture available from the Internet that you’d like to analyze
Next, create a button to trigger the JavaScript code. Below that, place a big <textarea> to show the results. The JSON returned by the cloud service includes a human-readable description of the scene, and even celebrity detection.
To glue the JavaScript code to the HTML, also include JQuery and load your own JavaScript file – called imageAnalysis.js in this example. The complete HTML:
Cognitive Services: Free Trial Account
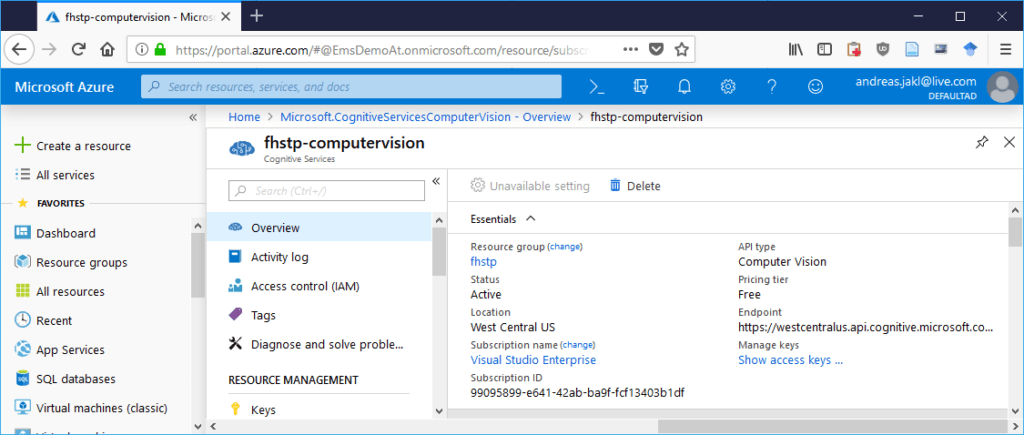
After creating the HTML page, the next step is signing up to Azure Cognitive Services. If you either already have an Azure account or create a free trial account, you can simply create the Computer Vision service. Next, write down the endpoint URL as well as the access key. The service doesn’t expire and currently gives you 20 transactions per minute / 5,000 per month for free.
In case you don’t have an Azure account and you don’t want to sign up for a free trial, there’s a really easy alternative option. With only a Microsoft Account, you can sign up for a 7-day trial for the Computer Vision service with one click.
No credit card is required. Your service will deactivate after one week. The region of the service is fixed to the US in this case. You’ll directly see your access key after you agree to the terms of use.
JavaScript to Access the Computer Vision API
The only remaining step is a short JavaScript file that performs the REST API call from your local web page to the Azure services.
The entry point for the code below is analyzeButtonClick(). It retrieves the text from both text input fields. Next, it sends these to the AnalyzeImage() function, along with the textarea HTML element where the results should appear.
The AnalyzeImage() function first configures the cloud service. In this example, it sets the language to English and requests pretty much everything that the Computer Vision service can currently analyze: categories, tags, description, faces, image type, dominant color and whether it’s adult content.
For production scenarios, you should limit the analysis categories to only what you really need. That reduces the amount of transferred data, and also helps keeping the costs down. Each category you specify is calculated as a (potentially billable) transaction.
AJAX Call to the Azure Cognitive Services / Computer Vision Service
The last part is most relevant: the actual call of the cloud service:
Using JQuery, the AJAX call is configured first. Then, two callback functions handle both possible outcomes: success (done) or error (fail).
For the configuration, you provide the URL of your cognitive service. Note that especially if you crated your service through a full Azure account and chose a different region than West Central US, you will need to adapt the URL.
Additionally, the code sets the subscription key in the header of the POST request. The last configured option is the image URL. Note that the image must be accessible by a cloud service. Some hosts don’t allow loading images if the request isn’t coming from a browser.
Success & Error for Image Analysis
The two promises the code handles are: successful or failed request. In the first case, the callback function directly gets the JSON data as parameter. The function simply converts the JSON to a string and places it into the HTML text area.
In case something goes wrong, the error message is placed in the text area.
Additionally, an alert informs that request is complete, even if no contents are returned at all for some reason.
Analyzing Images with Artificial Intelligence
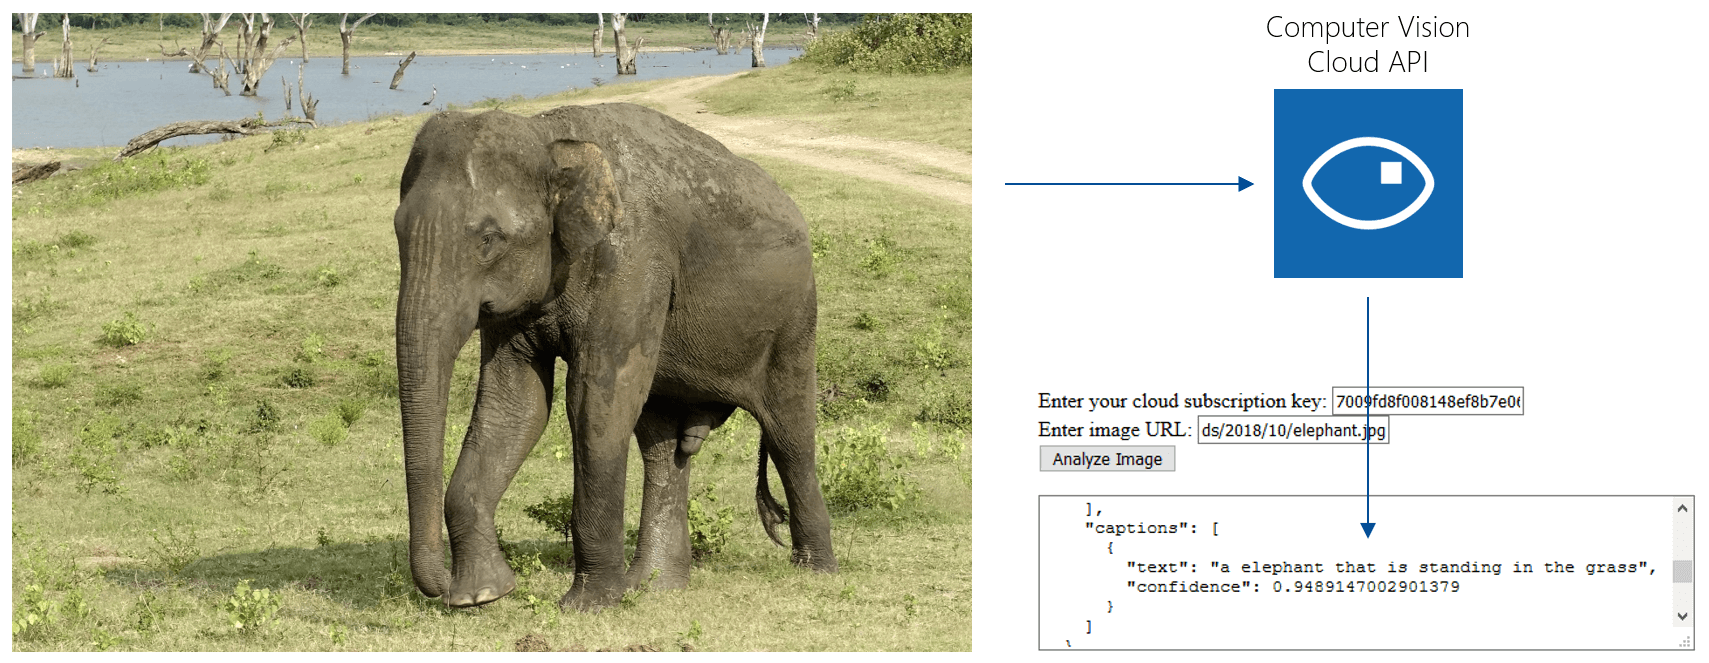
That’s it! Now simply open the HTML page with your browser. Enter the image URL you’d like to know more about. The elephant picture from the screenshot above is available here: https://www.andreasjakl.com/wp-content/uploads/2018/10/elephant.jpg
Additionally, don’t forget to enter your API key. Next, click the “Analyze Image” button. After a second you get an analysis of the image contents as JSON. For the elephant picture, this is:
Next Steps
For uncontrolled environments, you shouldn’t expose the API key directly in the JavaScript that gets sent to the user. Instead, place the actual interaction with the cloud on a Node.js server, which acts as a bridge between the user and your billable cloud services.
But all this makes the scenario more complicated, and you hopefully succeeded with the simplest possible way to call an immensely powerful artificial intelligence service from your own code. Congratulations!