So far, we’ve created a volume rendering of an MRI / CT / Ultrasound scan. This is based on Voxels. For 3D printing and highly performant visualization in AR / VR scenarios, we need to create and export a polygon-based model. For the first step, we will use the Grayscale Model Maker and export the 3D Model as .stl to further prepare the model.
To create a 3D model, we have two main options in 3D Slicer:
- Grayscale Model Maker: directly uses grayscale values from the image data. A threshold defines the surfaces. The model maker also takes care of smoothing the surfaces and reducing the polygon count.
- Model Maker: this requires labels or discrete data to build a 3D model, meaning you have to segment the image data.
As a first step, we will use the Grayscale Model Maker, and later explore the more advanced options offered by segmentation and the Model Maker.
Grayscale Model Maker
To create a 3D model based on a grayscale threshold, click on the module selector drop-down in the toolbar and choose Surface Models > Grayscale Model Maker.
In the ID area, select your scan data as Input Volume. For the Output Geometry, select “Create new model as…” and give the model a name that you can recognize later, e.g., “MyModel” or “MySkull”.

To create a good 3D model that isn’t too complex for mobile augmented reality scenarios, you will need to tweak the parameters:
- Choose a good Threshold value to make your model visible, while reducing noise around the model
- Increase Smoothing to reduce model complexity
- Increase Decimate for augmented reality, also to reduce model complexity
- If you’d like, also uncheck Split Normals. This is required for visualizing sharp features but can also create holes in surfaces.
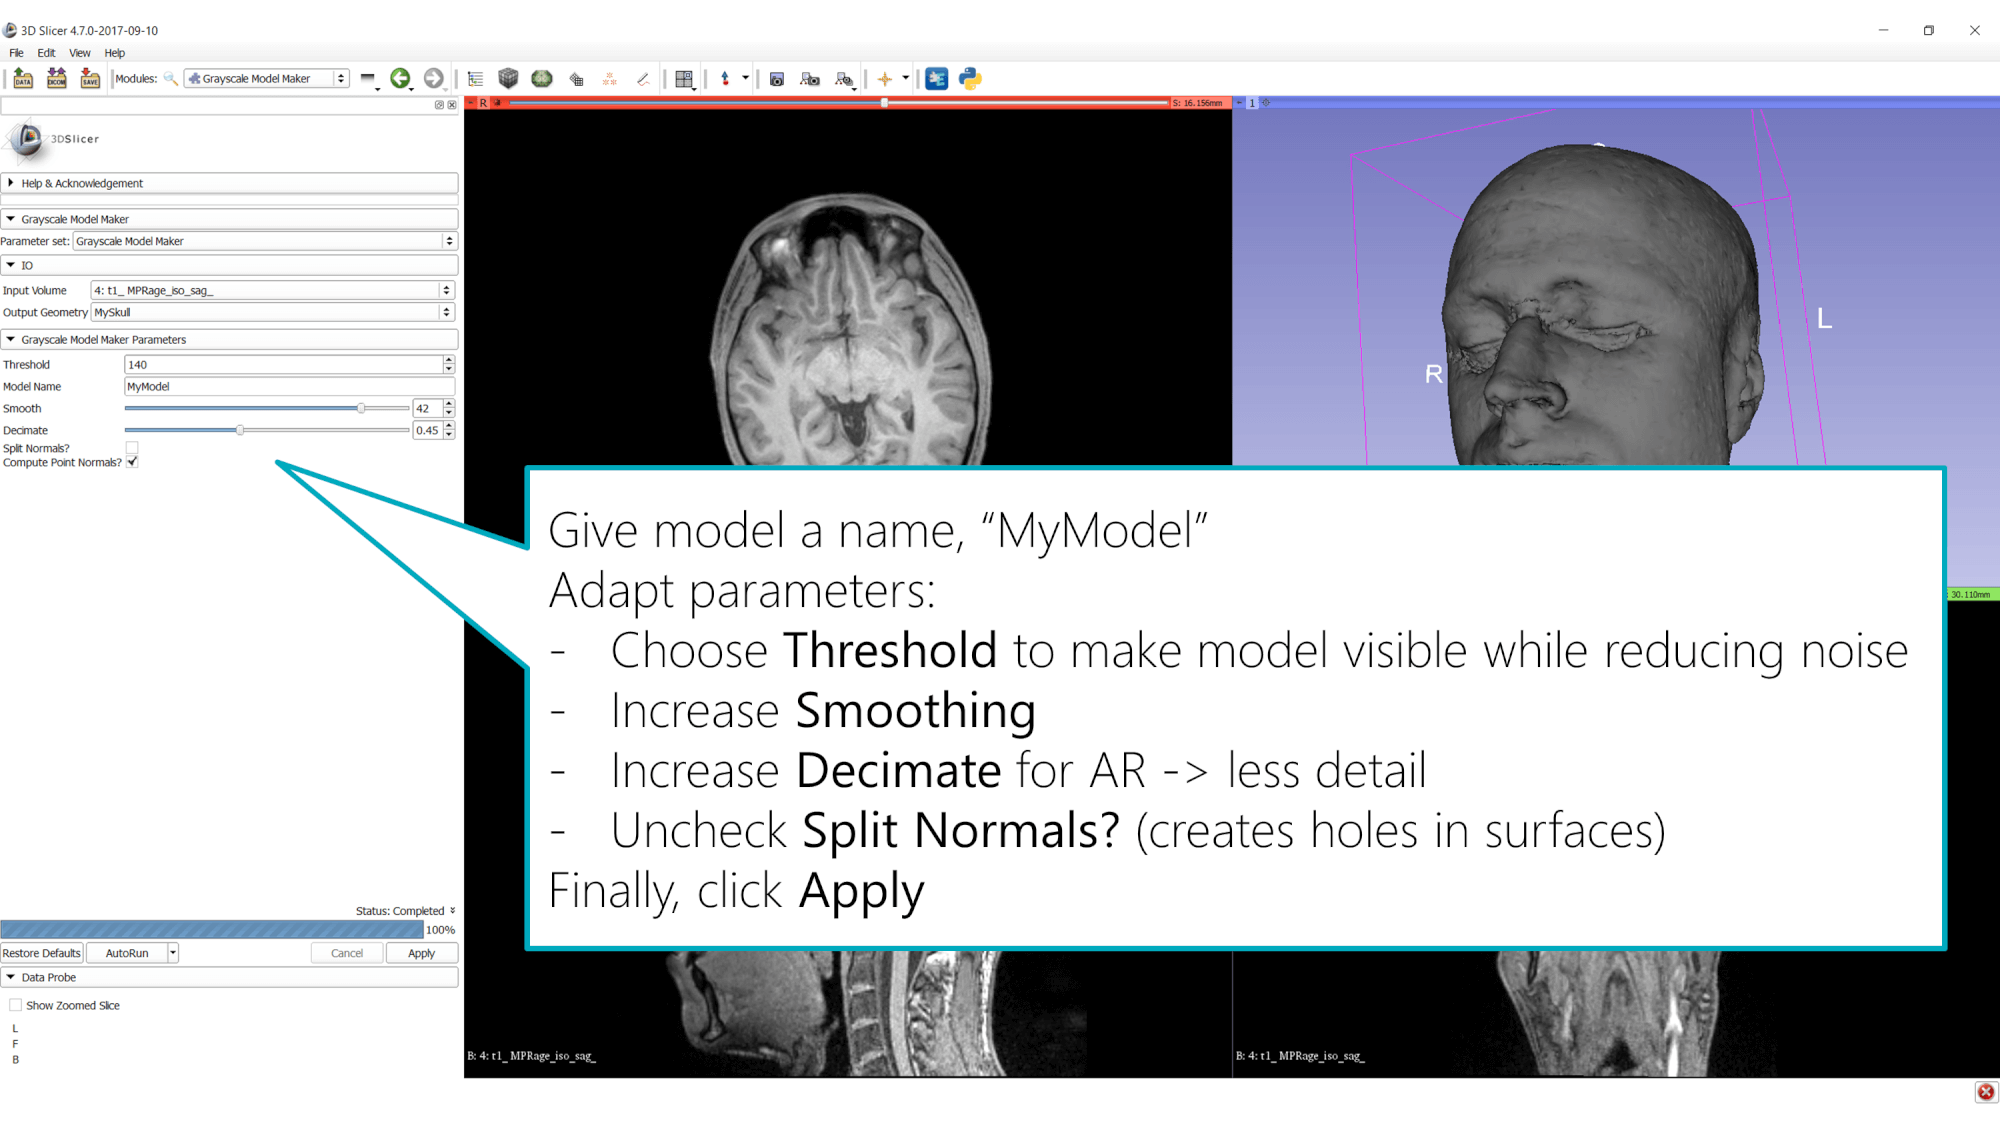
Finally, click apply and wait for your model to be created. Once the process is complete, you might not immediately see the results. 3D Slicer will now render both the generated 3D model as well as the volume rendering on top of each other. You should only keep one of these two 3D renderings active.
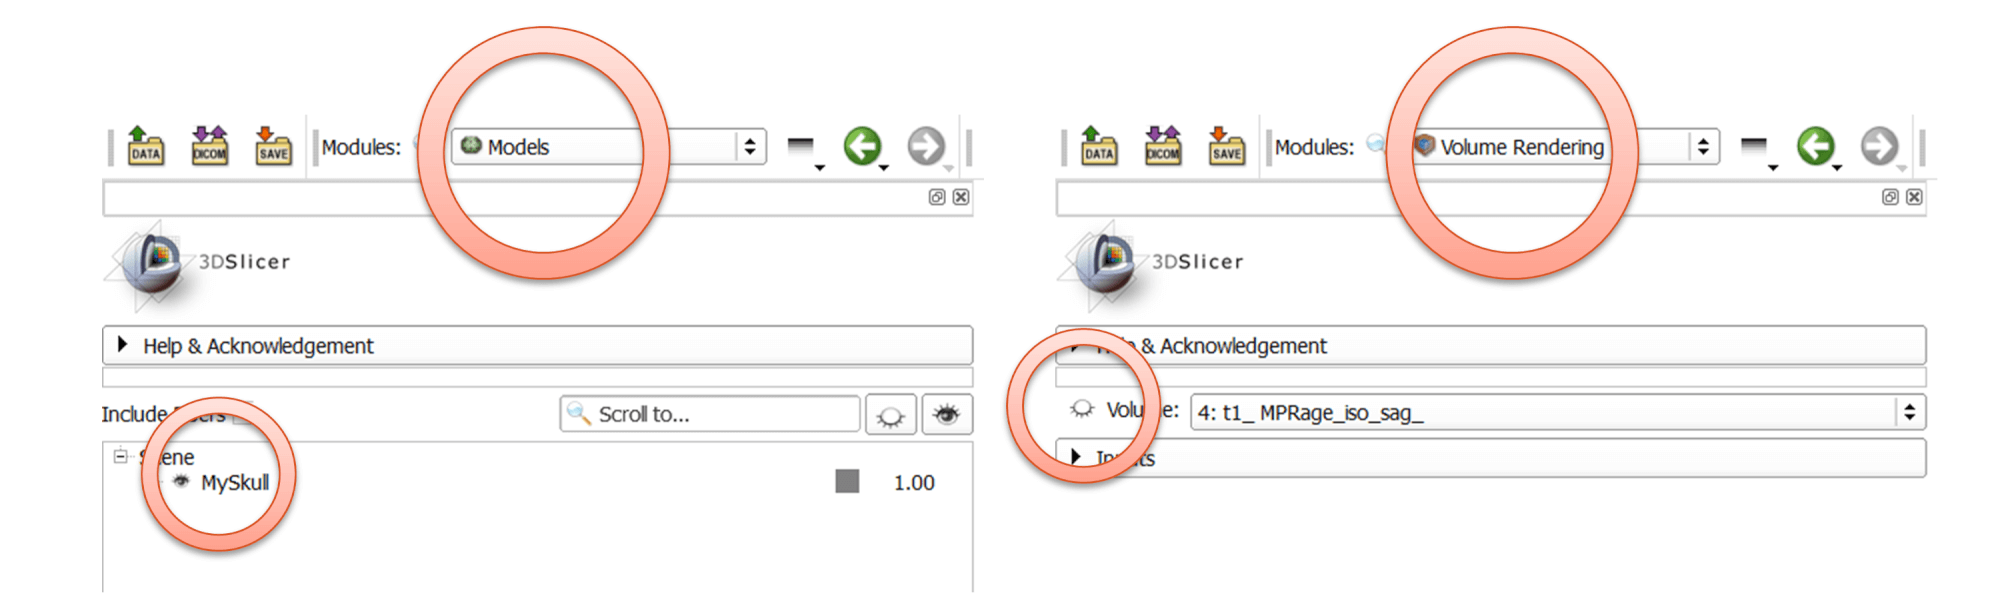
Therefore, go back to the Volume Rendering module and make the volume invisible using the eye icon. Make sure that in the Models module, the newly created “MyModel” is visible.
Exporting your 3D Model in .stl Format
Now that we have generated our first polygon-based 3D model in Slicer, it’s time to export it so that we can show it in Augmented & Virtual Reality or 3D print the model.
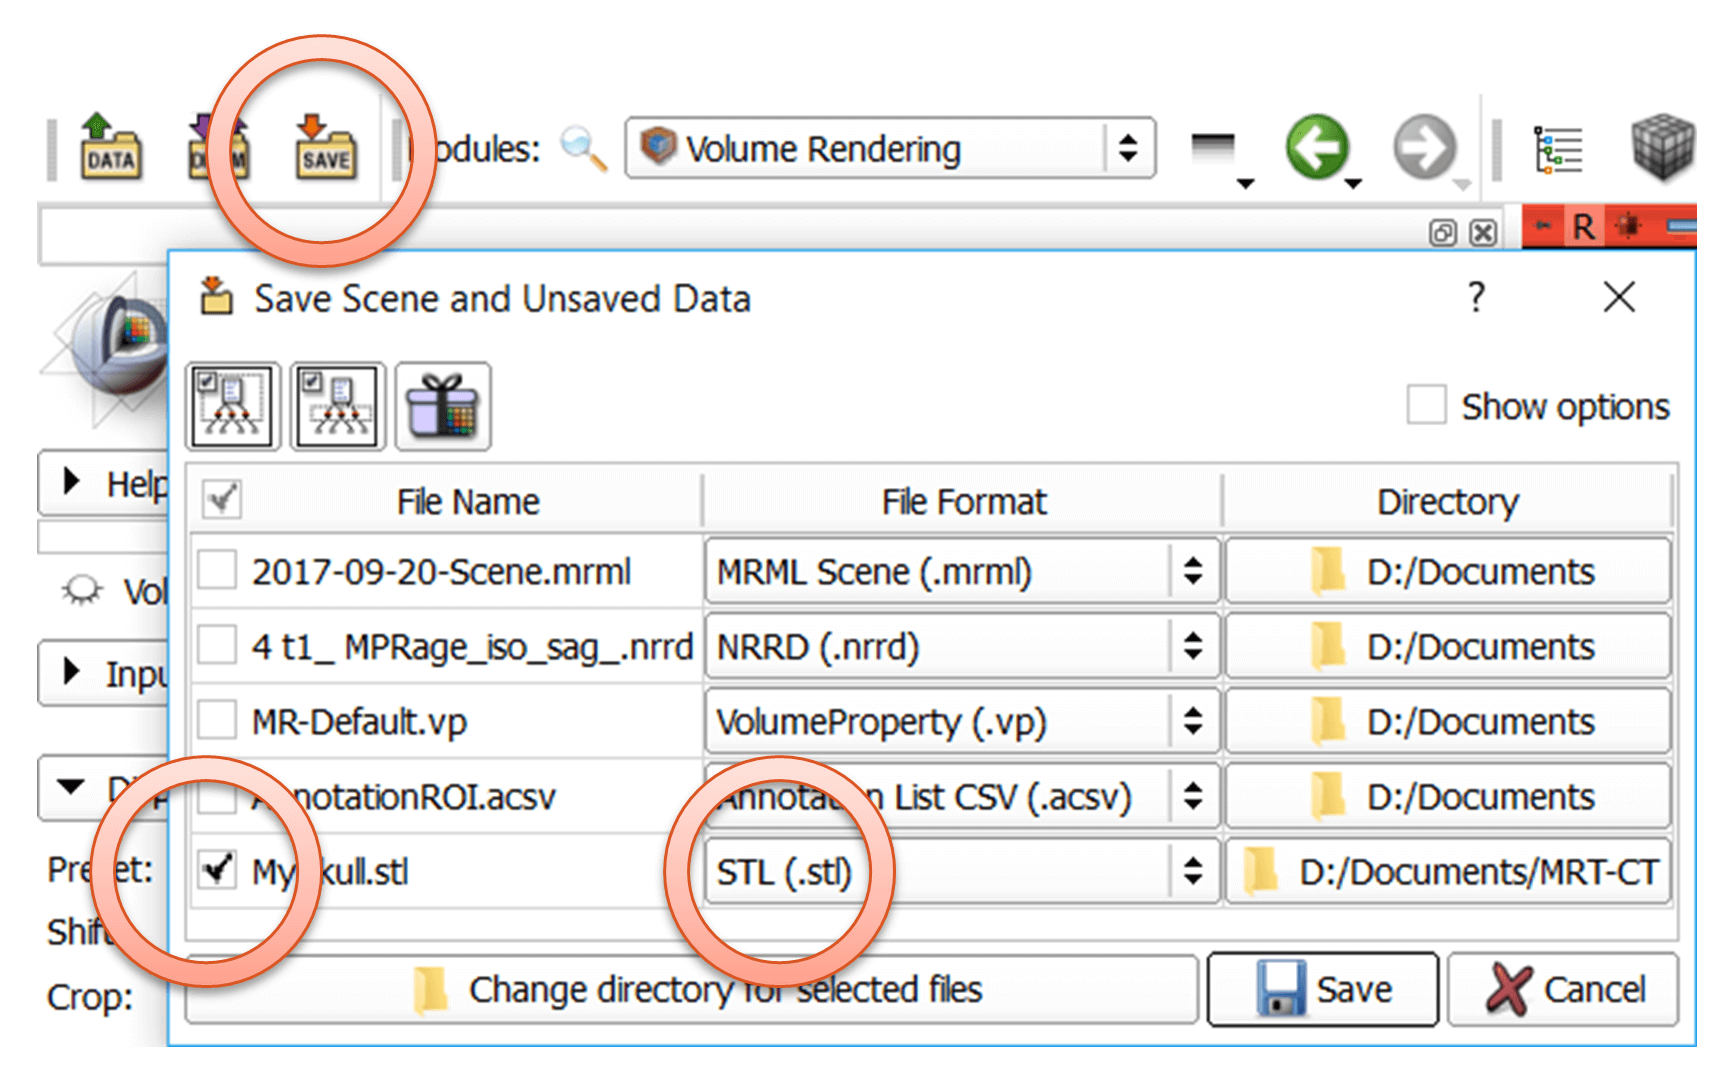
Click the Save button in the toolbar. You can save your whole workspace; in our case, we only need the 3D model that we’ve just created. Uncheck all the checkboxes and only leave your “MyModel” line active. In the “File Format” column, switch to “STL (.stl)”. Select the target directory and save the file.
STL is short for STereoLithography and widely used as 3D model data exchange format, especially for 3D printing software.
Visualizing the 3D Model
Great, we’ve just created our first 3D model of an MRI / CT / Ultrasound scan! It’s time to visualize and post-process the model.
If you’re using the latest version of Windows 10, it comes pre-installed with the “3D Builder” app. If you’re running Mac / Linux or an older version of Windows, get a freeware app to load and process .stl files (e.g., Blender or other tools specialized on 3D printing and handling .stl files).
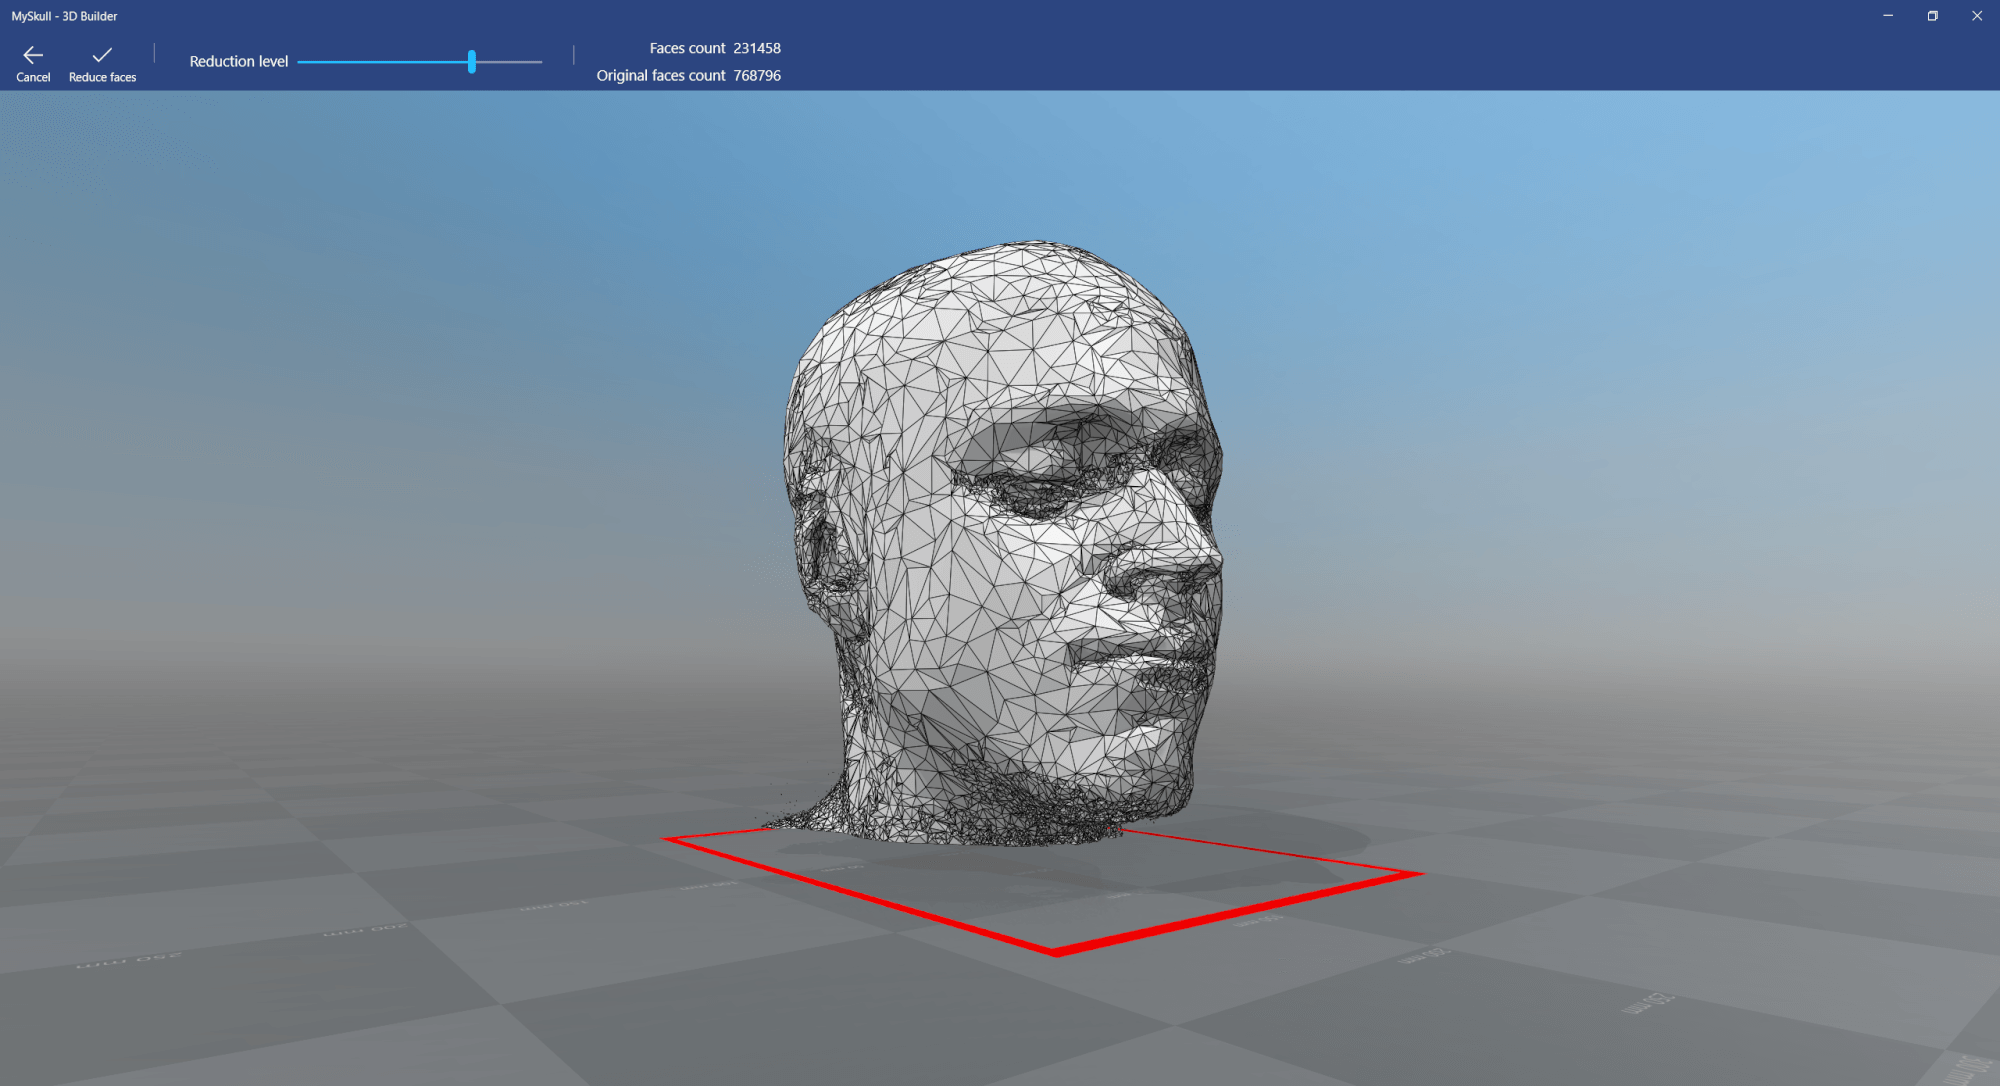
Upon importing, the Windows 10 3D Builder app asks about the file’s units – at least on my European system, millimeters (mm) are OK, and the head model corresponds to the actual size. You can check that using the faint numbers visible on the floor placed below the model.
Most likely, the exported .stl file is still large. Mine has around 50 MB – that’s tricky for visualization on a mobile device like the Microsoft HoloLens. Fortunately, 3D Builder has a reduction tool built-in that further simplifies the 3D model. Start it through Edit > Simplify. Pull the slider as far right as possible so that the details are reduced, while still retaining a good-looking model.
The 3D Builder might also inform you that “One or more objects are invalidly defined. Click here to repair”. Just click on the pop-up, and the app will ensure that all polygons are properly defined.
Finally, export the 3D model as .obj file, as Unity can’t directly import .stl files. Next, follow the guide to place the MRI scan 3D model in a HoloLens scene. In the next part of the blog series, we’ll look at more advanced operations: segmenting out the brain from the MRI scan and visualizing that instead of the whole head.