Update 20. December 2017: A new release of the Mixed Reality toolkit is now out as an official release. It’s recommended to use this, along with Unity 2017.2.1f1.
Update 13. November 2017: The latest source code of the Mixed Reality toolkit now combines both HoloLens and Mixed Reality headsets into a single toolkit that works with one Unity version: 2017.2.0p1 MRTP 4. It’s a special fork of Unity that is optimized for the “Mixed Reality Toolkit Preview”. A later version of Unity will hopefully combine all environments into a single release again. Read more about the environment setup at the GitHub pull request.
Update 19. October 2017: In the meantime, Unity 2017.2 final has been released, and the dev branch of the Mixed Reality toolkit has been merged back to the master. You should now be fine using the following versions for HoloLens development: Unity 2017.2.0f3+, Mixed Reality Toolkit (master branch), Visual Studio 2017.+4, Windows 10.0.15063.0 SDK.
Original Article: Lately, the tools required for HoloLens / Mixed Reality development have been undergoing profound changes. All three tools involved in building HoloLens apps are being restructured:
- Unity 2017 unifies Virtual / Augmented Reality APIs, making them flexible enough to target all platforms (e.g., phones with ARKit / ARCore, VR, AR). This also involves new and renamed APIs.
- HoloToolkit has been renamed to Mixed Reality Toolkit, as Microsoft expands the scope to include the new VR headsets with inside-out tracking going on sale this fall.
- Visual Studio 2017.3 also introduced some major changes under the hood. This is combined with the C# engine used in Unity slowly being migrated from the old Mono runtime to more recent versions of C#.
With the latest Unity 2017.2.0b11 release, everything should now be coming together. In this blog post, I’m describing how to use the latest versions of the tools for creating and deploying a HoloLens app.
Mixed Reality Toolkit
Even though the HoloToolkit GitHub repository has already been renamed to MixedRealityToolkit, the classes and namespaces are still called HoloToolkit. The current plan has the renaming of the namespace to MixedReality in November 2017, after the final Unity 2017.2.0 release. This modification will introduce some breaking changes.
![]()
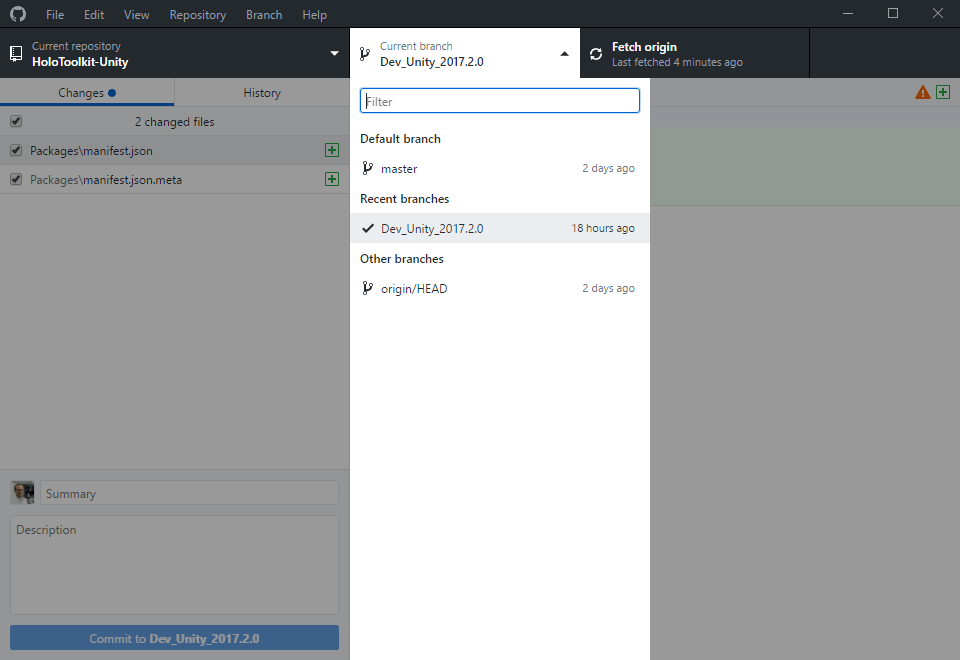
Additionally, the Mixed Reality Toolkit GitHub repository is now split up into two branches. The master branch releases are aligned with major Unity releases (every 3 months).
As we plan to use the latest Unity 2017.2 beta that includes all the new VR features, we need to switch to the dev branch of the MixedRealityToolkit-Unity. This screenshot shows how to switch in the GitHub Desktop app:
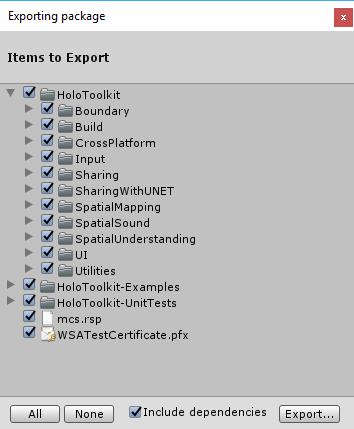
Obviously, the dev branch doesn’t contain any directly usable releases. Therefore, we need to export an own Unity package. As I’ve already described in a previous tutorial, open the checked out dev branch of the Mixed Reality Toolkit in Unity and export the whole “Assets” folder as a package.
Creating a new Unity Project for HoloLens
Now, create a new Unity project. Save the scene and call it “MainScene”. Right-click the Assets folder, choose “Import Package” > “Custom Package…” and select the package you’ve just created.
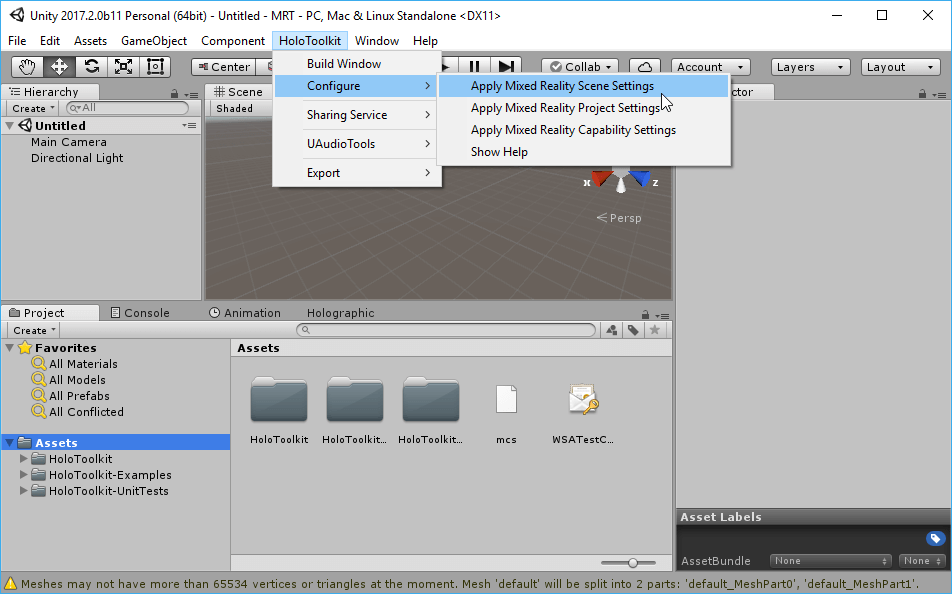
After the import process, your Unity will get the HoloToolkit menu, plus the 3 HoloToolkit subfolders in your Assets directory. Open to the new HoloToolkit menu and apply the three configurations:
- Mixed Reality Scene Settings
- Mixed Reality Project Settings
- Mixed Reality Capability Settings
Prepare the Scene with Mixed Reality Prefabs
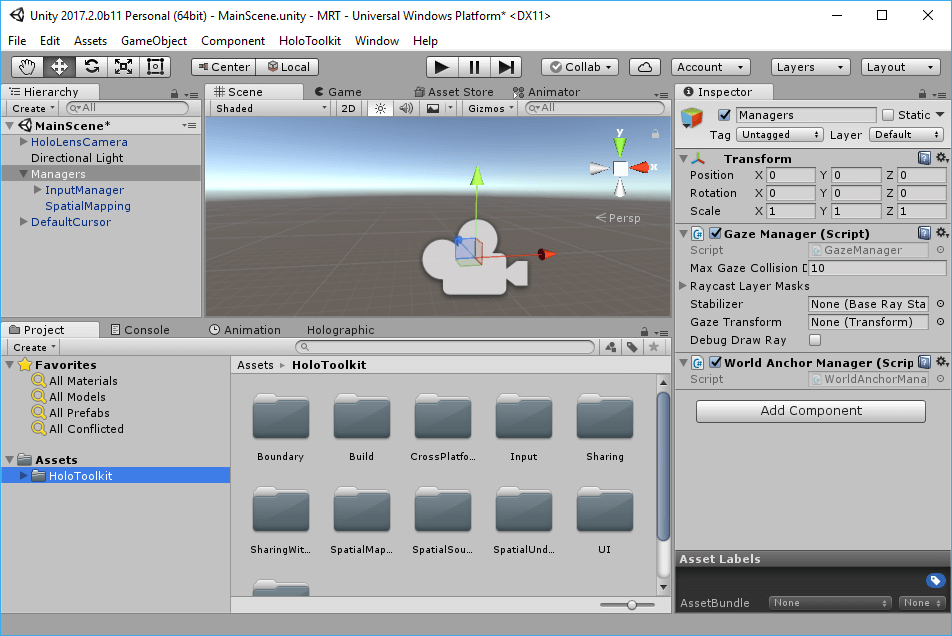
To get a more powerful camera experience that also works better when simulating in Unity, delete the default camera and drag the “HoloToolkit” > “Input” > “Prefabs” > “HoloLensCamera” into your scene instead. This gives you controls to move the camera and to simulate clicks even if you’re not deploying to the HoloLens.
Mixed Reality Managers
Next, add an empty game object (right-click “MainScene” and choose “GameObject” > “Create Empty”). Call it “Managers” and add the following three prefabs / scripts to the GameObject:
- Now, drag the “HoloToolkit” > “Input” > “Prefabs” > “InputManager” as a child to the empty Managers game object you just added.
- Additionally, add the “HoloToolkit” > “Input” > “Prefabs” > “SpatialMapping” prefab to the Managers. This script is needed to make HoloLens analyze and visualize the real world while placing the hologram.
- Finally, drag the “Utilities” > “Scripts” > “WorldAnchorManager.cs” to Managers. This script is required by the TapToPlace.cs script which we will add later. It ensures that the hologram can be anchored to a position in the real world.
To also get the cursor, drag the “HoloToolkit” > “Input” > “Prefabs” > “DefaultCursor” to the MainScene.
Now your scene should look like this:
Creating a Placable Hologram
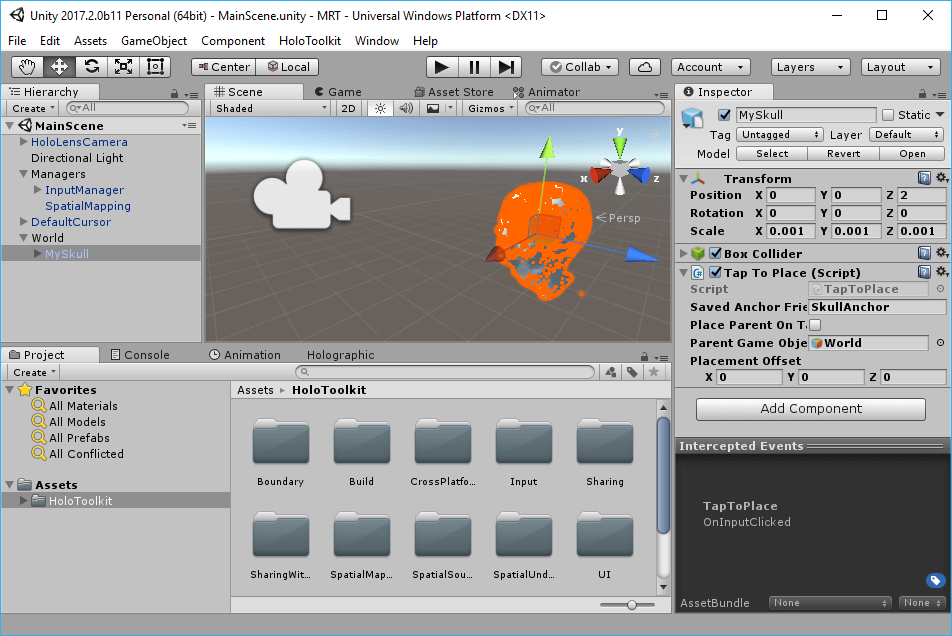
To test on the HoloLens, we import a 3D object and use the scripts from the Mixed Reality Toolkit to make it possible to place the hologram. Simply drag & drop the 3D object file from Explorer into the Assets folder in Unity.
Create new empty game object beneath your MainScene and call it World. Drag the 3D object into World and position it at 0/0/2 – this places the object two meters in front of the user, which is at position 0/0/0 when starting your app. Adapt the scale and rotation so that it makes sense in relation to the camera position. Check the camera preview window by clicking the camera to see if the object is indeed in front of your camera and visible.
To make it possible to place the hologram, we need to add a collider. With the 3D object selected, click “Add Component” and select “Box Collider”. Also adapt the size and position of the collider (shown in green) so that it is a little bigger than the 3D object.
Now, we just need to make the 3D object placeable as a hologram in the real world. Drag the “HoloToolkit” > “SpatialMapping” > “Scripts” > “TapToPlace.cs” script onto the 3D object. Give the “Saved Anchor Friendly Name” a useful name – that gets more important when you have multiple holograms to place.
Fixing the Build
Unfortunately, just building from the HoloToolkit-Menu didn’t work for me with the current versions initially – some settings need to be modified first.
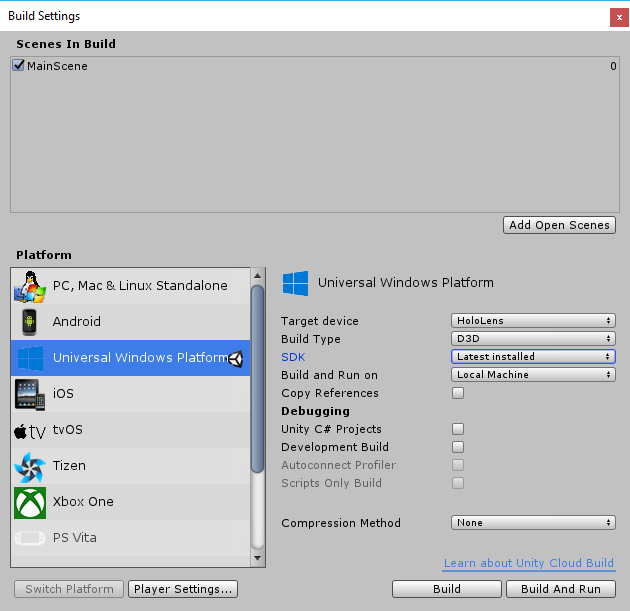
To compile for HoloLens, go to “Build Settings”. There, make sure your scene is included in the build, otherwise click on the “Add Open Scenes” button. For target device, you can choose “HoloLens”; the build type stays at “D3D”.
For the SDK, “Latest installed” is what you need; make sure you have the Fall Creators Update SDK installed (the latest version on my machine is 10.0.16299). If you use an older SDK (note that the HoloLens is actually still on 10.0.14393), you will get the following error, as the old SDK is missing some extensions required for the new Mixed Reality headsets:
Assets\HoloToolkit\Utilities\Scripts\Extensions\HapticsExtensions.cs(9,23): error CS0234: The type or namespace name 'Haptics' does not exist in the namespace 'Windows.Devices'
Assets\HoloToolkit\Input\Scripts\ControllerVisualizer.cs(123,49): error CS0246: The type or namespace name 'SpatialInteractionController' could not be found
If you later take a look at the properties of the generated app in Visual Studio, you will see that the minimum Windows 10 version is still set to 10.0.10240, while the target version is the Windows 10 Fall Creators Update (10.0.16299). As we don’t use the new features of the Fall Creators Update, we’re fine to run the app on the HoloLens, even if its OS version is older.
Update 13. November 2017: for the latest Mixed Reality Toolkit, you must use the 10.0.16299 SDK. More information at GitHub.
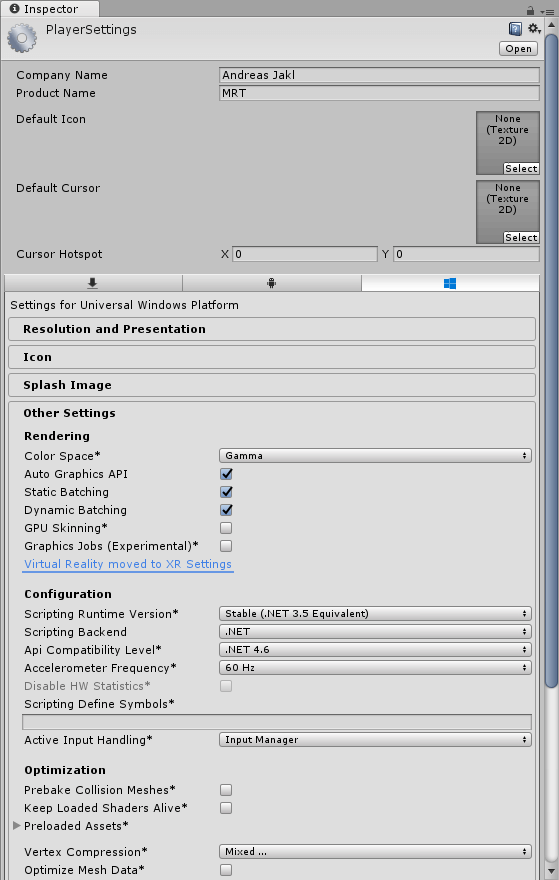
Next, go to the “Player Settings…”, and scroll down to “Other Settings”. Switch the “Scripting backend” from “IL2CPP” to “.NET”. For HoloLens, IL2CPP doesn’t seem to produce executable results at the moment.
Run the app on HoloLens
If you build now and then open the solution with Visual Studio 2017, it should work to compile for “Release / x86 / Device” to test the app on your HoloLens. Air-tap on the 3D object to anchor the hologram in the real world.
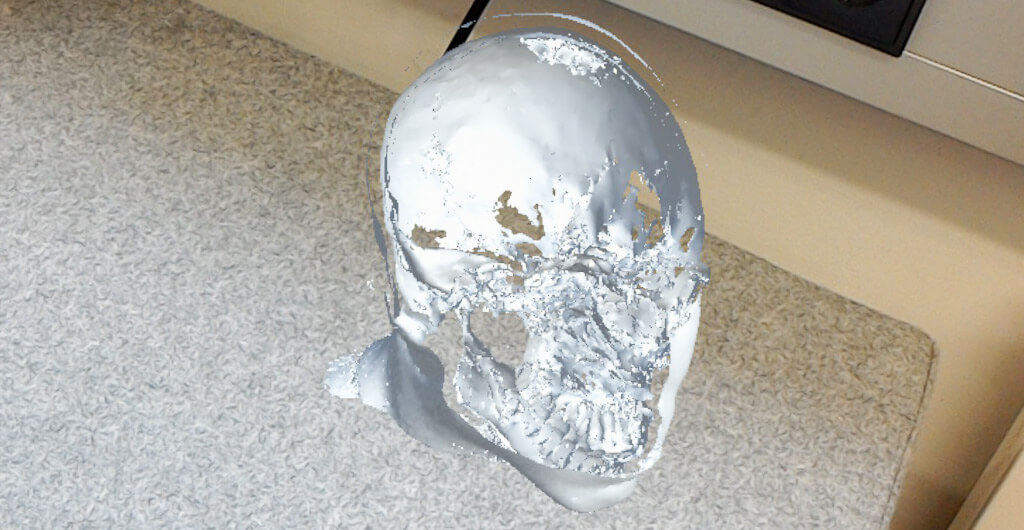
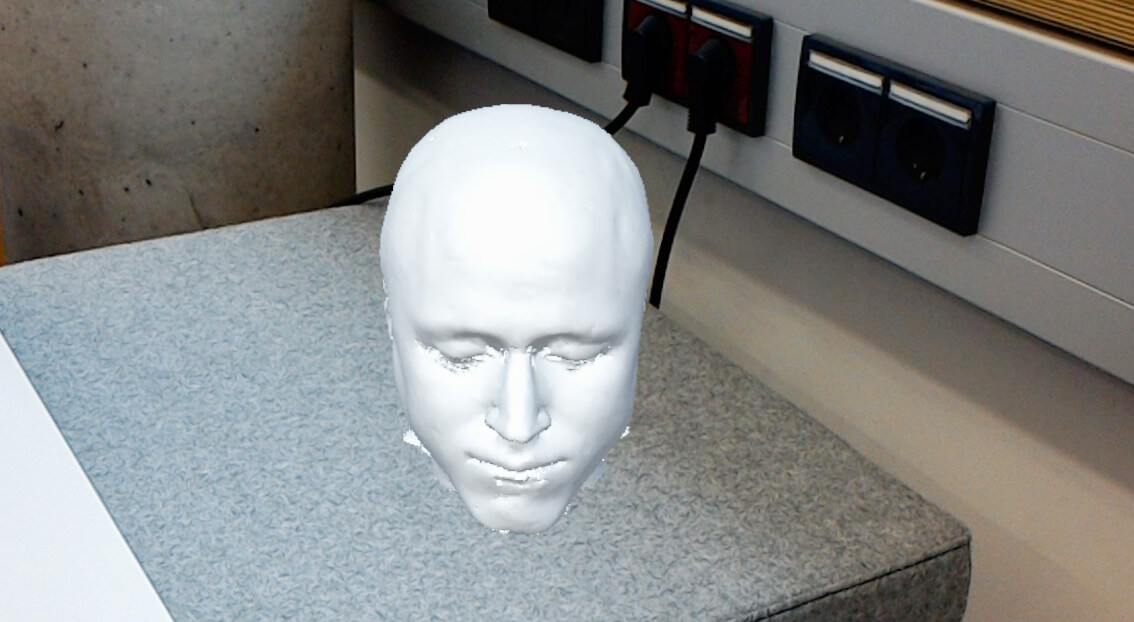
Here, you can see the results of an MRI head scan placed in my office:
Especially cool in this scenario is that with the default near clipping plane for the HoloLens camera set to 0.85 meters, it’s easy to get closer to the skull and look inside it, slicing it to explore the inner structure: