Categories
AR / VR HoloLens Image Processing

Capturing a 3D Point Cloud with Intel RealSense and Converting to a Mesh with MeshLab

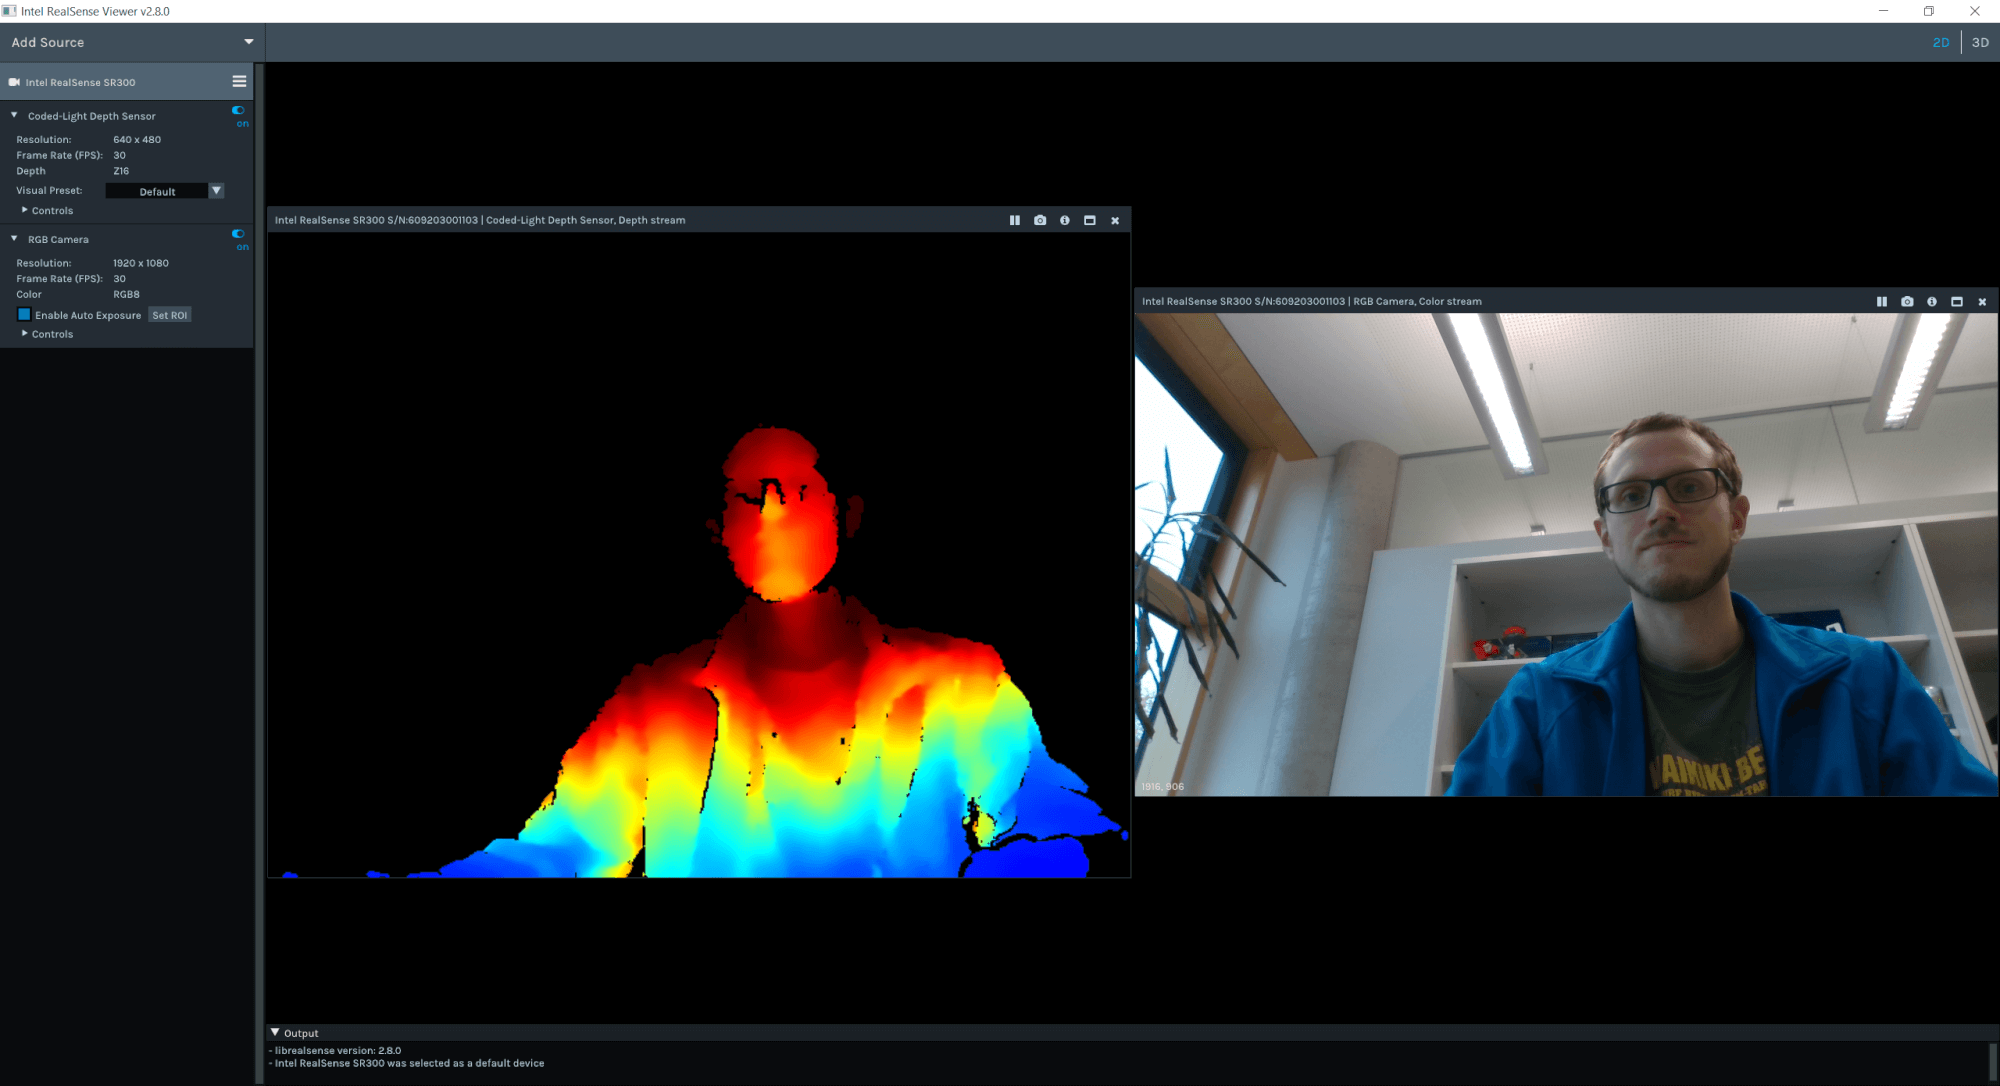
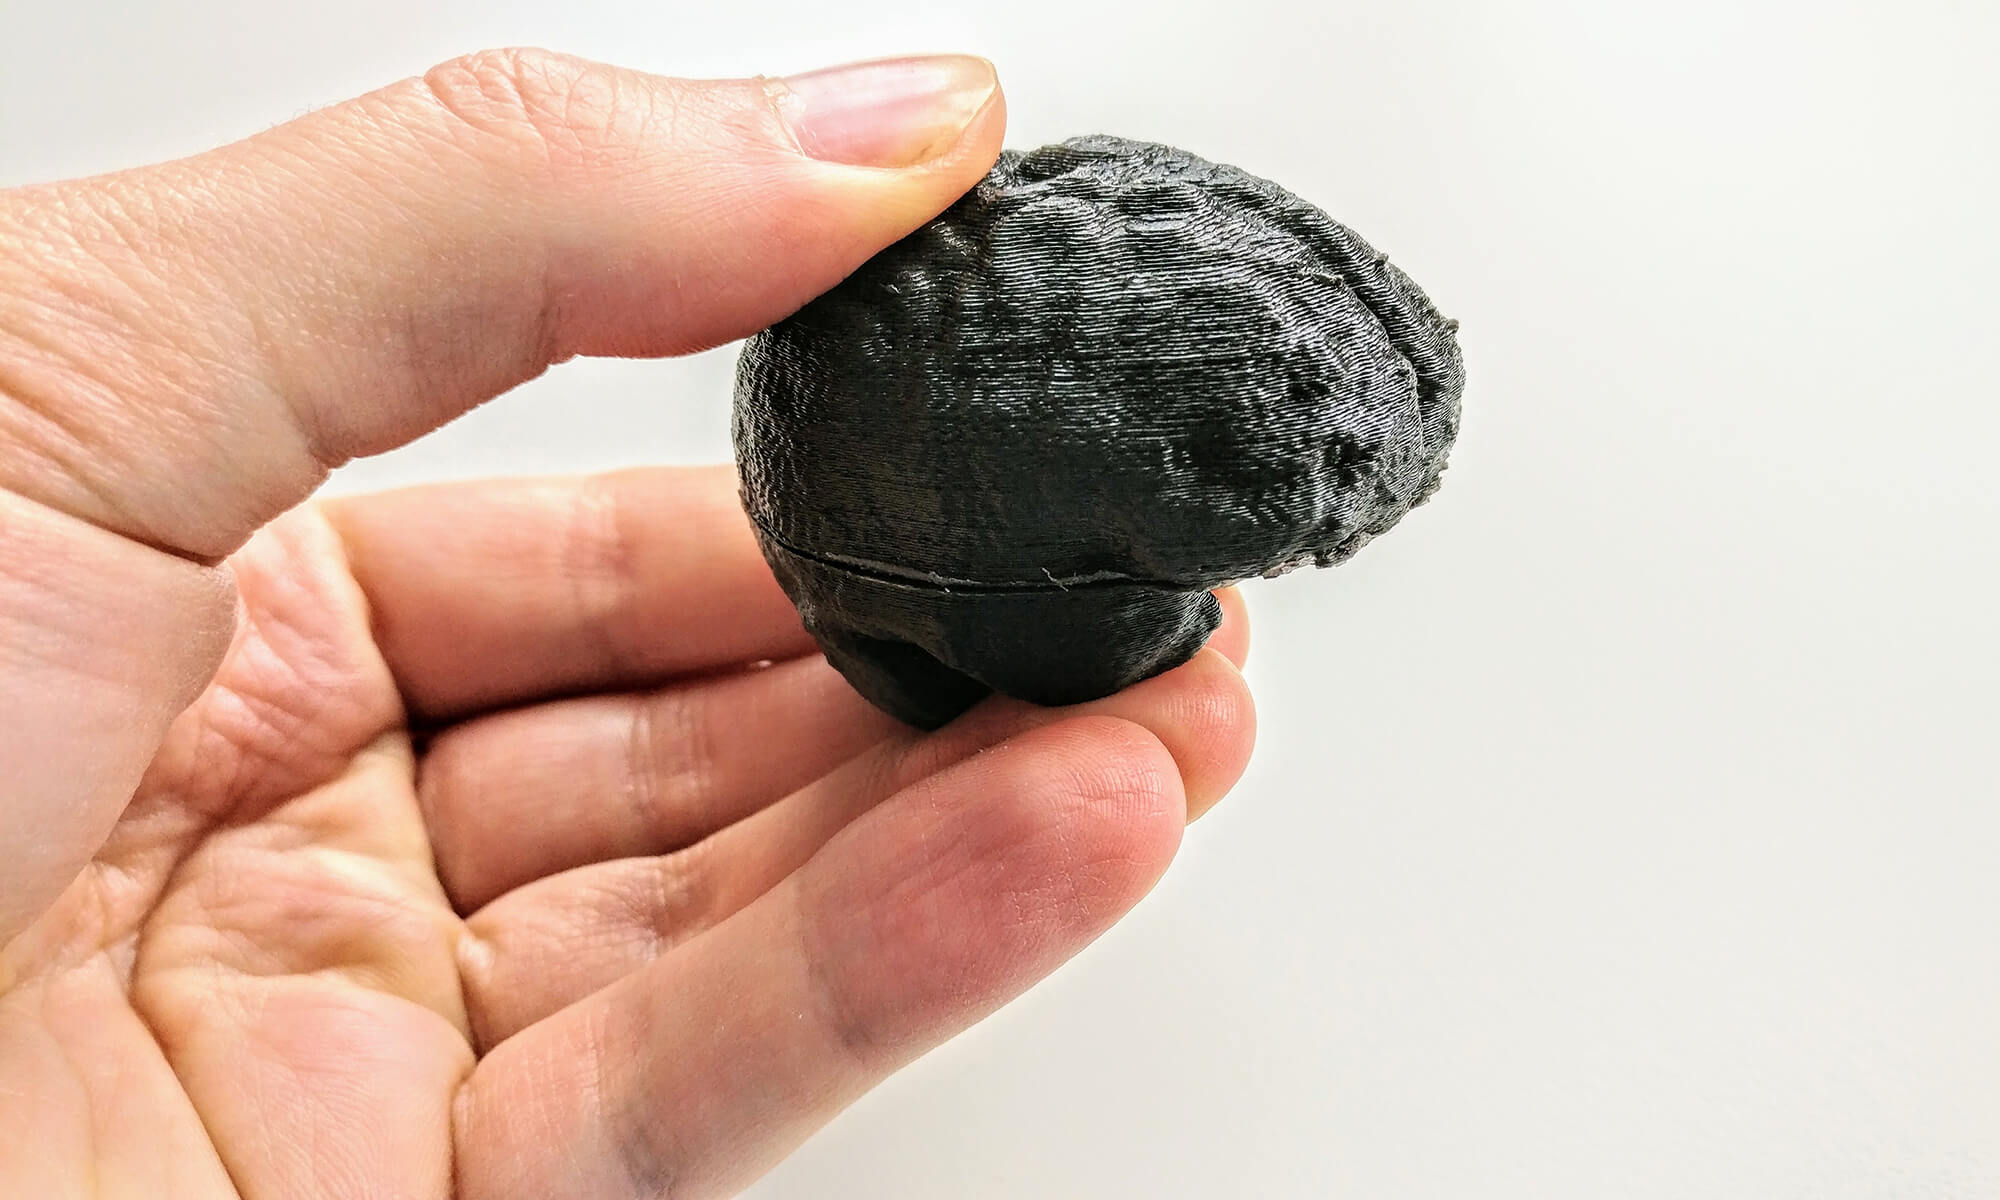
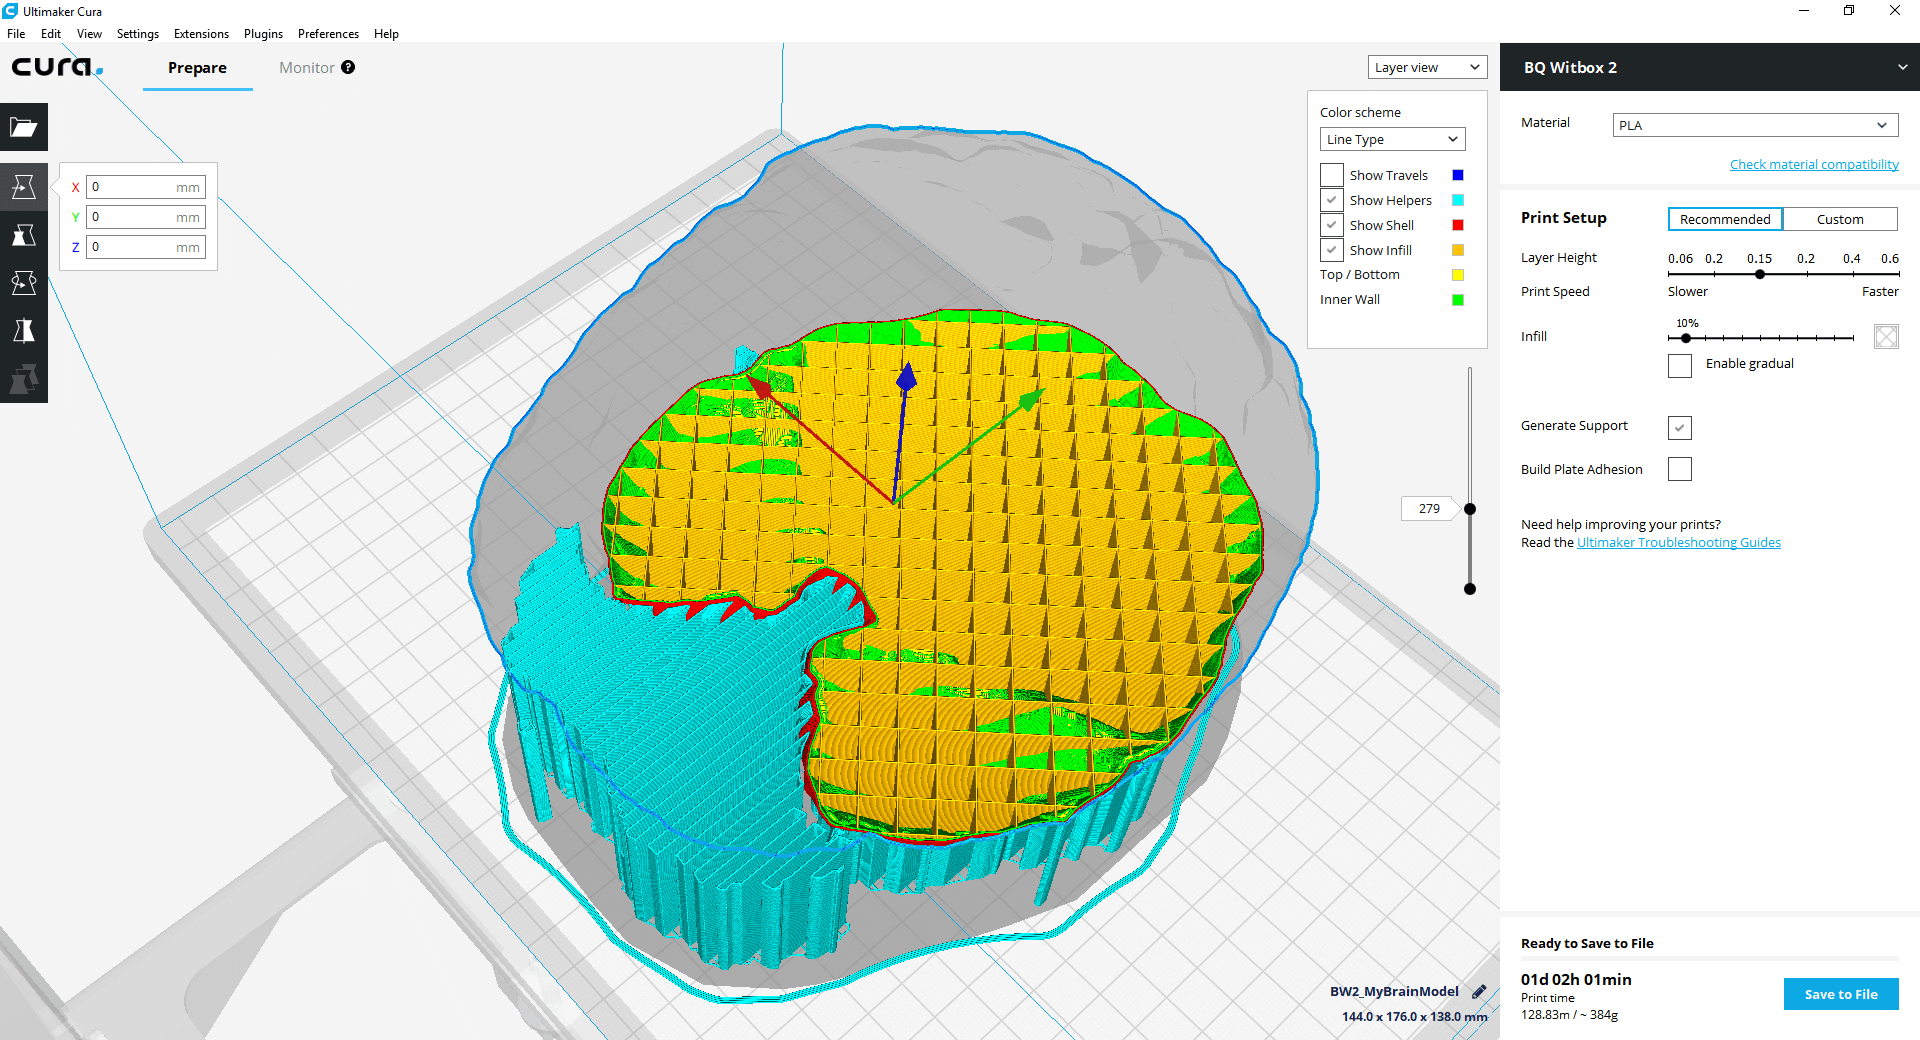
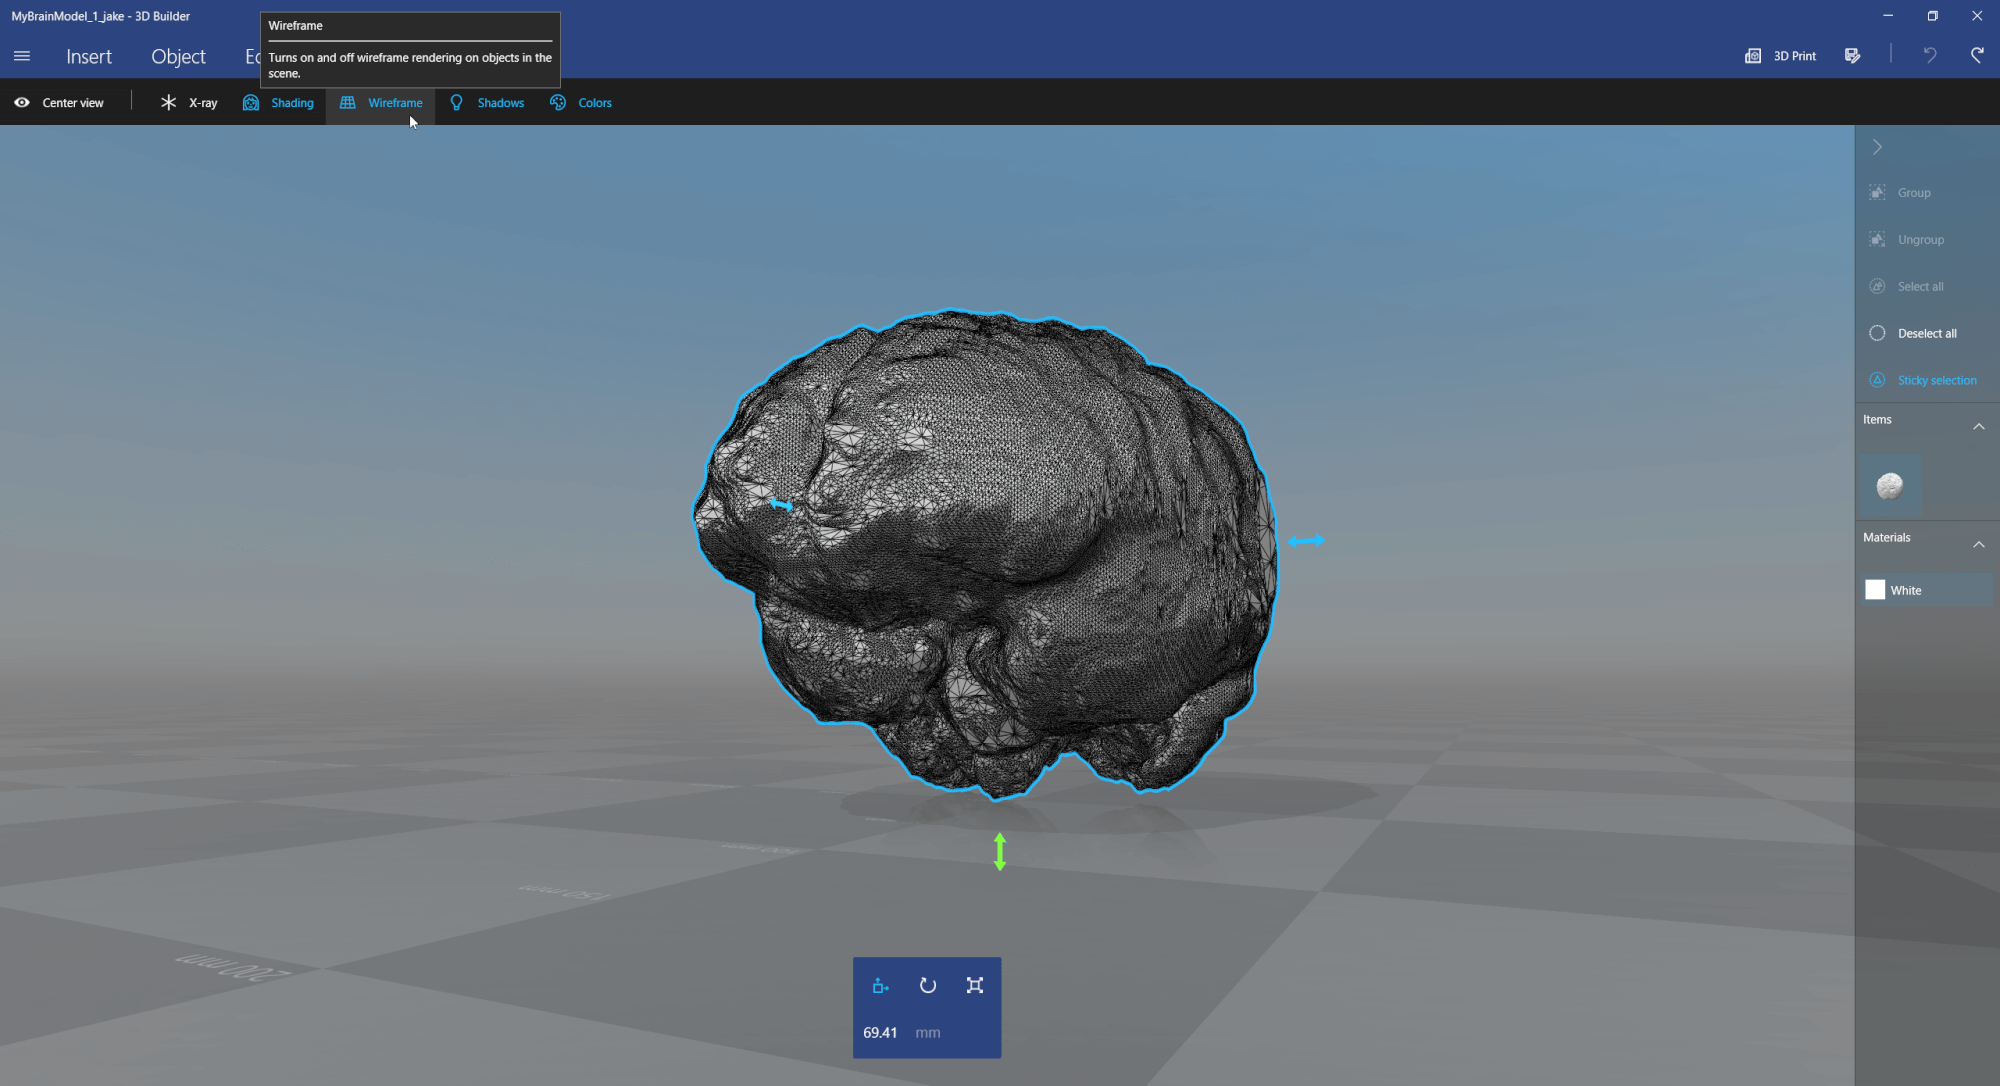
When dealing with Augmented and Virtual Reality, one of the most important tasks is capturing real objects and creating 3D models out of these. In this guide, I will demonstrate a quick method using the Intel RealSense camera to capture a point cloud. Next, I’ll convert the point cloud to a mesh using MeshLab. This mesh can then be exported to an STL file for 3D printing. Another option is visualization in 3D for AR / VR, where I’ll also cover how to preserve the vertex coloring from transferring the original point cloud to Unity.

Categories
3D Printing AR / VR Digital Healthcare

3D Printing MRI / CT / Ultrasound Data, Part 2: Splitting the Brain

Are there any other ways to 3D print segmented medical data coming from MRI / CT / Ultrasound by splitting it in two halves?

In the first part of this article, the result was that the support structures required by a standard 3D printer significantly reduce the details present on the surface of the printed body part.

Christoph Braun had the idea for another method to reduce the support structures to a minimum: by splitting the object in two halves, each has a flat surface area that can be used as the base for the 3D print.

Importing and Scaling the STL Model

For processing the 3D object, we’ll use OpenSCAD – The Programmers Solid 3D CAD Modeler. It’s a free open source tool, aimed more at developers, with the advantage that the processes can easily be automated.

Categories
3D Printing AR / VR Digital Healthcare

3D Printing MRI / CT / Ultrasound Data, Part 1: Support Material

Based on the 4-part tutorial where we segmented the brain from an MRI image, one of the most interesting application areas is printing such 3D models. In that sense, it makes no difference if the data is coming from an MRI (e.g., a brain or tumor), CT (e.g., the skull) or ultrasound. In this article, we’ll look at how to prepare the 3D model for 3D printing.

In the preparation phase, we segmented the model from the original DICOM medical data using 3D Slicer. Afterwards, we reduced the level of detail using the built-in tools in Windows 10.

In this part, we print the MRI brain model using the Witbox 2 3D printer with plastic and deal with support structures. The aim is to make this process accessible for everyone – so you don’t need specialized and expensive software & hardware; we’ll instead use open source and free tools as much as possible.

Special thanks to Christoph Braun from the FH St. Pölten, who is the resident 3D printing expert and prepared the steps to produce the amazing results!

Categories
3D Printing AR / VR Digital Healthcare HoloLens Image Processing Windows

Visualizing MRI & CT Scans in Mixed Reality / VR / AR, Part 4: Segmenting the Brain

In the previous blog posts, we’ve used a simple grayscale threshold to define the model surface for visualizing an MRI / CT / Ultrasound in 3D. In many cases, you need to have more control over the 3D model generation, e.g., to only visualize the brain, a tumor, or a specific part of the scan.

In this blog post, I’ll demonstrate how to segment the brain of an MRT image; but the same method can be used for any segmentation. For example, you can also build a model of the skull based on a CT by following the steps below.

Categories
3D Printing AR / VR Digital Healthcare HoloLens Image Processing Windows

Visualizing MRI & CT Scans in Mixed Reality / VR / AR, Part 3: 3D Model Maker

So far, we’ve created a volume rendering of an MRI / CT / Ultrasound scan. This is based on Voxels. For 3D printing and highly performant visualization in AR / VR scenarios, we need to create and export a polygon-based model. For the first step, we will use the Grayscale Model Maker and export the 3D Model as .stl to further prepare the model.

To create a 3D model, we have two main options in 3D Slicer:

  • Grayscale Model Maker: directly uses grayscale values from the image data. A threshold defines the surfaces. The model maker also takes care of smoothing the surfaces and reducing the polygon count.
  • Model Maker: this requires labels or discrete data to build a 3D model, meaning you have to segment the image data.

As a first step, we will use the Grayscale Model Maker, and later explore the more advanced options offered by segmentation and the Model Maker.

Categories
3D Printing AR / VR Digital Healthcare HoloLens Image Processing Windows

Visualizing MRI & CT Scans in Mixed Reality / VR / AR, Part 2: 3D Volume Rendering

After importing the MRI / CT / Ultrasound data into 3D Slicer in part 1, we’re ready for the first 3D visualization inside the medical software through 3D Volume Rendering. This is a major step to export the 3D model to Unity for visualization through Google ARCore or Microsoft HoloLens, or for 3D printing.

Slices in 3D View

After optimizing brightness and contrast of the image data, the easiest way of showing the data in 3D is to visualize the three visible slices (planes: axial / top / red; sagittal / side / yellow; coronal / frontal / green view) in the 3D view. This gives a good overview of the position and the relation of the slices to each other.

Categories
3D Printing AR / VR Digital Healthcare HoloLens Image Processing Windows

Visualizing MRI & CT Scans in Mixed Reality / VR / AR, Part 1: Importing Data

Some of the best showcases of Mixed Reality / VR / AR include 3D visualizations of MRI (magnetic resonance imaging), CT (computer tomography) or ultrasound scans. 3D brings tremendous advantages for analyzing the scanned images compared to only viewing 2D slices. Additionally, a good visualization brings value to patients who can gain a better understanding if they can easily explore their own body.

As part of the 3D information visualization lecture at the FH St. Pölten, I’m giving an overview of the process of converting an MRI / CT / ultrasound scan into a hologram that you can view on the Microsoft HoloLens or with Google ARCore. This blog post series explains the hands-on parts, so that you can easily re-create the same results using freely available tools.