Based on the 4-part tutorial where we segmented the brain from an MRI image, one of the most interesting application areas is printing such 3D models. In that sense, it makes no difference if the data is coming from an MRI (e.g., a brain or tumor), CT (e.g., the skull) or ultrasound. In this article, we’ll look at how to prepare the 3D model for 3D printing.
In the preparation phase, we segmented the model from the original DICOM medical data using 3D Slicer. Afterwards, we reduced the level of detail using the built-in tools in Windows 10.
In this part, we print the MRI brain model using the Witbox 2 3D printer with plastic and deal with support structures. The aim is to make this process accessible for everyone – so you don’t need specialized and expensive software & hardware; we’ll instead use open source and free tools as much as possible.
Special thanks to Christoph Braun from the FH St. Pölten, who is the resident 3D printing expert and prepared the steps to produce the amazing results!
Directly printing the STL File
Traditional plastic-based 3D printers can’t easily print overhang – they need to place support structures or use support material. However, typical structures segmented from MRT, CT or ultrasound images don’t have flat surfaces – as such, you can’t directly send the files to a printer like you could with a box, without considering the contents first.
Therefore, the 3D printing software adds supporting structures to ensure the overhang has a base to stand on. After printing, this needs to be cut away and the surface sanded. If the object has fine details, these of course get lost during the manual and mechanic removal of support material.
At the University of Applied Sciences in St. Pölten, we tested the 3D printing using the Witbox 2 from BQ. As recommended by BQ, we used Cura for slicing.
Update: You can download my 3D model as .obj file of the final segmented brain from Poly by Google, as well as from Remix3D by Microsoft.
Overhang and Support Structures
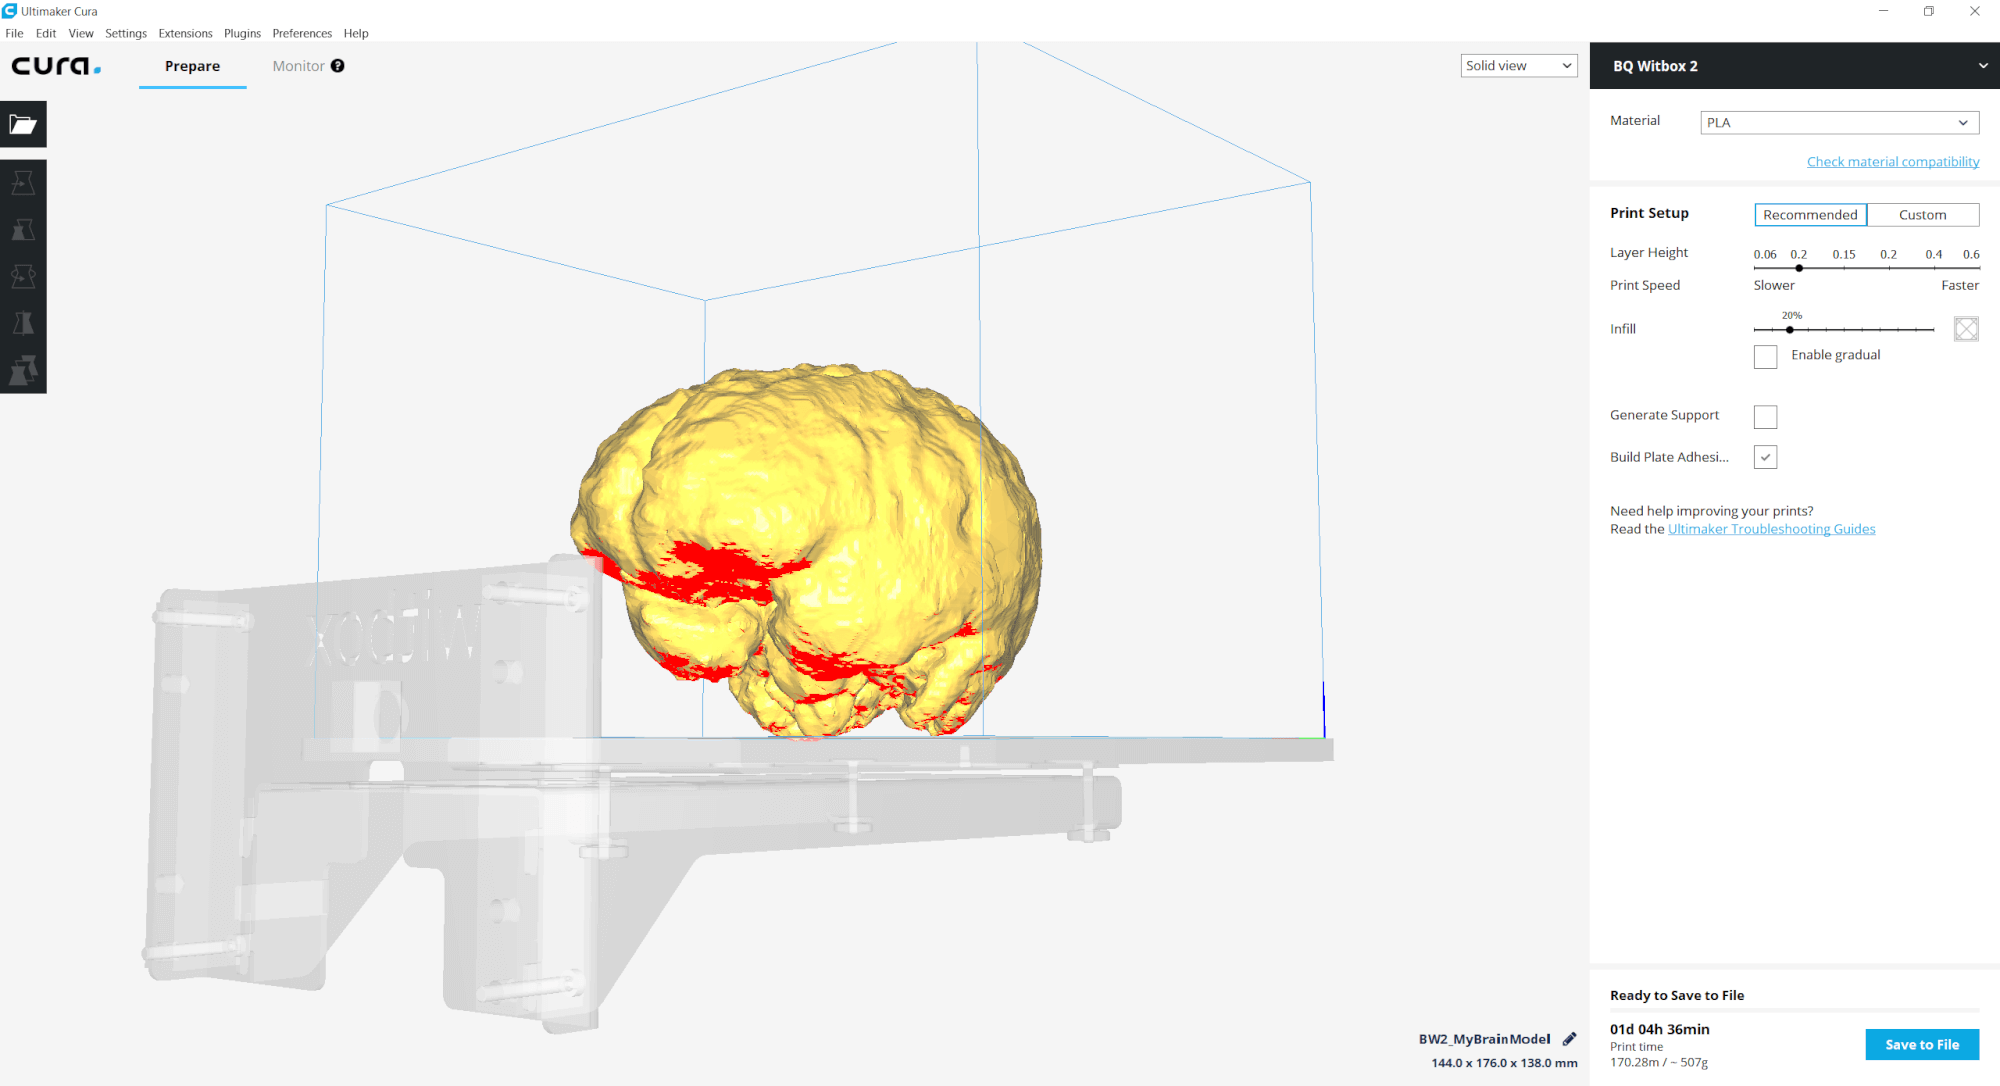
By default, Cura shows the overhang in red (in solid view):
Activate the “Generate Support” checkbox in the panel on the right, and switch to layer view in the top right corner of the 3D view. Using the vertical slider on the right side of the 3D view, you can then visualize up to a certain layer to get a better impression of how the object looks in the inside:
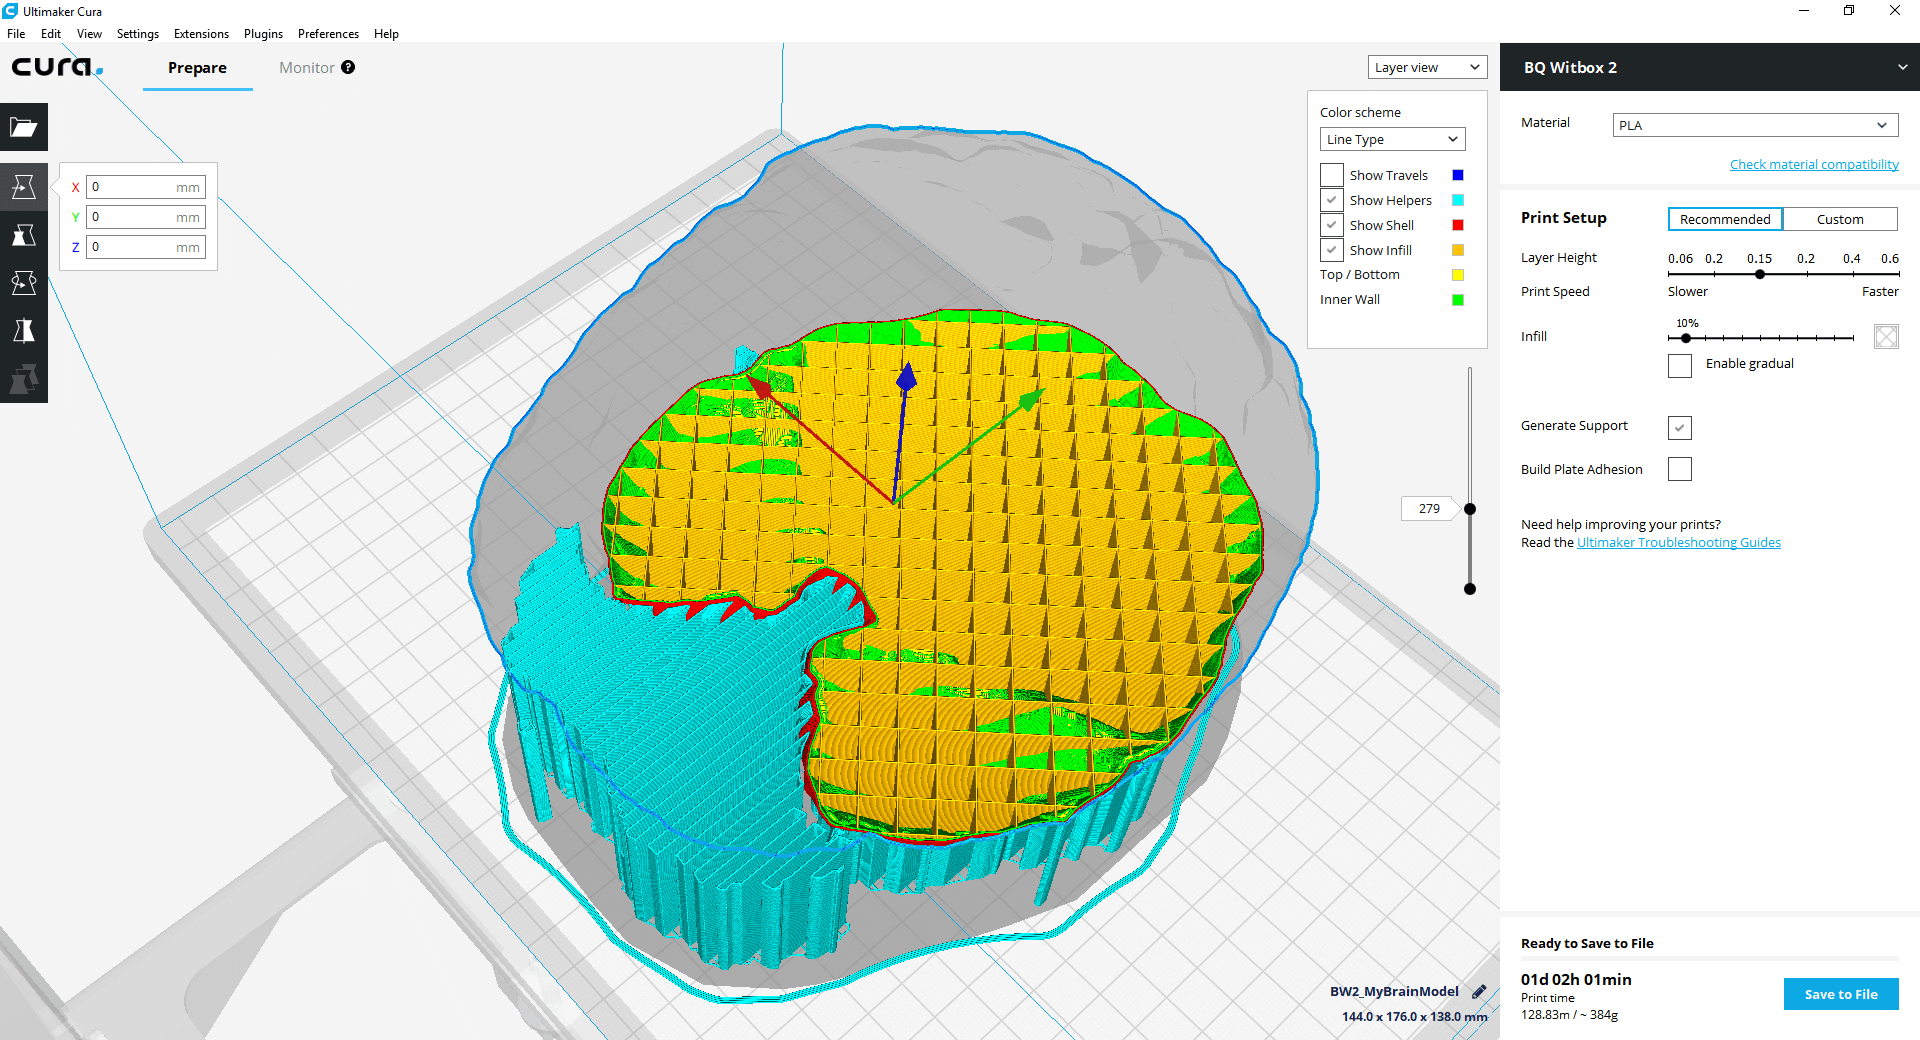
The support / helper material is shown in turquoise, the checkered infill in orange.
3D Printing the MRI Model
Printing the brain like this (in reduced size with PLA material) yields the following result:
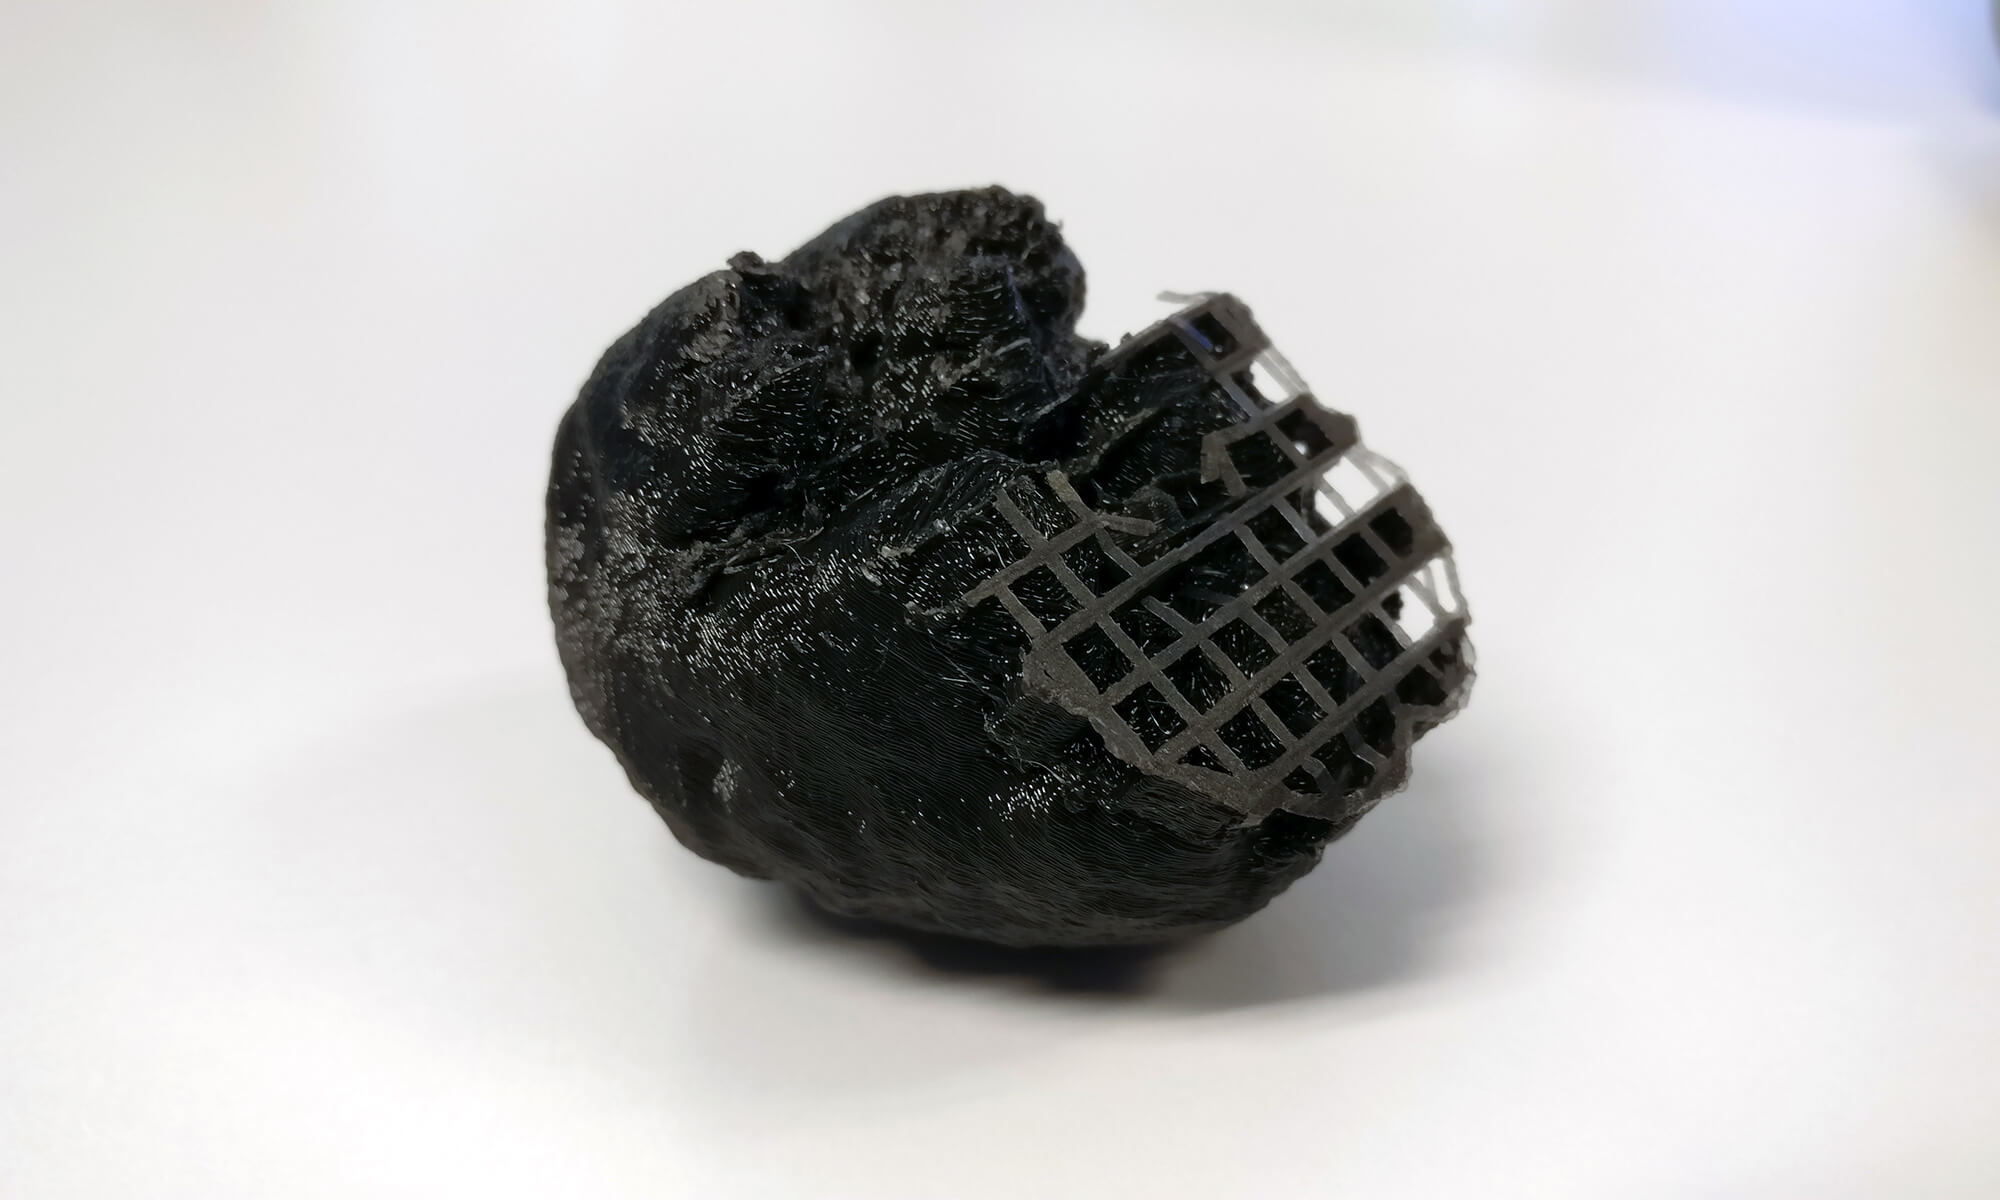
On the upper half seen in the photo, the support structures have been removed. However, with the delicate details from an MRT scan, you’d also need to apply sanding to get a cleaner surface; and this would remove a lot of the details.
As such, the traditional support structures are problematic when printing medical data. Of course, more advanced printers offer other ways to remove the support material – e.g., when the supporting structures are based on a gel, or a different material that can be dissolved in water or chemicals, or a different process called sintering that “hardens” the usable material out of powder. Michael Armbruster has written a good overview.
Unfortunately, these technologies make the printer more expensive, and they also add to the cost of the 3D printed object. Therefore, we’ll look at other ways to reduce the need for support materials to a minimum in the next part.