A video is a great way to showcase your Unity app. To capture the full visual fidelity of your app, you need to record at the highest possible quality with a smooth frame rate.
Several screen recording apps are available in the Google Play Store. However, there’s an easy and completely free way that provides the highest possible quality.
This short guide demonstrates how to record the screen with an APK file generated by Unity. Of course, it works for both AR and Non-AR Apps.
Create the APK in Unity
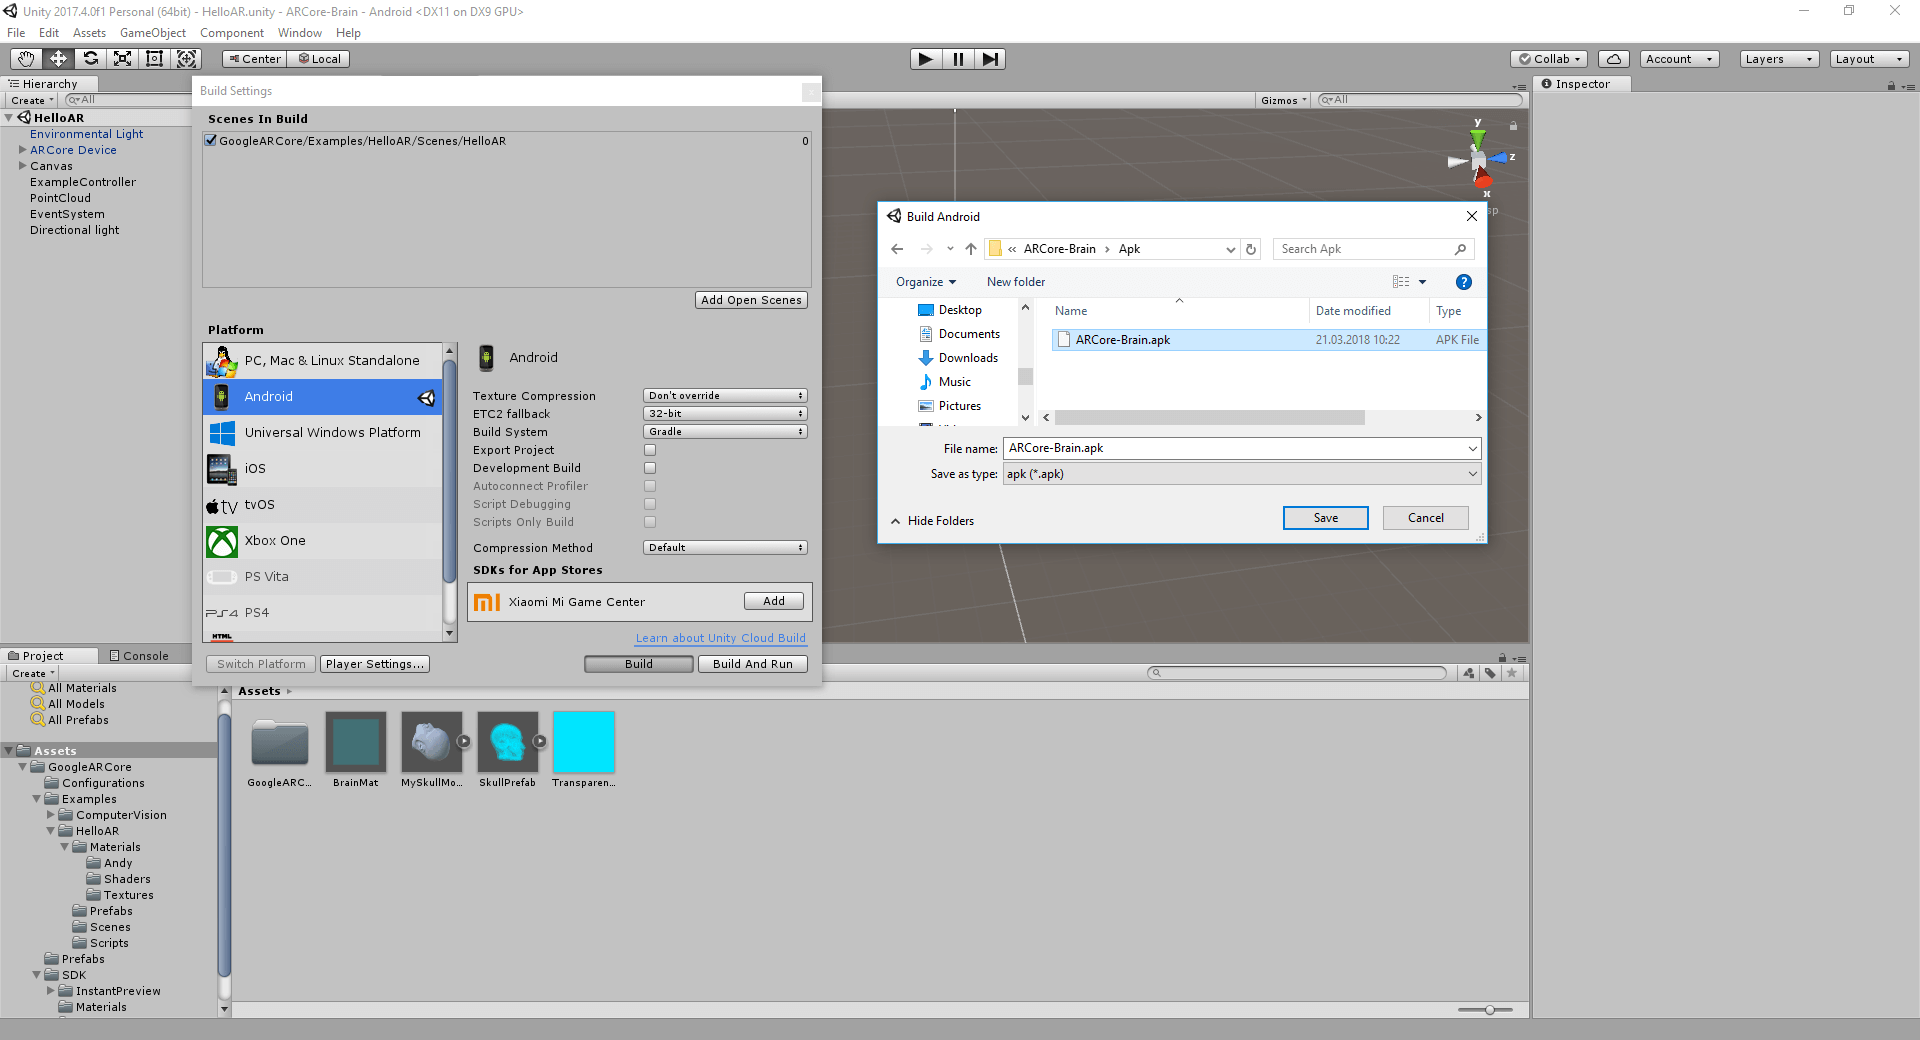
The first step is to build your app from Unity. In this example, I’m using an app based on the ARCore example, customized with an own 3D model. Go to File > Build Settings and choose “build” to generate an Android APK.
Watch the video recording of my session at the Mobile Developer After-Work for more information on how I created the 3D model based on an MR image.
Open the APK in Android Studio
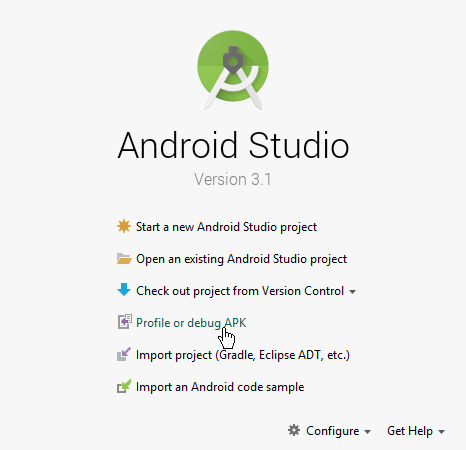
Next, launch Android Studio. Choose “Profile or debug APK” from the “Welcome”-menu and select the APK file you’ve just created.
Android Studio will go ahead and disassemble the APK. You can ignore the warning “Libraries (*.so) in the APK are missing debug symbols”. As we’re just going to capture a live stream of the Android screen, we don’t need debug symbols anyway.
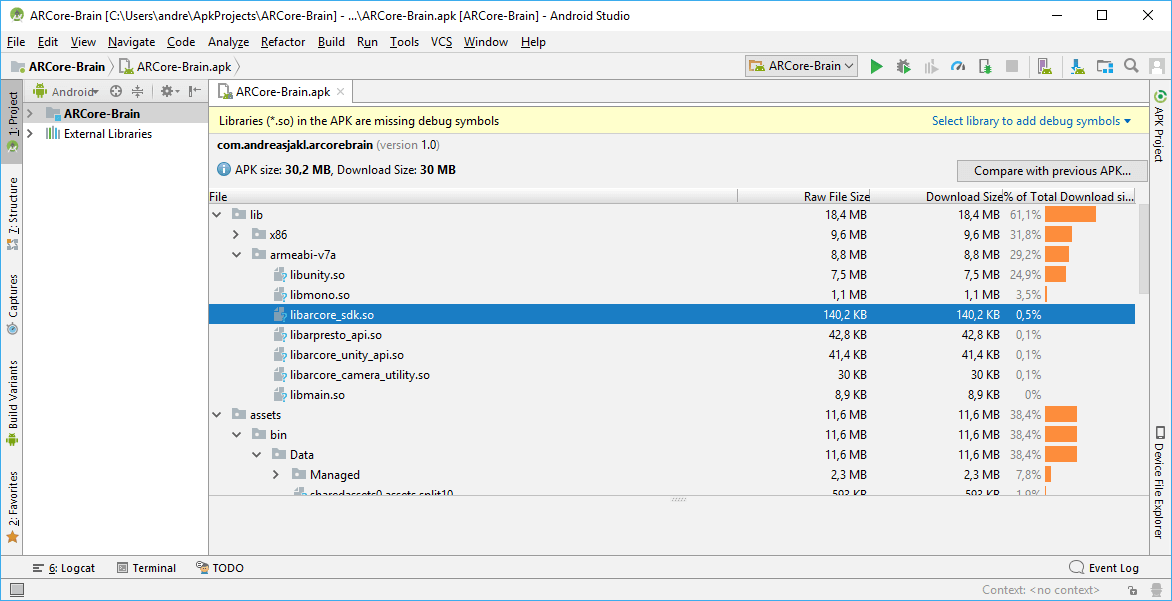
If you’re interested: in the lib folder, you can see the included ARCore libraries. The .so files are native shared libraries that were built using the Android NDK.
Live Screen Recording & Video Capturing
Now, simply run the app using the green play button (Shift + F10). Right now, ARCore only works on a real device, so you can’t use the emulator.
Once the app is up and running, open “Logcat”. If the window is not visible, open it through View > Tool Windows > Logcat (Alt + 6).
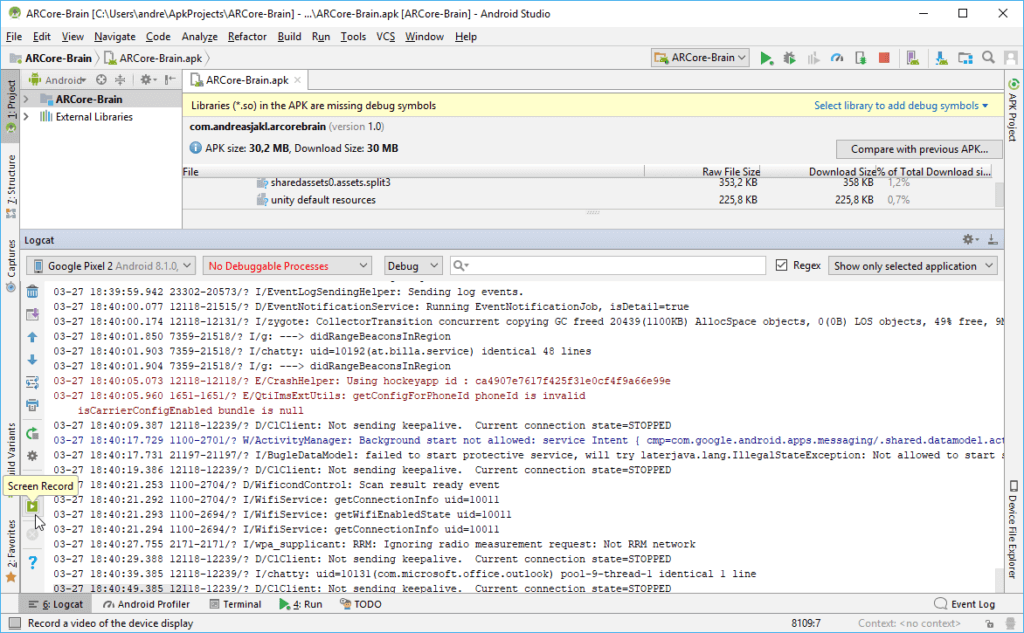
Click the green “Screen Record” button on the left side of the Logcat window. This brings up a dialog where you can specify the recording settings:
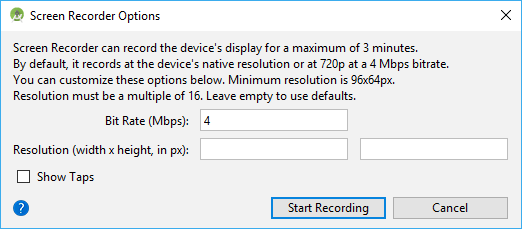
If you don’t enter a resolution, the default is the full screen resolution of the device – which is usually what you want for a video in the best possible quality.
If you want, you can also increase the bit rate from the default 4 Mbps, for example to 8 Mbps.
In addition, it might be helpful to activate the Show Taps checkbox to make interactions with the app visible in the video. More information about the settings is available in the Android developer documentation.
Once you’ve set up everything, click on “Start Recording”.
A few more tips:
- Especially for recording AR content, the challenge is that you should also include ARCore detecting the environment in the video.
- As we’re recording the live camera view, make sure you hold the phone as steady as possible.
- It’s a good idea to rotate the phone to landscape mode before starting the recording. After all, most videos on YouTube are in landscape mode.
- If you have your phone connected via an USB cable, make sure it’s long enough and you have plenty of room to walk around the AR object without hitting the limits of the cable and without the cable getting into the picture.
Your Captured Google AR Core Video
Once you’re finished, stop the recording and save it as an MP4 video file. I’ve uploaded my example video:
Please accept YouTube cookies to play this video. By accepting you will be accessing content from YouTube, a service provided by an external third party.
If you accept this notice, your choice will be saved and the page will refresh.
The video uses the H264 – MPEG-4 AVC codec, with the full screen resolution of the Google Pixel 2 (1920×1080). It’s recorded at 30 FPS. I’ve increased the bit rate to 8 Mbps. In this case, the 35 seconds video resulted in an mp4 file with 35 MB.
Animated GIF
Of course, animated GIFs are not a good video format in any way. For quick & easy embedding into web sites, it might be still be a good alternative. Especially since animated GIFs usually play automatically.
A great free online tool is available from ezgif.com. Simply upload your mp4 file.
In the next step, make sure your animated GIF is as short as possible. Reduce the frame rate and the resolution to get to a reasonable file size. After creating the animated GIF, the tool allows further optimizing with a lossy GIF variant. Very often, this is a good idea. For example, this video is down to just 5.6 MB and still succeeds at showing the full ARCore experience: