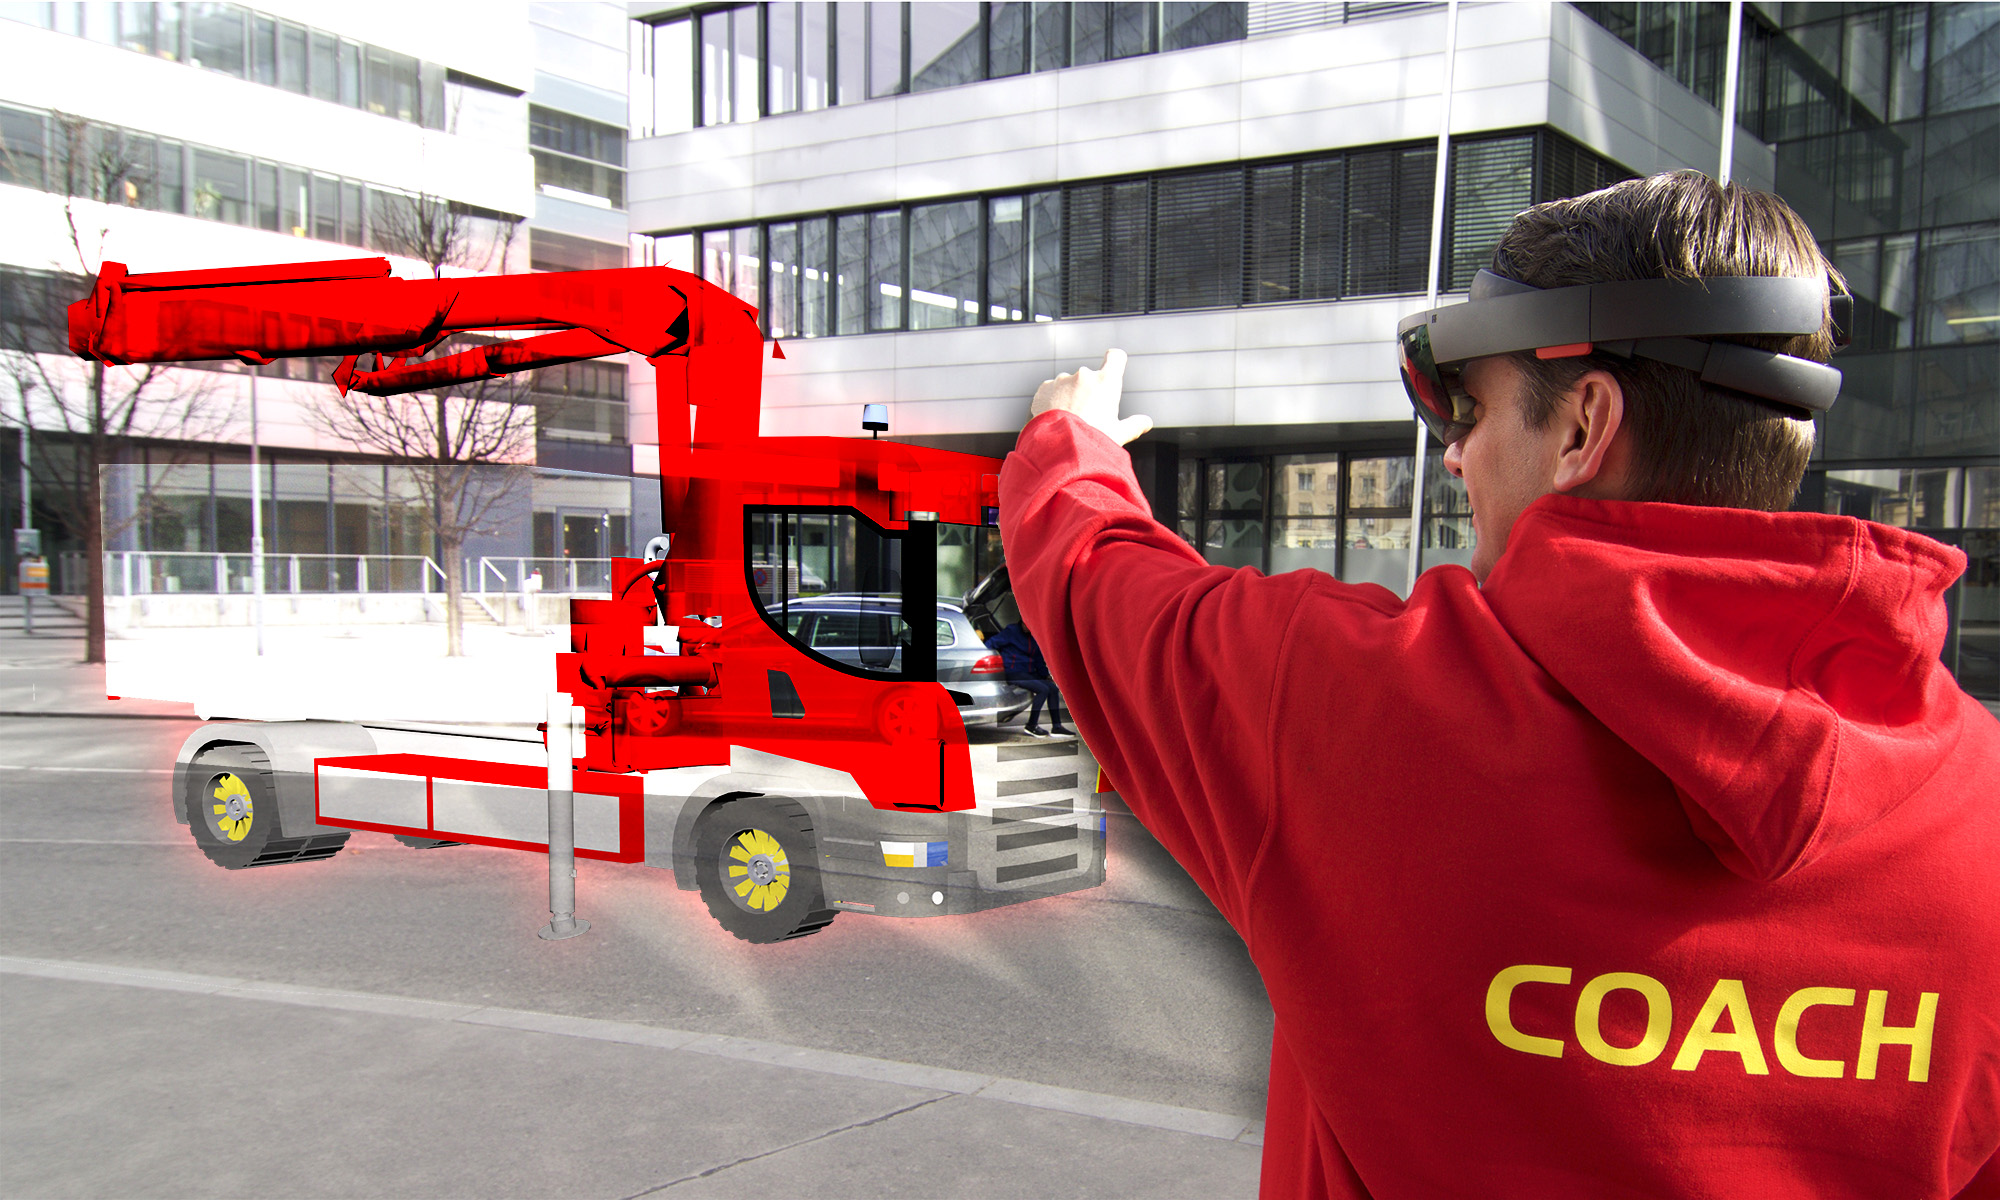
Screenshots taken with HoloLens are often difficult to comprehend, as they only show the scene as seen by the user, but not the user itself. How is he interacting with the scene, where is he standing in relation to the view?
Therefore, photos of HoloLens apps usually show a 3rd person view. Getting a real live transmission of the 3D objects seen by a HoloLens user works with the new Spectator View by Microsoft. However, setting that up is tricky: you need 2 HoloLenses, some special hardware and in the ideal case a 3D printed mount.
A simpler approach for a still screen is to take a photo with a good quality camera, and then to render the scene with matching perspective.
Unity itself is not directly suited to rendering a scene to an image, and it also lacks some of the advanced tools to align the 3D scene with a photo.
Here, I’ll describe an approach to use 3ds Max to simulate the view of a HoloLens user in 3rd person view. I used this for our PalKranHoloPlan AR8000 project, which we created during the Palfinger Hackathon.
Exporting the Unity Scene
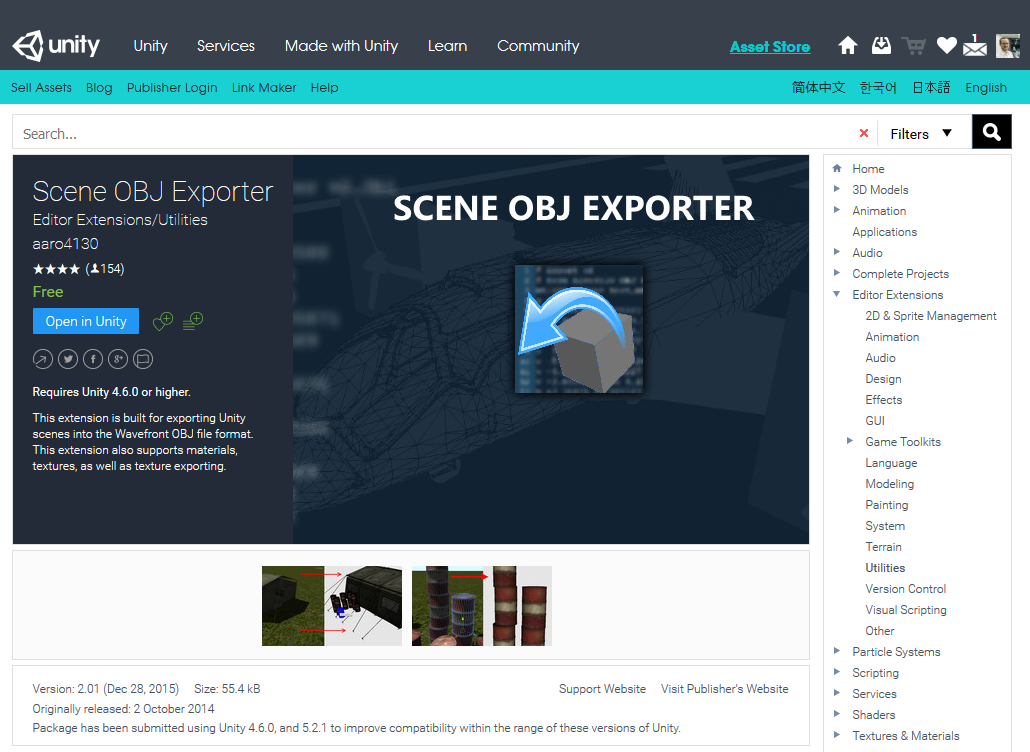
First of all, you need to get the Unity scene into a 3D software. I used 3ds Max in this case. Unfortunately, Unity only includes “import” functionality, but no “export”. A good workaround is using the free Scene OBJ exporter from the Unity Asset Store. A more fully featured plugin would be Export2Maya ($60).
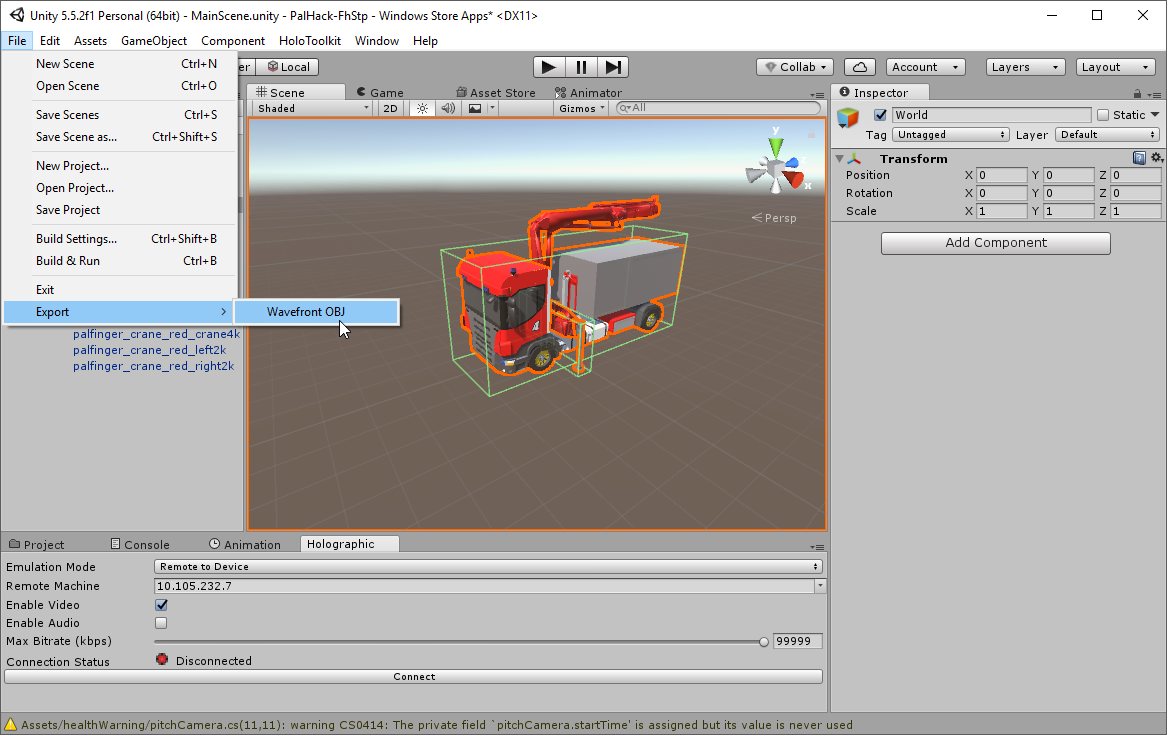
After adding the extension, restart Unity. This should add the “Export” -> “Wavefront OBJ” menu item:
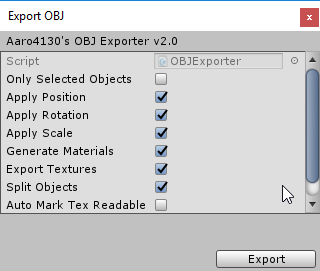
The standard options should be fine:
Perspective Matching in 3ds Max
The resulting file can then be imported to 3ds Max:
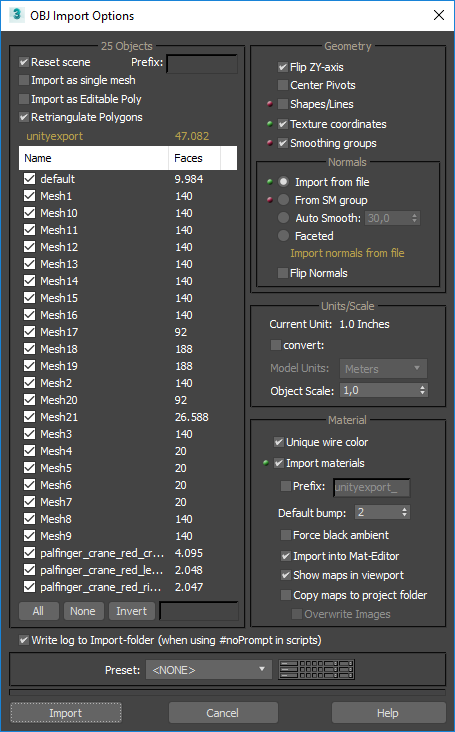
You can select to import the normals from the file, as they should be included in the exported obj. You might need to help 3ds Max to find the textures, but otherwise the import should work smoothly:
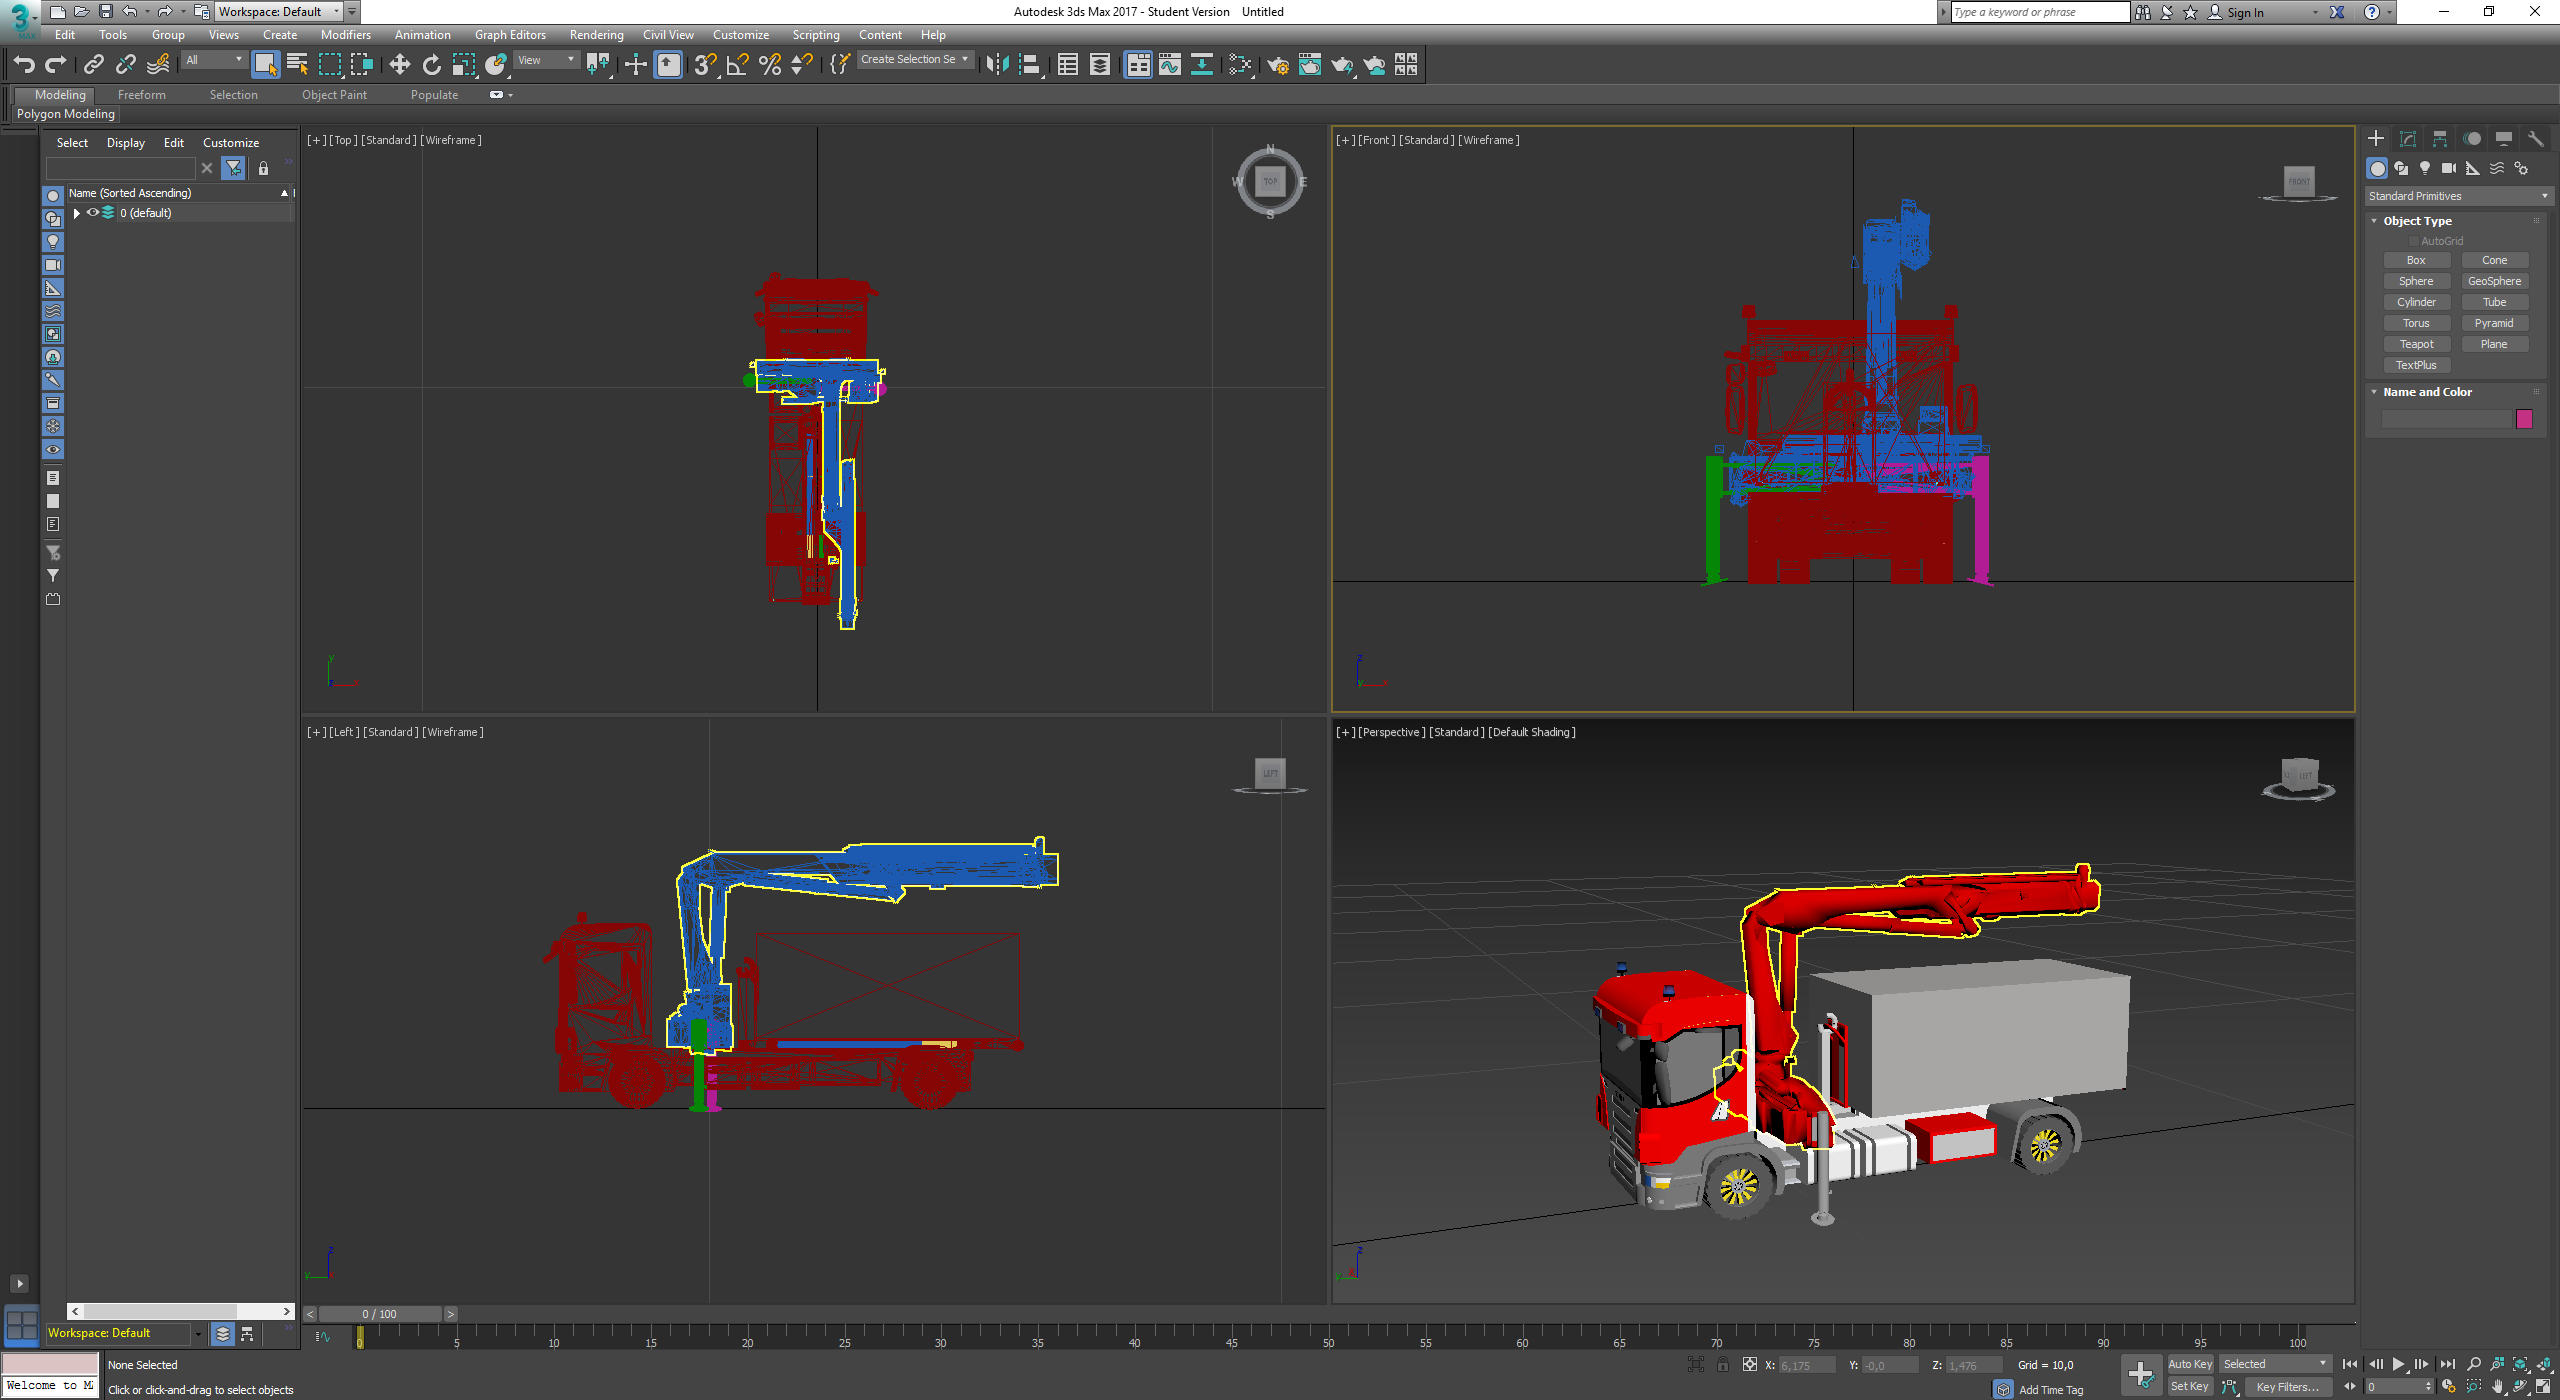
The next step is to match the perspective of the 3d objects with a photo of the scene where the user is interacting. For this step, use the Perspective Match Utility from 3ds Max to align the scene with the photo. I’d recommend going the way using the free camera. Set the image as background for the camera as explained in the 3ds Max documentation.

The tool then generates 6 different colored lines that you can match to the various perspectives in the image. Of course, it’s easier to hide the 3d objects in the meantime. A fully matched scene should look like this:
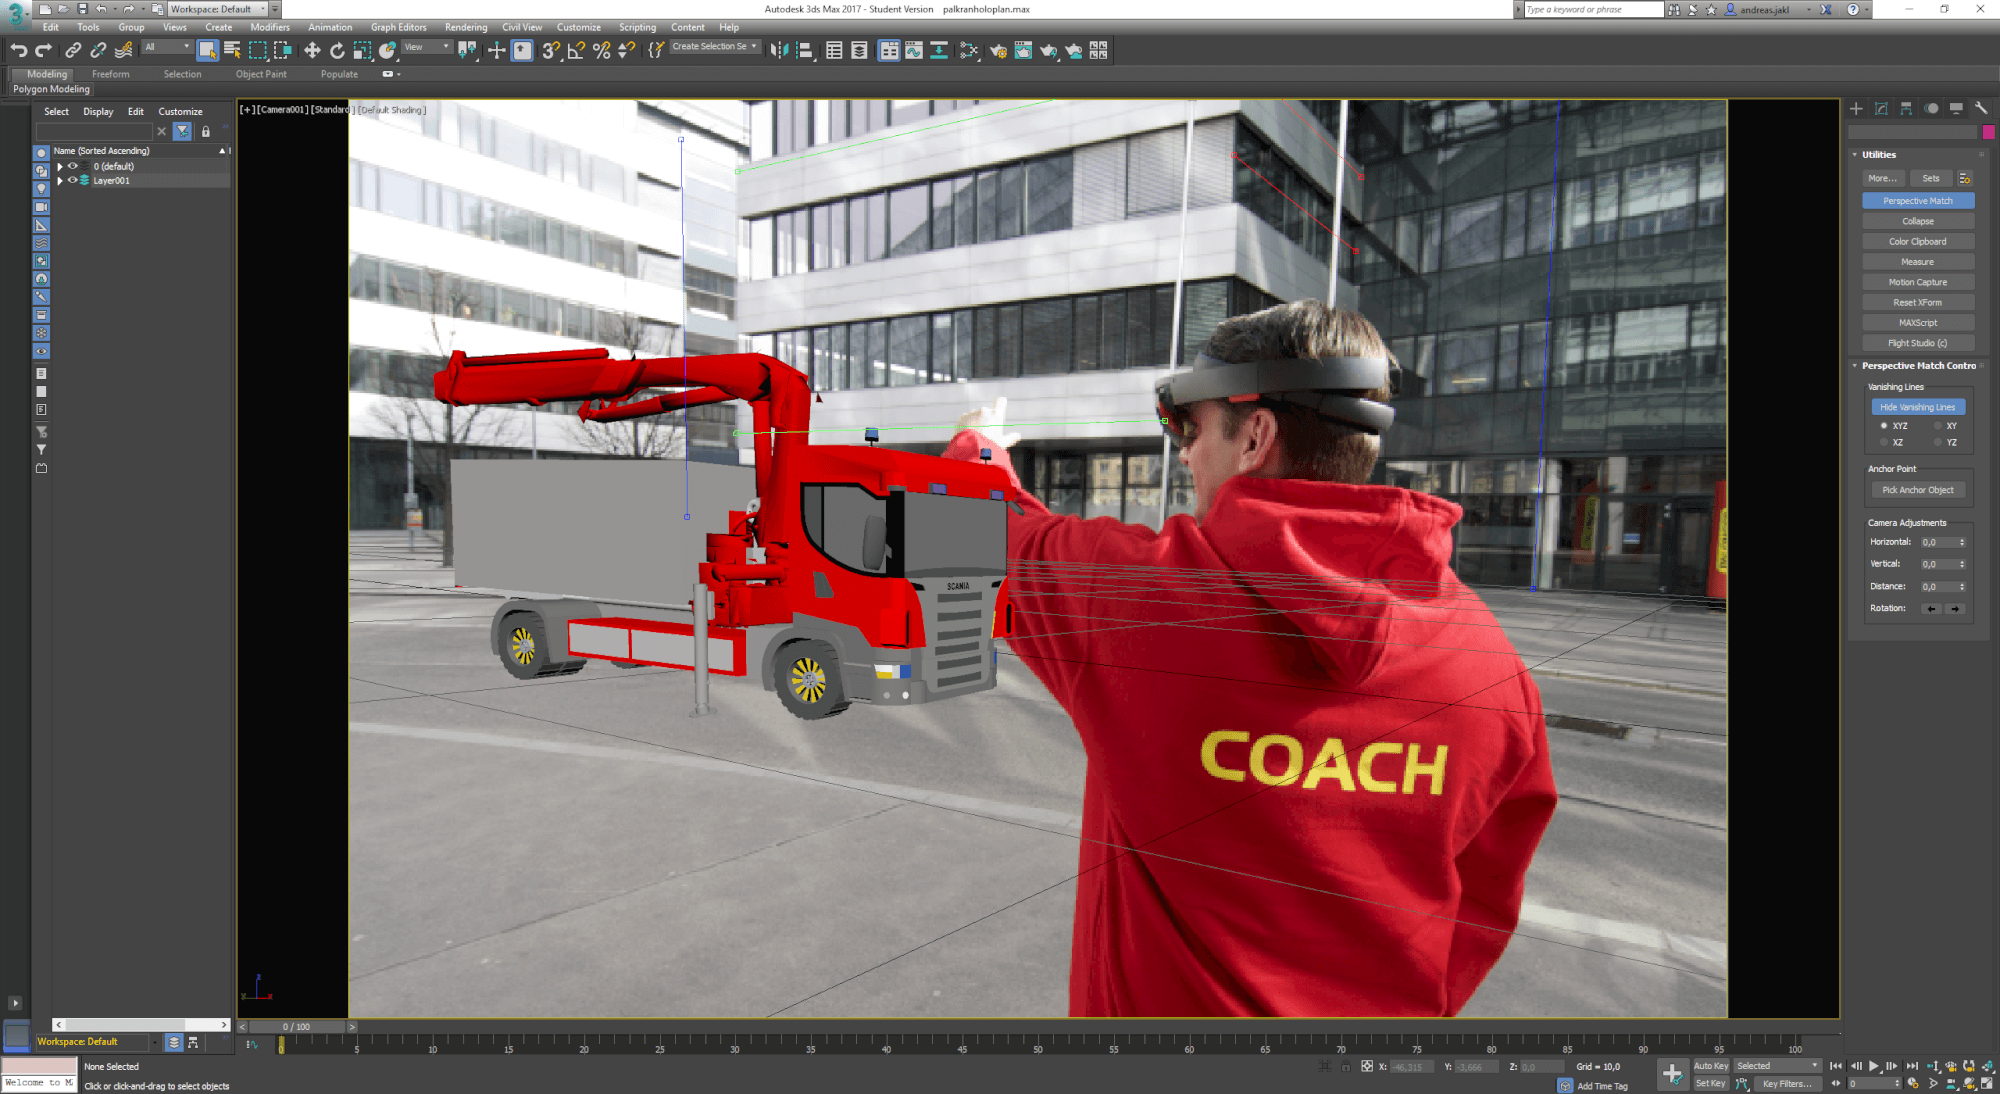
While the perspective is already fine, we need to do some color corrections and ensure that the man is in front of the 3d object. First, render the scene to a png file with transparent background. Match the render output size with the pixel size of the photo.

Finishing Touches with Photoshop
Afterwards, open the rendered file and the photo with Photoshop. Extract the person and put it in front of the 3d object.
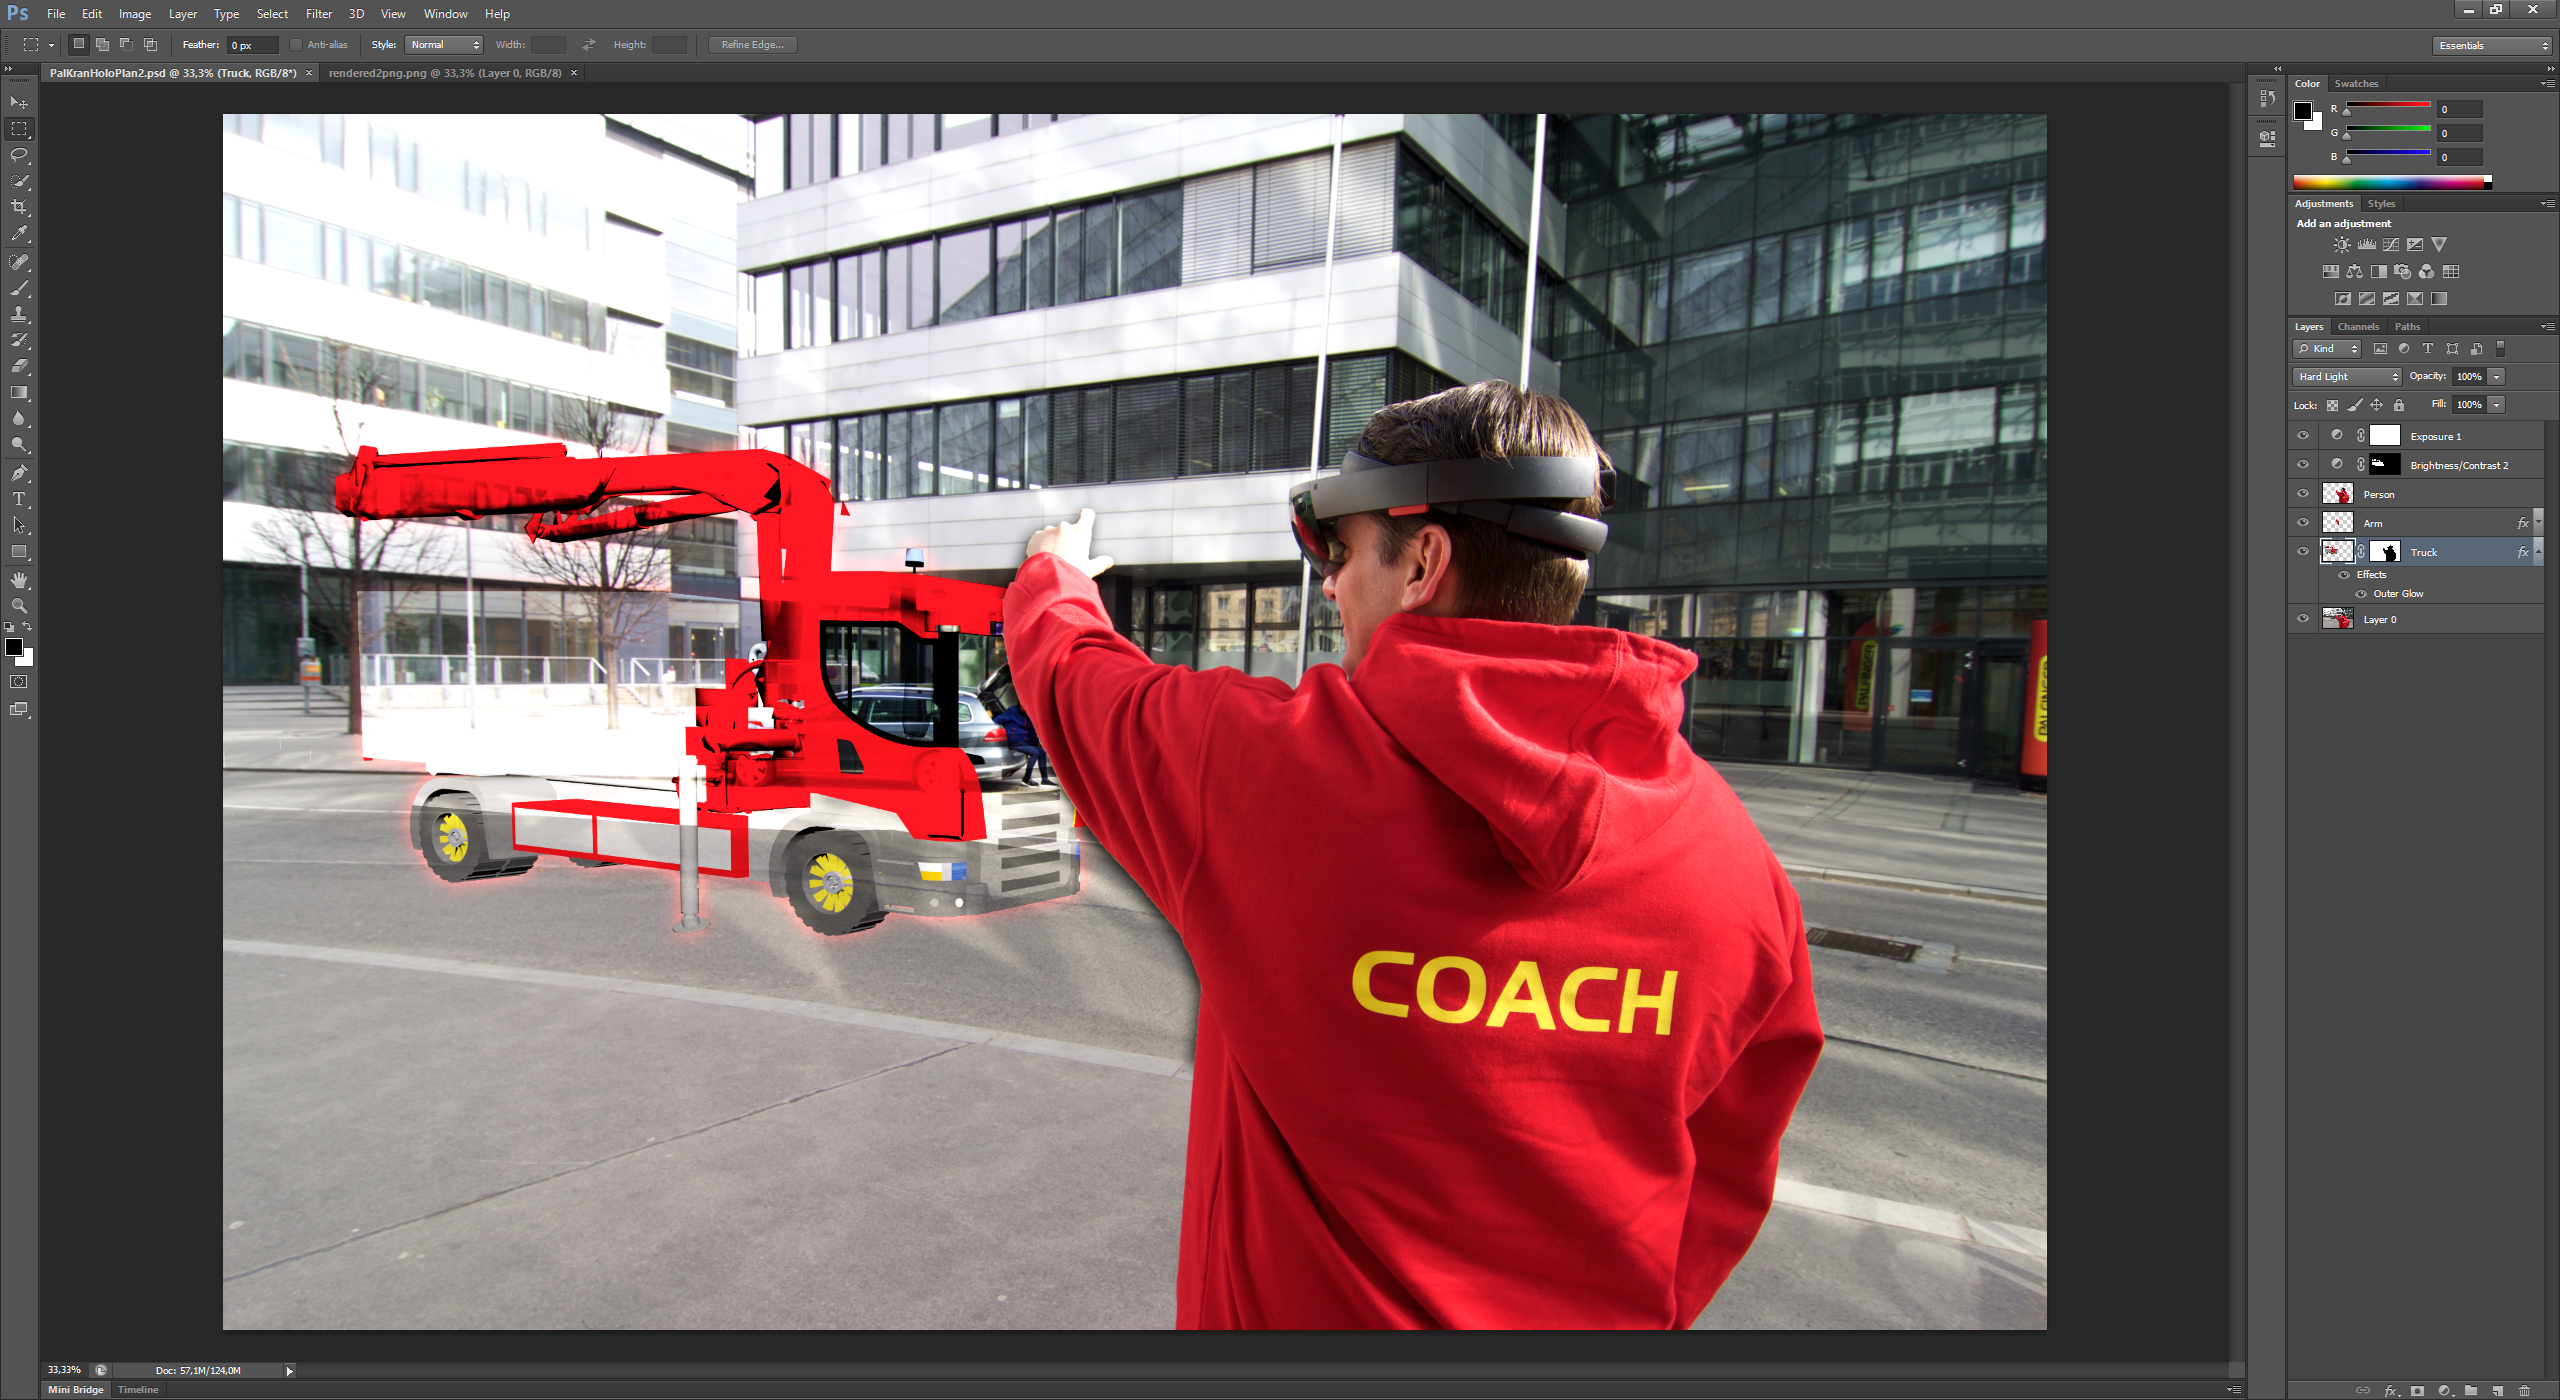
As the HoloLens has a light display that only adds light to the scene, it can not produce a fully opaque object. To simulate this, you can change the blending mode of the 3d object layer to “hard light”. Add some adjustment layers to create a better overall color impression. It also makes the scene a bit more clear if you add a bit of shadow between the person and the 3d object, as well as a bit of glow around the 3d object to visually indicate that the hologram is artificially added to the real scene.
Following the guide, you can get a scene similar to the photo below. It’s a quick and easy way to simulate a HoloLens scene with a photo, without the need of a second HoloLens and still producing an accurate result with full perspective matching.