Setting up a Raspberry Pi with Windows 10 IoT Core turned out to be more difficult than expected. In the end, there was a successful workaround – here’s how to get it running (even on non-supported SD cards).
Setting up the Raspberry Pi
As I’ve set up the public transport departure monitor with Linux, I wanted to try Windows 10 IoT Core for the Arlo security project – after all, the Python download script was running fine on my Windows 10 desktop PC.
The first step is to set up an SD card with the Windows image. Officially recommended are 16 and 32 GB cards from Samsung and SanDisk. I only had 4 and 64 GB cards left, and didn’t want to buy yet another one.
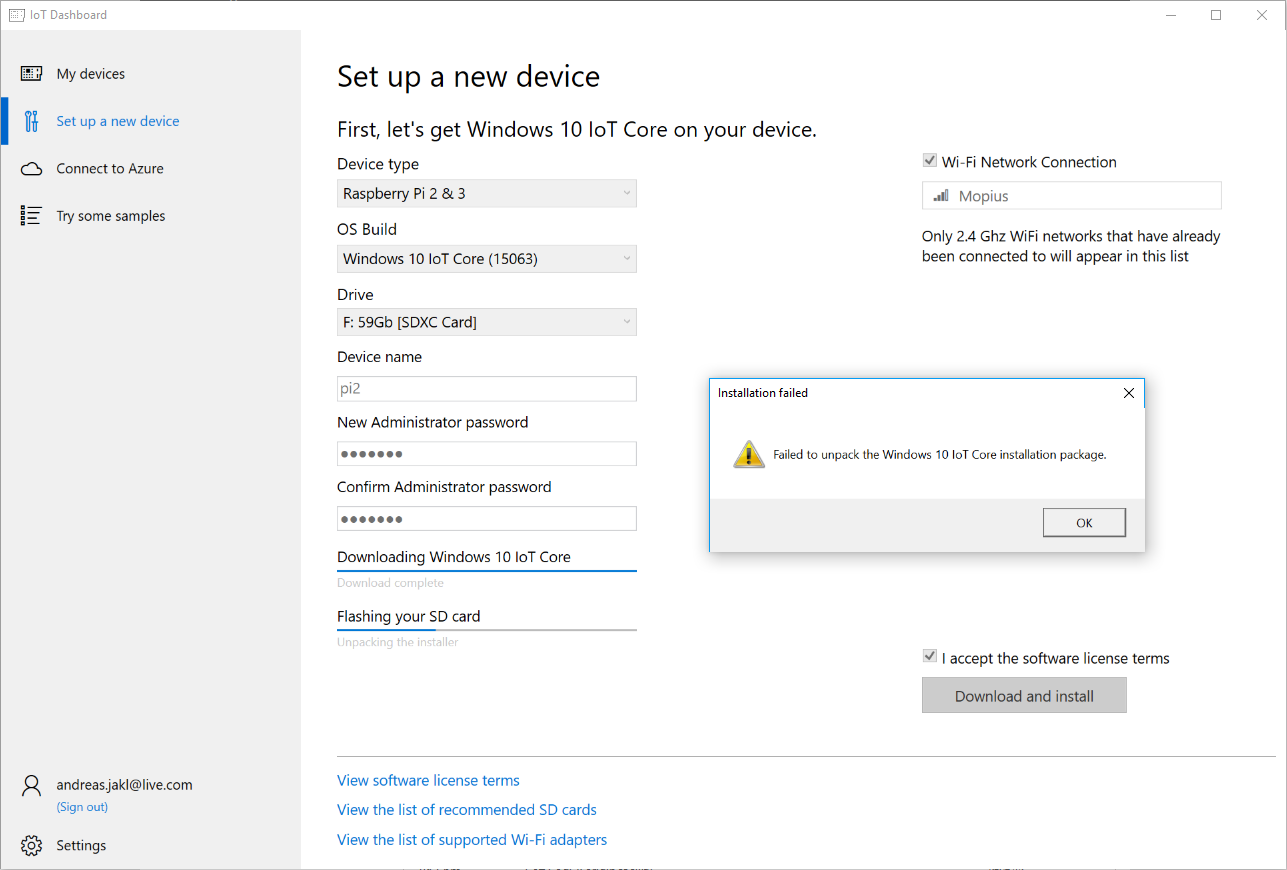
Unfortunately, the Windows 10 IoT Core Dashboard app failed to successfully flash the Windows 10 IoT Core image to both SD cards. It doesn’t provide any helpful advice; the error message is “Failed to unpack the Windows 10 IoT Core installation package”.
Reading the documentation, it turns out that an issue with the >32 GB SD card can be that Windows can only format in exFAT and NTFS; however, the Raspberry Pi image would need the card in FAT32. The recommended tool is the SD Memory Card Formatter. Unfortunately, this tool also failed to produce a working SD card for me.
Next, I tested the NOOBS installer. I managed to flash & boot with the 4GB SD card; in this case, downloading Windows 10 IoT Core through NOOBS didn’t work as well: the available space on the 4 GB SD-card was about 100 MB too small.
Another article of failures and compatibility problems is here; also a good read if you’re struggling: Windows 10 IoT and the Raspberry Pi 3 – installation, failure, and eventually success
How to Download Windows 10 IoT Core
Luckily, I found another workaround in the end, that was successful even with my 4 GB SD-card.
First, download the flash image of Windows 10 IoT for the Raspberry Pi 2 / 3. Choose if you go with the Insider version, or with the latest stable release (rs2):
- Windows 10 IoT Core Insider Preview for Rasperry Pi 2 & 3: this is the version I used and would recommend, as the IoT Core is anyway bleeding edge and a lot has improved in the latest insider builds: change log / release notes.
- Windows 10 IoT Core ISO for Raspberry Pi 2 & 3 for the stable version (currently 15063)
Windows 10 IoT and the Raspberry Pi 3 – installation, failure, and eventually success
No matter which route you go, you’ll download an .iso file. Don’t flash that to your SD card, it’s no use really. You need to mount the .iso by double-clicking in Windows Explorer and you’ll see why.
In the ISO, you will only find an installation file: Windows_10_IoT_Core_for_RPi.msi – would have been easier if that download was available directly and not packaged in an .iso, but that’s the way it is.
Install that .msi, and the main new file you’ll get on your PC is the actual image to flash on your SD card. It’s placed in:
C:\Program Files (x86)\Microsoft IoT\FFU\RaspberryPi2\flash.ffu
How to Flash Windows 10 IoT Core
This flash.ffu file is what needs to be flashed to the SD card. Flashing can be done through the IoT Core Dashboard app. While the Dashboard app didn’t manage to automatically do it’s magic, it does work if you supply the .ffu manually.
Open the IoT Dashboard, and choose “Custom” for the device. Locate the .ffu file and ensure you’re happy with the device name and admin password.
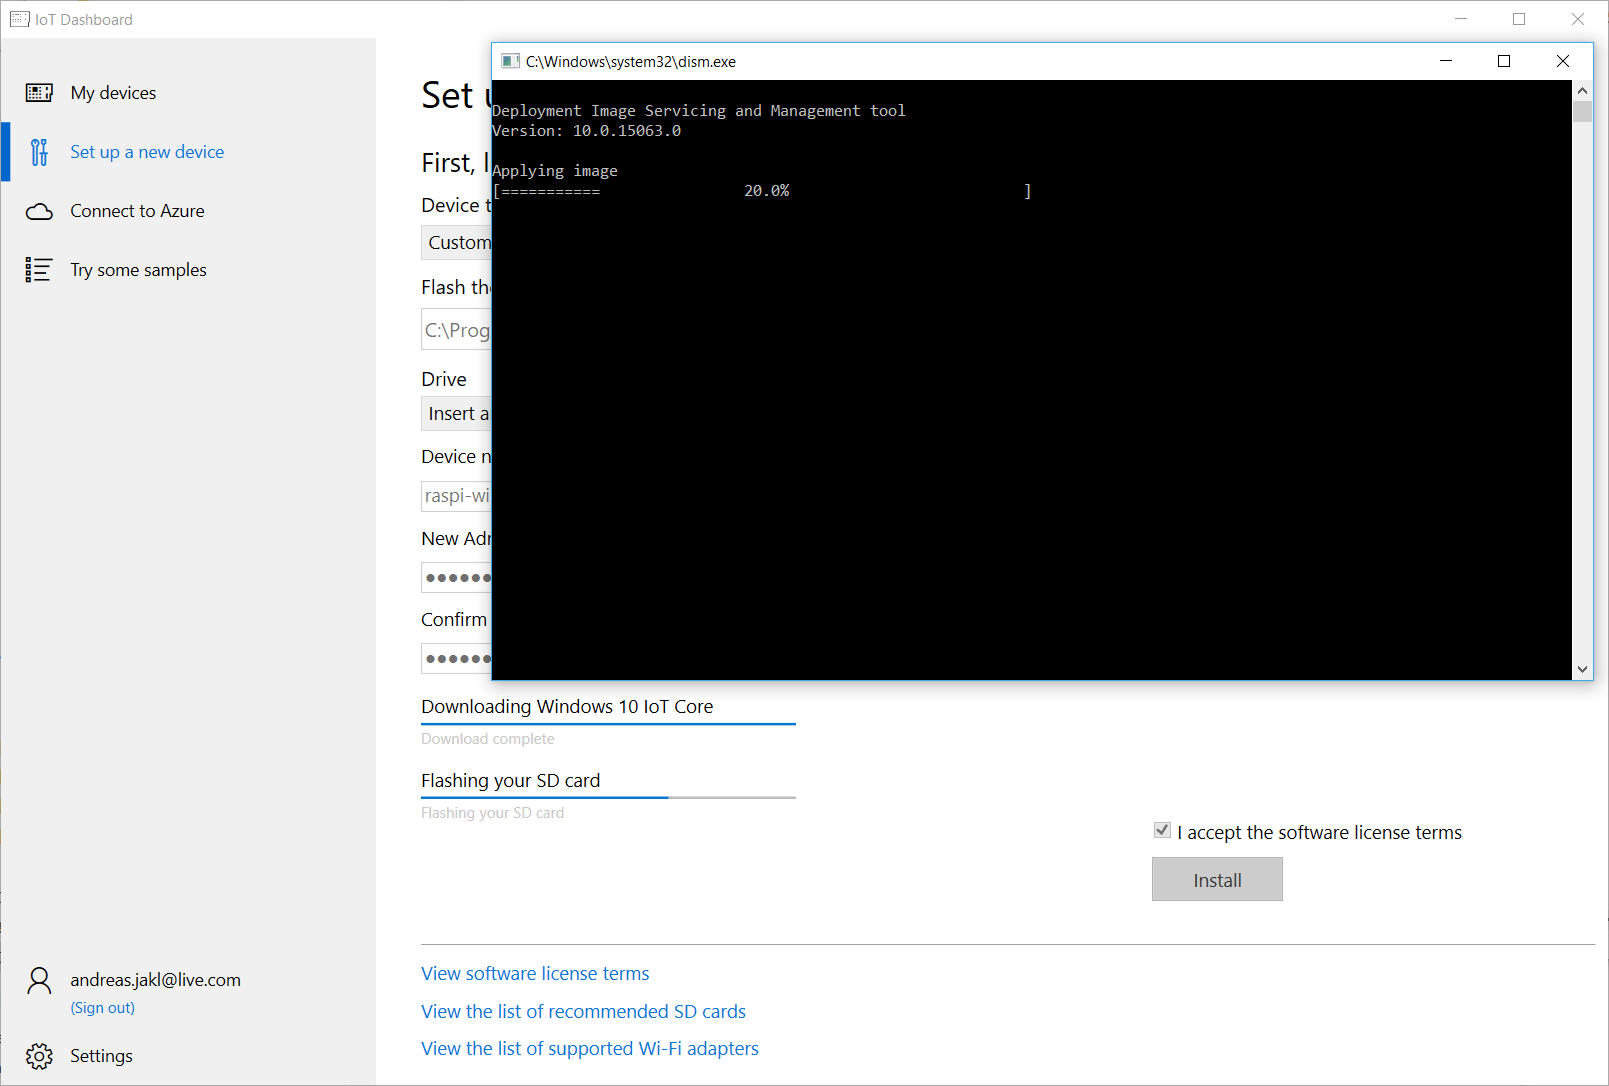
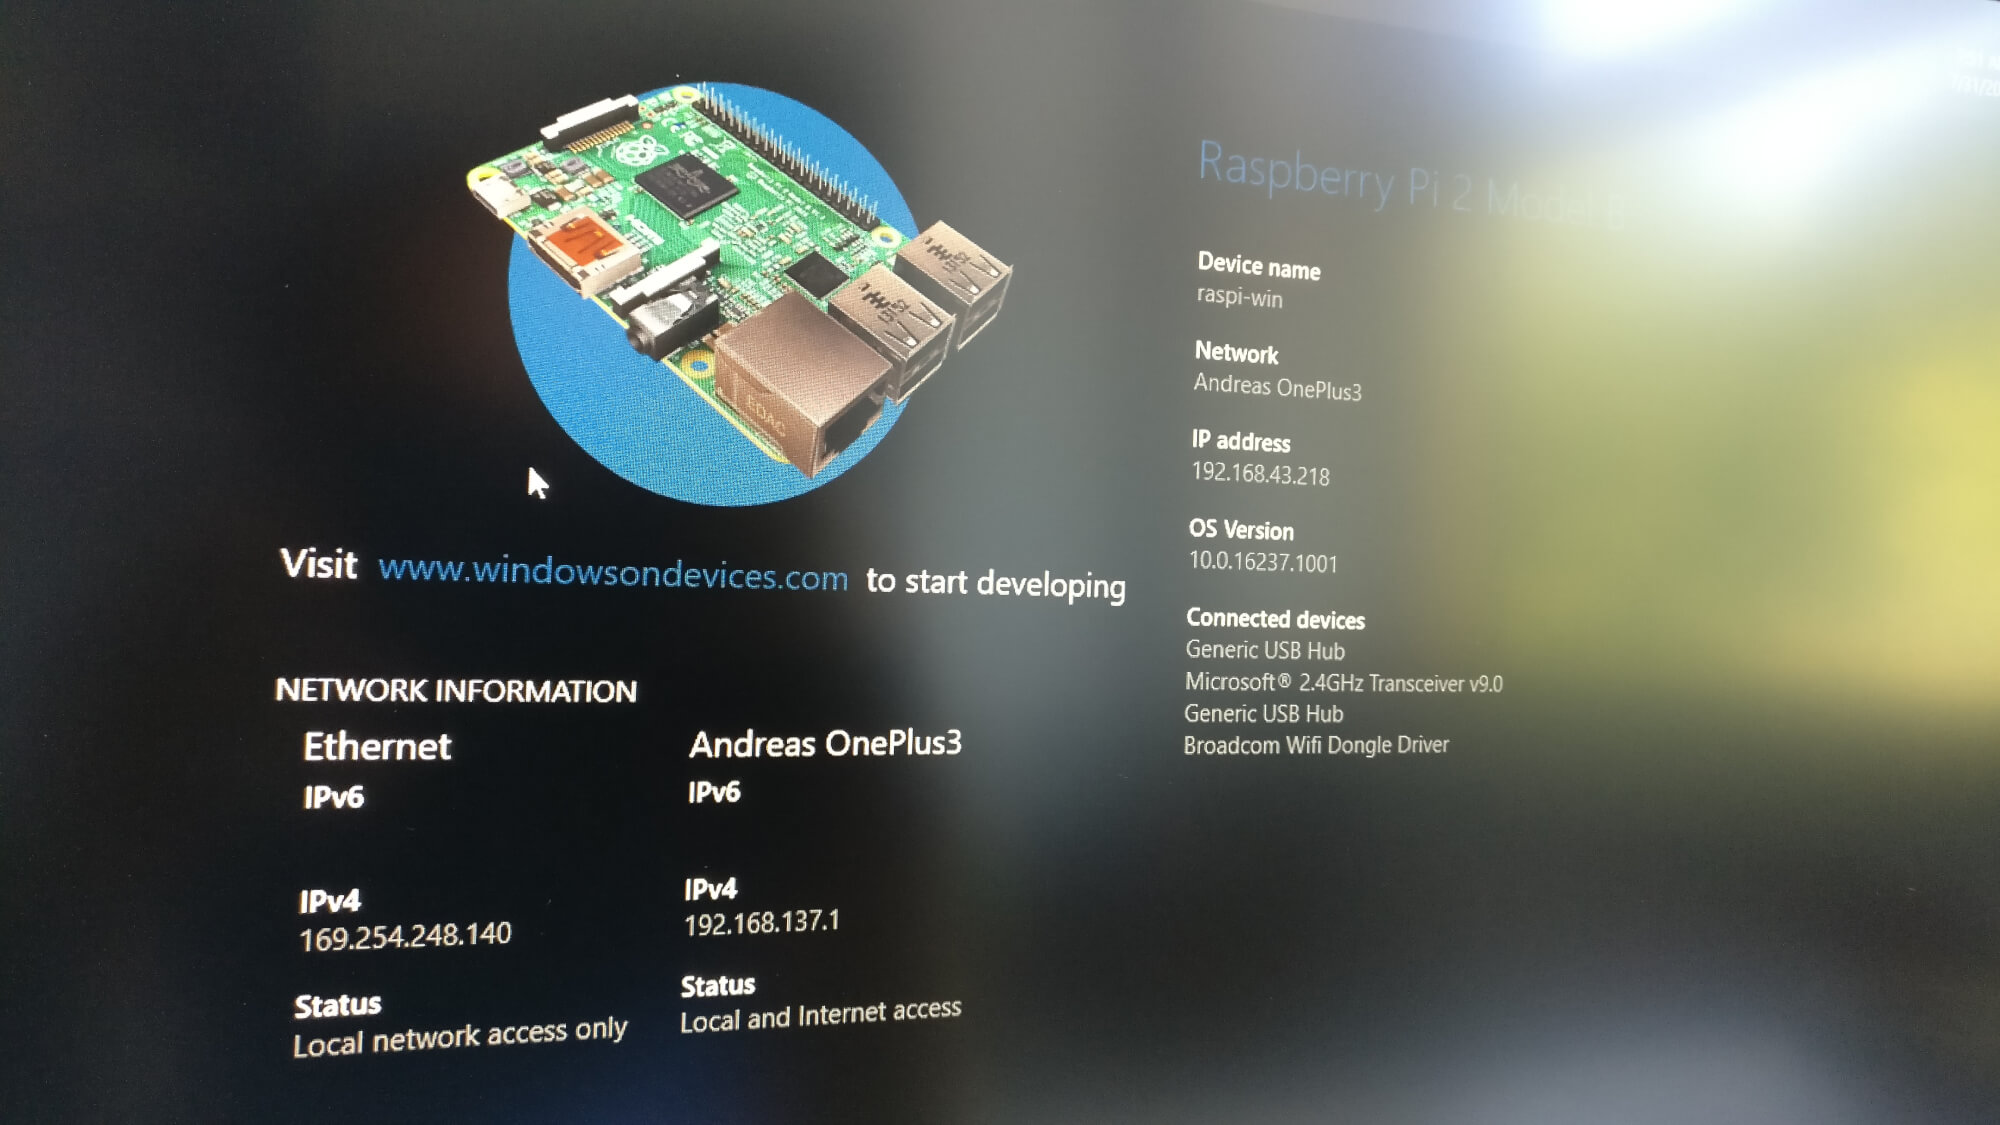
Click on Install – and voila, Windows 10 IoT Core installs fine even on a 4 GB SD card!

The SD card now has 5 partitions: MainOS has a capacity of 1.45 GB with 590 MB free; Data has a capacity of 1,66 GB with 1,04 GB free. Theoretically, that should be more than enough space to work with Windows 10 on the Raspberry Pi!